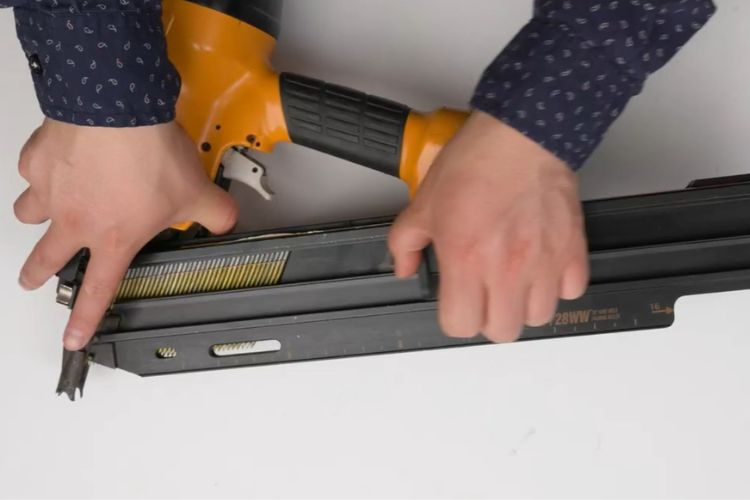
Nail guns are a great way to streamline the construction process by reducing the amount of time needed to drive nails into lumber manually. And Bostitch nail guns are a popular choice among many professionals and do-it-yourselfers.
Bostitch nail guns come in a few different varieties, but the frame nail gun is the most popular. It can be a little tricky to load this kind of nail gun if you are unfamiliar with them. However, don’t worry; we are here to assist. In this blog post, we’ll walk you through a step-by-step guide on how to load a Bostitch nail gun. We’ll also share some helpful info for troubleshooting typical loading problems.
Read Also: How To Use A Framing Nail Gun?
How To Load A Bostitch Nail Gun?
One of the most frequent issues with any nail gun getting jammed. This also applies to Bostitch. If you can’t load the tool correctly, you can experience recurrent jamming problems. Because of this, you should use caution when loading a Bostitch nail gun. To help you grasp the loading techniques more thoroughly, we will attempt to cover every significant issue in the following essay.
Safety Precautions:
- No matter what nail gun you choose to use, you must take certain safety steps to protect both you and your surroundings. These include
- Always checking whether the nail gun is disengaged from the air hose before loading nails. If not, must disconnect it from any power source first.
- Must wear safety gear including eye and ear protection, construction-grade gloves, and a helmet.
- Never place your finger or any part of the body in the tip of the gun or point it at anyone else while loading the nailer. It may fire accidentally and cause serious injury.
- While loading nails, do not pull the trigger or depress the trip mechanism as it may fire accidentally.
- Checking the tool for any loose or damaged parts. If found, avoid loading nails and attempt to repair the tool.
- Never hang the nail gun using the rafter hook with your belt or clothing.
Read Also: How to prevent nail gun injuries?
Expert Tips On How To Load A Nail Gun
Here is some advice from experts to help you complete the task quickly and effectively if you’re seeking guidance on how to load your Bostitch nail gun:
- Always start by reading the manual that came with your nail gun. This will give you a good understanding of the proper way to load and use the gun.
- When loading the nails, make sure that they are all facing the same direction (mostly downward). This will ensure that they are all driven into the wood in the same direction.
- Always choose the correct size and collation of nails recommended by the manufacturer.
- Checking whether the head of the nail gun is clear or has any leftover nails. If found, remove them immediately before inserting new strips. Otherwise, it will cause a jam.
- Once the nails are loaded, use your finger to gently push them down into the chamber. This will help prevent them from jamming when you’re trying to use the gun.
- When you’re ready to use the gun, make sure that you’re always holding it firmly with both hands.
- Once all set, try to run a test on scrap wood. It will help you to confirm all things are going rightly.
5 Easy Steps To Loading A Bostitch Nail Gun
The steps of loading A Bostitch framing nail gun are as follows-
Step 1 Disengage The Power Source:
Disconnect your Bostitch framing nailer from the power source. If it is a pneumatic type framing nailer, disconnect the connector of the air compressor hose. Or, if it is a cordless type, remove the battery from the nail gun.
Step 2 Choosing The Right Kind Of Nails:
There are numerous varieties of nails. Some are coil, while others are stick style. Some have clipped heads, while others have round heads. Some are wire or paper collated, while others are plastic collated. The model of nail gun you select will determine which mix of nails is best.
Usually, the Bostitch framing nailer F21PL employs plastic collated round head nails with a stick-style design that can be up to three and a half inches long. In the manufacturer’s booklet, you can find the specifications for the nails that work with it.
Use only the nails recommended by Stanley-Bostitch to avoid jamming the nails.
Step 3 Pull The Latch
You will find a spring-loaded pusher latch on the magazine near the head of the gun. You have to lift it and drag it up to the end of the magazine. Secure it in place with the pusher lock of the magazine.

Step 4 Insert Nail Strip(s)
When you pull the latch, you’ll notice an opening on the upside of the magazine’s rail for entering nails. Insert the nail strip(s) in the rail with the pointed end down. Inclined the nail gun to freely move the strip toward the tip. Apply a gentle push to set the strip as near to the tip as possible.
Step 5 Engaged The Slider
To release the slider, first, pull it back then press the release tab on the magazine with your finger. Allow the slider to creep gradually in the rail, pushing the nail strip toward the tip of the nail gun to hold it in place tightly.
Do not let go of the slider abruptly. It may break the nail strip or deform it, causing a jam.
If you follow the procedures above, you should have a loaded magazine by this time. To shoot nails, connect the air hose to your Bostitch nail gun and squeeze the trigger. The work is complete.
How Do I Unload The Bostitch Nail Gun?
Once you’ve reached the endpoint of shooting nails or to switch into another nail size, the very next critical duty is to unload the nail gun for the forthcoming loading. It is, however, a very simple work. To accomplish this –
First, turn off the power source by removing the battery or disconnecting the air hose.
Second, move the spring-loaded pusher mechanism toward the magazine’s end and lock it in place.
Finally, raise the tool so that the remaining nail strip can freely slide toward the opening. Push out to remove that strip to free up space in the magazine for the next loading. It’s all done for now.
How To Load Metal Connector Nails In The Bostitch F21PL?
The Bostitch F21PL framing nailer is compatible with both wood and metal connector nails. You can load metal connector nails into the instrument by simply following the nail-loading process described above for wood nails. Just remember to use Stanley-Bostitch heat-treated metal connector nails and that you cannot load more than one stick at a time.
Before employing metal connector nails, the metal connector attachment must also be installed. For information on how to install metal connector attachments, consult the instruction manual.
Troubleshooting Common Loading Issues
The most frequent loading problem is jamming the nail gun after stuck a nail into the head. You may lessen nail gun jamming by
- Using the appropriate nails.
- Use nail strips that are generally straight (not bent).
- loading nail strips according to the correct guidelines.
- Using the recommended brand, such as Stanley-Bostitch nails for your Bostitch nail gun.
- Before loading nails, make sure the nail gun head is in good shape.
If, despite taking the aforementioned precautions, the Bostitch nail gun continues to jam, your next duty is to unclog it by removing the stuck nail. You only need to open the nail’s head portion and use a screwdriver to remove the nail. You can read one of our articles on how to unjam a nail gun by clicking here.
Takeaways
To sum up, loading a Bostitch nail gun is simple. As soon as you master the procedure, you’ll be able to complete it swiftly and effectively, freeing up your time to focus on the task at hand. Never direct the nail gun at you, another person, or any other item out of safety.
Recent Posts
Woodworking in 2025 is all about efficiency, precision, and smart technology. Whether you're a beginner or a seasoned craftsman, having the right tools can make all the difference. Here are the top 7...
Ever tried drilling into a piece of wood only to end up with a splintered mess or a wobbly hole? Yeah, it's more common than you think. Wood might seem like an easy material to work with, but...

