
Yes, you can nail down vinyl plank flooring. Vinyl plank flooring can be nailed down to a subfloor with a proper underlayment and nail installation technique.
Vinyl plank flooring is one of the most popular flooring options due to its durability, easy installation, and versatility. Although it is primarily designed to be installed as a floating floor, it can also be nailed down using specific techniques.
To nail down your vinyl plank flooring, you should ensure that the subfloor is clean, level, and flat. Then, you need to apply a suitable underlayment to create a moisture barrier and cushion the floor.
Finally, use a pneumatic flooring nailer to secure the planks to the subfloor. Properly installed, nailed down vinyl plank flooring can be a long-lasting and attractive floor option for any room in your house.
The Basics: Understanding Vinyl Plank Flooring And Installation Process
What Is Vinyl Plank Flooring?
Vinyl plank flooring is a type of flooring made from synthetic materials that mimic the look of wood, stone, or other materials. It’s a popular flooring choice due to its durability, affordability and is quickly gaining popularity among homeowners. The flooring comes in various colors, patterns, and sizes, making them a versatile option.
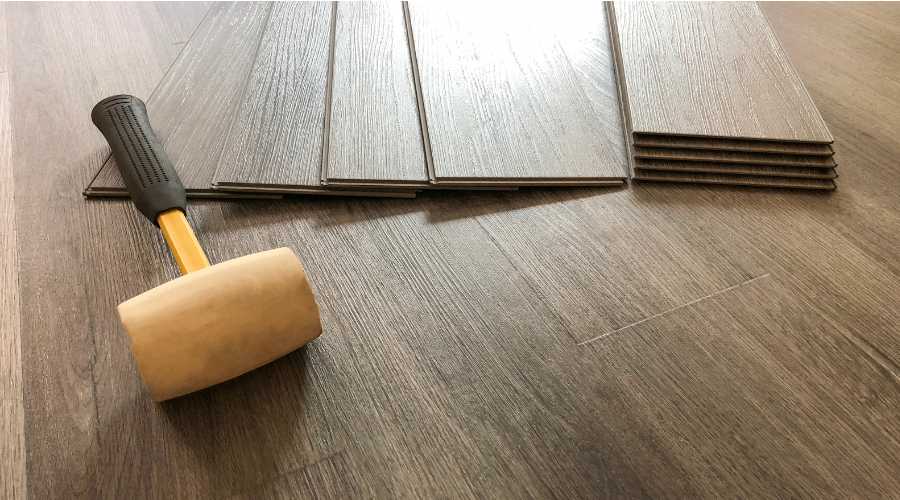
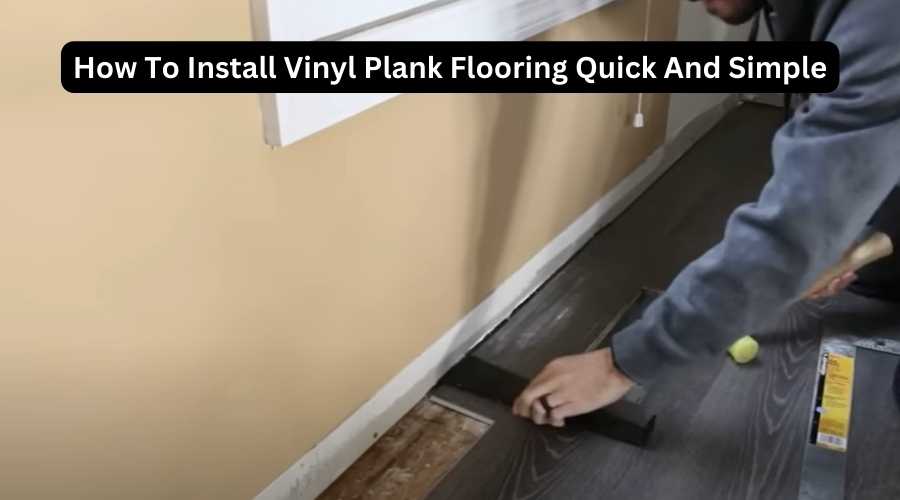
How To Install Vinyl Plank Flooring Quick And Simple?
The installation process of vinyl plank flooring mainly depends on the type of vinyl planks you have.
Here’s a brief overview of how vinyl plank flooring is typically installed:
Step 1: Preparing the surface: The surface must be free from debris and has a smoothed finish.
Step 2: Laying out the planks: Determine the layout of the vinyl planks in the room. Leave a gap of about 1/4 inches between the planks and the walls.
Step 3: Adhering the planks: Apply adhesive to the subfloor, but cautiously, since excess adhesive can damage the vinyl planks. Roll the planks over the adhesive and align them accordingly.
Step 4: Trimming: Cut the edges of the planks with a cutter or saw to ensure a perfect fit in the layout.
The Benefits Of Using Vinyl Plank Flooring
Vinyl plank flooring has numerous advantages, some of which are:
- Affordability: Compared to other flooring options, vinyl plank flooring is very affordable, making it a popular choice.
- Durability: Vinyl plank flooring is resistant to scratches, dents, and stains, and is also waterproof, making it perfect for any room, particularly high-moisture areas like kitchens and bathrooms.
- Easy to install: Vinyl plank flooring is one of the easiest types of flooring to install, which can save you the expense of hiring a professional.
- Ease of maintenance: Vinyl plank flooring is low maintenance and easy to clean with minimal effort. With regular sweeping and mopping, the flooring can maintain its original gloss.
Vinyl plank flooring is an excellent flooring option for homeowners seeking durability, affordability, and a variety of designs to suit their home aesthetics. Its ease of installation and maintenance make it an ideal option for diy enthusiasts looking to transform their interiors.
Can You Nail Down Vinyl Plank Flooring? Pros And Cons
Vinyl plank flooring has become increasingly popular in recent years, and for a good reason. It is a fantastic alternative to hardwood flooring since it is more affordable, easier to install, and easier to maintain.
Generally, vinyl plank flooring is installed using the ‘floating floor’ method, but can it be nailed down?
We will explore the pros and cons of nailing down vinyl plank flooring and when it is not advisable.
Pros Of Nailing Down Vinyl Plank Flooring
Nailing down vinyl plank flooring has its benefits, and these are:
- Sturdier installation: Nailing down vinyl plank flooring provides a more secure and long-lasting installation compared to the floating floor method.
- No expansion gap needed: When you nail down your vinyl plank flooring, you don’t need to leave any expansion gaps, which is necessary when using the floating floor method.
- Less movement: As the floor is nailed down, there is less movement resulting in a quieter floor with fewer creaks and squeaks.
Cons Of Nailing Down Vinyl Plank Flooring
Nailing down vinyl plank flooring also comes with some drawbacks, which are:
- Limited design flexibility: With the floating floor method, you have the flexibility to switch planks and different styles, which is not possible with the nail-down method.
- Difficult to remove: If you decide to remove your floor, nailing down vinyl plank flooring makes it exceptionally challenging to do so. You may end up damaging the subfloor in the process.
- Noise transfer: Nailing down vinyl plank flooring is louder, which means that it can create noise transfer to adjacent rooms.
When Is It Not Advisable To Nail Down Vinyl Plank Flooring?
If you are installing your vinyl plank flooring over a concrete or wooden subfloor, nailing it down is not advisable since it can cause cracking or splitting.
Moreover, if you have a radiant heating system, do not nail down your vinyl plank flooring, as the heat can cause warping and lifting of the planks.
If you are wondering whether you can nail down vinyl plank flooring, the answer is yes, you can. However, it comes with its pros and cons, and it’s not advisable in all situations.
Therefore, it’s crucial to weigh the advantages and disadvantages before deciding whether or not to nail down your vinyl plank flooring.
Pre-Installation Considerations
Vinyl plank flooring is an inexpensive and easy-to-maintain option for homeowners who want to upgrade their floorings. If you plan on installing it, here are some things you may need to keep in mind.
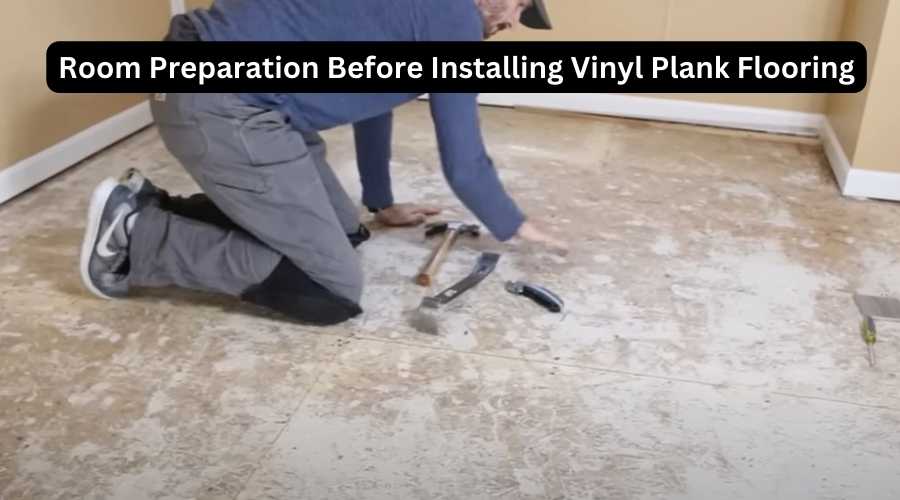
Room Preparation: Measurement, Layout, And Subfloor Inspection
Before you install vinyl plank flooring, you should prepare the room by taking the right measurements, checking the layout, and inspecting the subfloor.
Here’s what you need to do:
- Measure the width and length of your room, and then multiply the two dimensions to determine the square footage required.
- Make sure you check the layout and determine the best direction to lay the planks. Typically, vinyl plank flooring is installed parallel to the longest wall in the room.
- Inspect your subfloor for any humps or dips that could cause problems with your new flooring. You may need to level the subfloor before installing the vinyl planks.
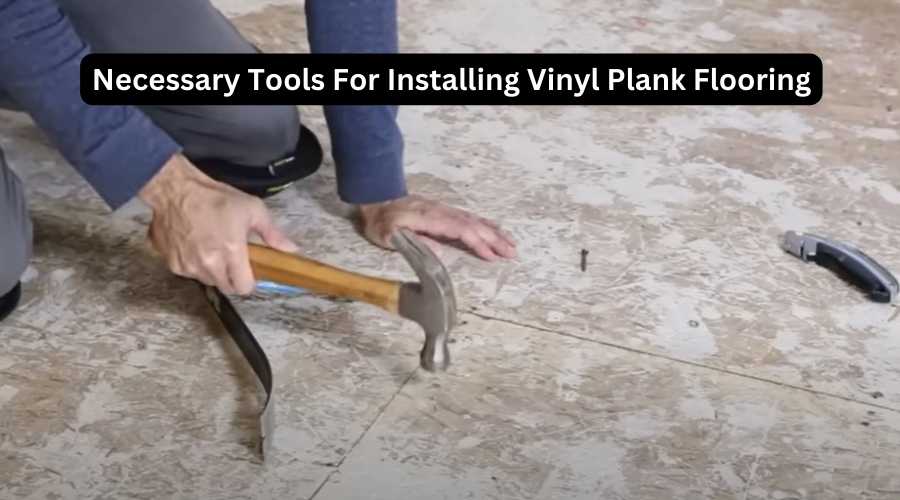
Which Tools Are Necessary For The Job?
To install vinyl plank flooring, you will need the following tools:
- Tape measure, chalk lines, and a pencil for laying out the floor.
- A circular saw or a jigsaw to cut the planks to the required size.
- A rubber mallet and a tapping block to secure planks and provide extra support.
- A pull bar, which is used to pull the planks together during installation.
- A utility knife to trim the planks around the room’s perimeter.
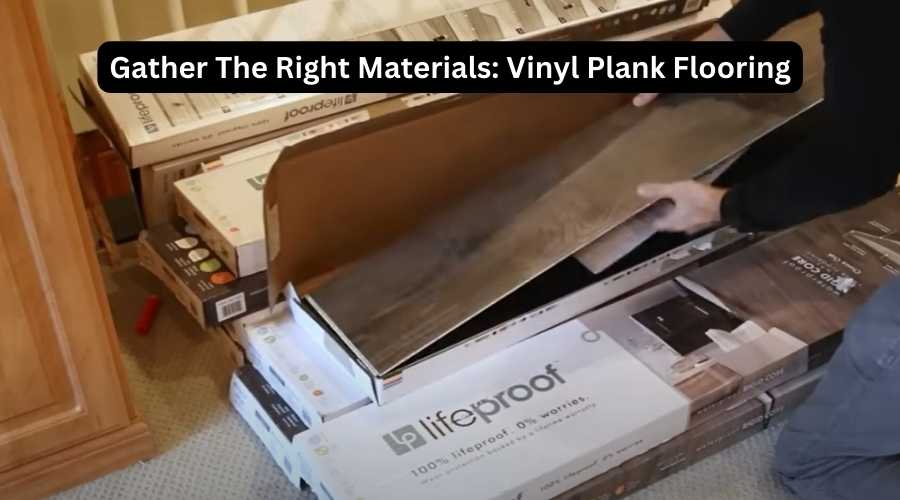
Purchasing The Right Materials: Vinyl Plank Flooring And Nails
Vinyl plank flooring is often a popular choice because of its versatility and durability. It can withstand heavy foot traffic and is resistant to moisture and stains.
When purchasing vinyl plank flooring and nails, you should keep these things in mind:
- Make sure to measure the room accurately and add about 10% for mistakes and scrap.
- Choose a vinyl plank flooring that fits your lifestyle and budget. Note that thicker planks have a better feel underfoot and are more durable.
- Choose nails that are appropriate for use with vinyl plank flooring. Typically, 18-gauge finish nails are ideal for this purpose.
Installing vinyl plank flooring requires proper preparation, the right tools, and high-quality materials. By keeping these factors in mind, you can enjoy a long-lasting, beautiful flooring that meets your needs.
Getting Started With Installation
Before you get started on installing your vinyl plank flooring, here are some critical things you need to know:
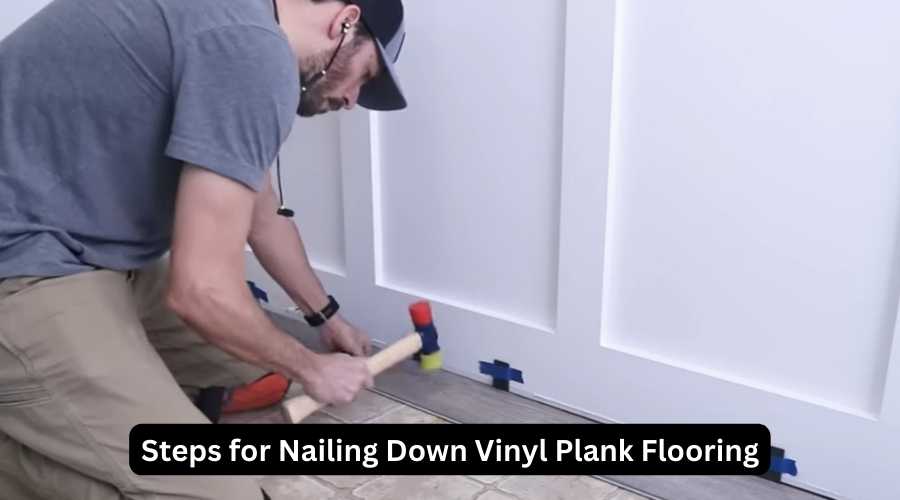
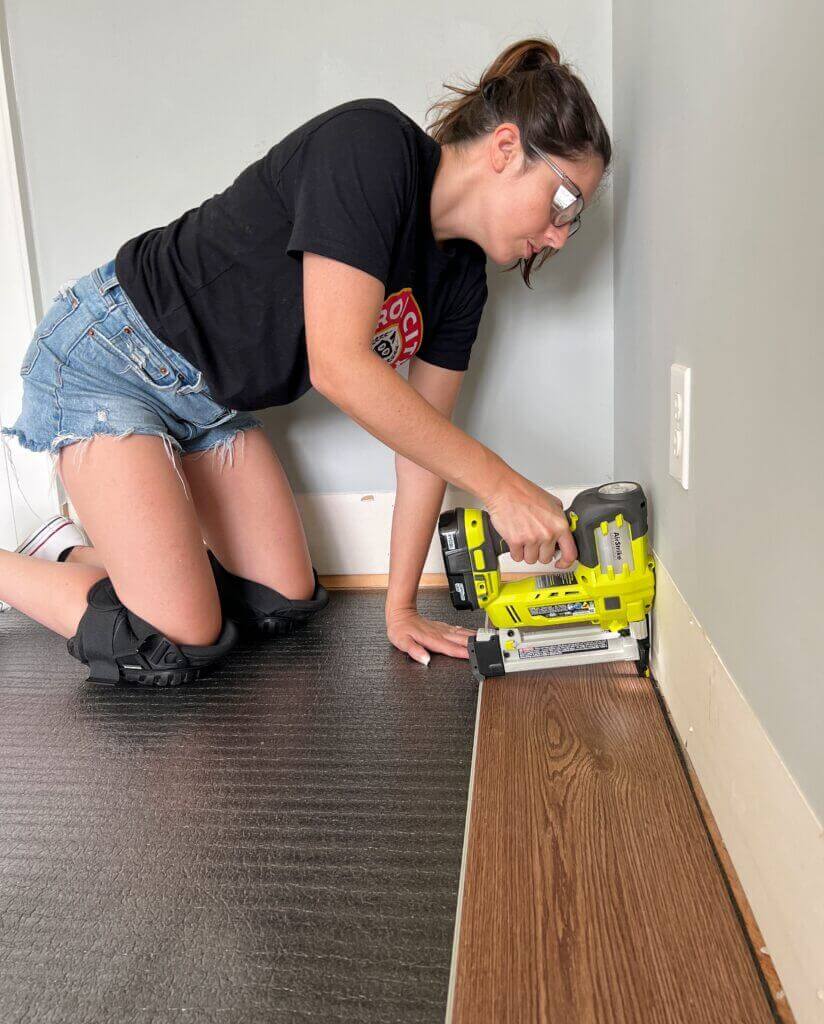
Step-By-Step Process Of Nailing Down Vinyl Plank Flooring
Here is a step-by-step guide to help you get started with nailing down your vinyl plank flooring:
- Gather your tools: To install your vinyl plank flooring, you will need a variety of tools, including a hammer, measuring tape, chalk line, utility knife, and a saw.
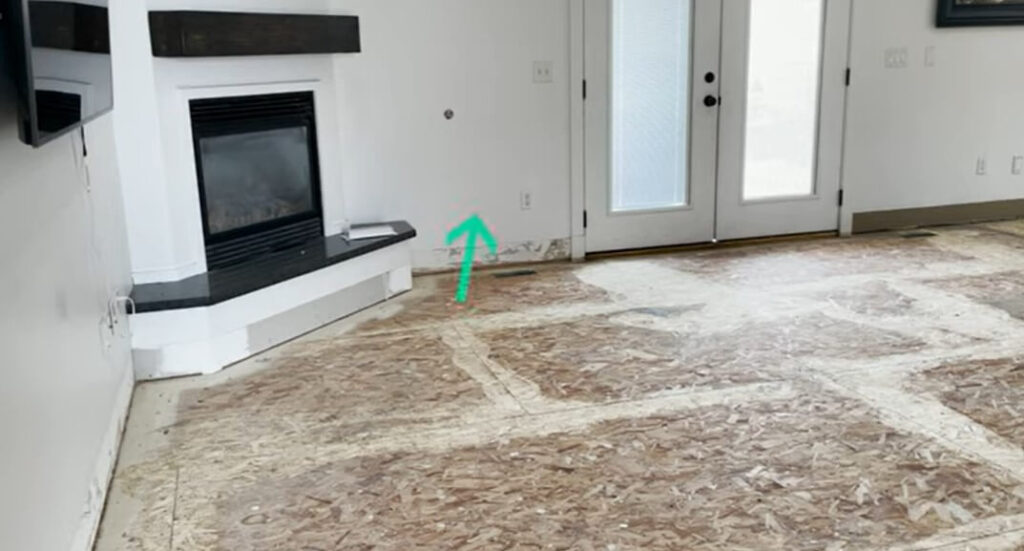
- Prepare the subfloor: Ensure that the subfloor is clean, dry, and level. Remove any existing flooring material, fix any imperfections in the subfloor, and vacuum or sweep any debris.
- Determine the starting point: Find the center of the room and snap a chalk line down the middle of the floor. This line will help you ensure that the planks are installed straight.
- Install the first row: Starting from the center of the room, place the first row of planks side by side. Ensure that each board is snug against each other and that there are no gaps in between.
- Nail down the planks: Once the first row is installed, nail them down using a hammer and finishing nails. Be sure to nail the planks about 1/2 inch from the edge to prevent splitting and to use at least two nails per board.
- Install the next row: Begin the second row by cutting a plank in half and using the leftover piece to start the second row. Ensure that the boards are staggered and continue nailing them down like the first row. Repeat these steps until the floor is complete.
Tips For Achieving A Professional And Durable Finish
Here are some tips to help you achieve a professional and durable finish when installing your vinyl plank flooring:
- Acclimate the planks: It’s crucial to acclimate your vinyl plank flooring in the room where you will be installing it for at least 24 hours before installation.
- Use glue: Applying glue to the edges of each plank before nailing them down is an excellent way to ensure greater stability and durability.
- Measure twice, cut once: Always measure each plank before cutting it. This way, you’ll have more precise cuts that fit more snugly together.
- Be mindful of the pattern: If your vinyl plank flooring has a pattern that needs to match up, be sure to consider this when installing. A wrong cut can throw off the pattern and ruin the whole look of the floor.
Allow the boards to settle: Once you’ve installed the flooring, allow it to settle for at least 24 hours before adding furniture or walking on it.
Troubleshooting Common Installation Issues
Here are some common issues that you may encounter during the installation process:
- Gaps between the boards: If you notice gaps forming between the boards, make sure the planks are tight against each other while installing them. If there are existing gaps, you can use a bit of wood glue or filler to fill them in before finishing.
- Crooked boards: If the boards are crooked or not laying flat, ensure the subfloor is level and adjust accordingly. Also, make sure you’re nailing the planks down securely.
- Damaged planks: If you accidentally damage a plank during installation, you can replace it with a new one. Use a chisel to remove the damaged plank and snap a new one into place.
By following these tips and using the step-by-step guide, you can achieve a professional-looking and durable vinyl plank flooring installation.
Common Mistakes When Installing Vinyl Plank Flooring:
1. Poor Subfloor Preparation: Neglecting to properly prepare the subfloor can lead to uneven surfaces and premature wear. Ensure it’s clean, dry, and level before installation.
2. Inadequate Acclimatization: Failing to allow the vinyl planks to acclimate to the room’s temperature and humidity can result in expansion or contraction issues after installation.
3. Skipping Underlayment: Underlayment provides cushioning and sound insulation. Skipping it can lead to a less comfortable and noisy flooring experience.
4. Incorrect Seam Alignment: Misaligning the seams between planks can create unsightly gaps or overlaps. Precise alignment is crucial for a polished look.
5. Insufficient Expansion Gaps: Not leaving enough space around the edges for expansion can cause buckling or warping as the vinyl reacts to temperature and humidity changes.
6. Rushing the Installation: Vinyl plank flooring requires careful measurement and alignment. Rushing the process may lead to crooked rows and an unprofessional finish.
7. Using the Wrong Tools: Using improper tools or outdated techniques can damage the planks or make installation more difficult. Always follow the manufacturer’s guidelines.
8. Neglecting to Clean As You Go: Failing to clean up adhesive or debris during installation can result in a messy and hard-to-fix final appearance.
9. Ignoring Manufacturer Instructions: Each vinyl plank product may have specific installation requirements. Ignoring these instructions can void warranties and lead to problems.
10. Overlooking Quality Control: Not inspecting planks for defects before installation can result in visible flaws in the finished floor. Always check each plank for issues.
Avoiding these common mistakes when installing vinyl plank flooring will help ensure a successful and visually appealing flooring project.
After Installation Maintenance And Care
Vinyl plank flooring has become a popular choice among homeowners due to its durability and versatility. However, it is important to note that proper maintenance and care are crucial for the longevity of your vinyl plank flooring.
We will explore tips for waterproofing and protecting your vinyl plank flooring, cleaning and maintenance tips for long-term durability, and how to repair damages to your vinyl plank flooring.
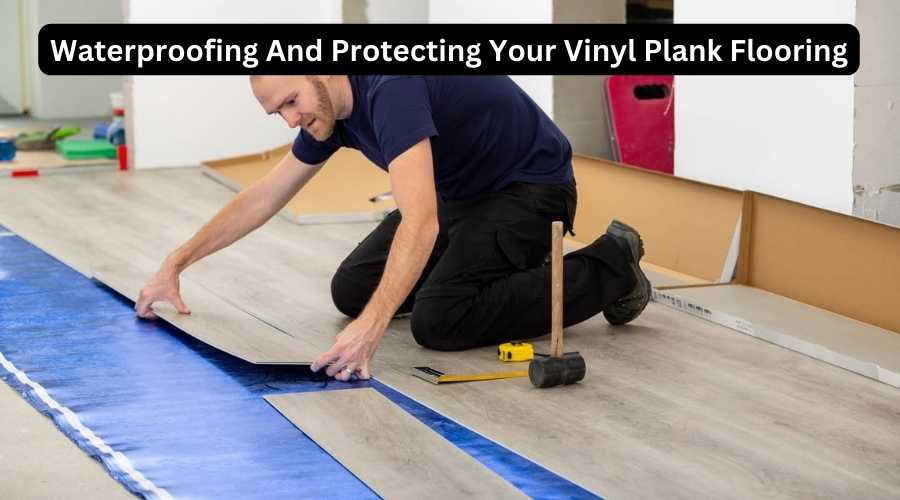
Tips For Waterproofing And Protecting Your Vinyl Plank Flooring
To extend the lifespan and prevent water damage to your vinyl plank flooring, consider these tips:
- Wear and tear protection: Place doormats at entrances to reduce the amount of dust, debris, and moisture that enters your home.
- Consider waterproof underlayment: Adding a waterproof underlayment can help prevent moisture from seeping through the subfloor and damaging your vinyl plank flooring.
- Protect against sun damage: Keep blinds or curtains closed during peak sun hours to avoid direct UV exposure on your flooring, which can lead to fading and discoloration.
- Avoid standing water: Quickly clean up spills, puddles, leaks, or floods to prevent standing water from causing damage to your vinyl plank flooring.
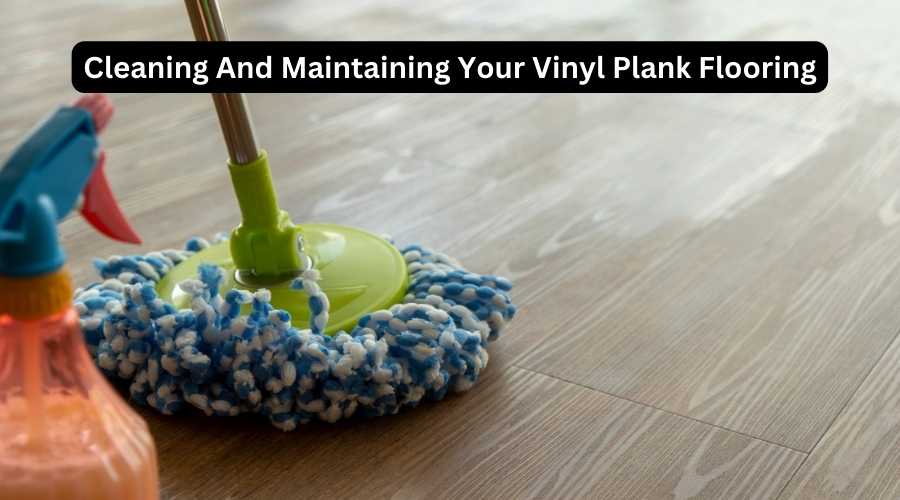
Cleaning And Maintenance Tips For Long-Term Durability
Vinyl plank flooring has a protective layer called the wear layer, which makes the surface durable and scratch-resistant. Following best practices for cleaning and maintenance can maximize the longevity of your vinyl plank flooring. Consider these tips:
- Regularly sweep and vacuum: This removes dirt and debris that can scratch your flooring. A weekly sweep and vacuum can keep your vinyl plank flooring looking brand new for years to come.
- Damp mop with manufacturer-recommended cleaning products: Use a damp mop and avoid using excess water or soap. Excess water can seep through the seams of your vinyl plank flooring and cause water damage.
- Protect against furniture scratches: Consider adding felt pads under your furniture to avoid scratches and dents on your vinyl plank flooring.
- Avoid sharp objects: Be cautious with sharp objects on your vinyl plank flooring, such as high heels or pet claws.
How To Repair Damages To Your Vinyl Plank Flooring
Despite taking preventative measures, damages to your vinyl plank flooring can still occur. Here are some tips on how to repair damages:
- Small scratches: These can be buffed out with a clean, damp cloth or with a flooring repair kit.
- Slight dents: Use a hair dryer or heat gun to apply heat to the dented area, and then gently massage the area until the dent is removed.
- Heavy damages: For deep scratches, dents, or gouges, consider cutting out the damaged area and replacing it with a new plank. This may require professional help for larger areas.
By following these tips for waterproofing and protecting your vinyl plank flooring, cleaning and maintenance, and repair, you can help ensure that your vinyl plank flooring remains durable and beautiful over time.
Comparing Nailing Down Vinyl Plank Flooring To Other Installation Methods
Nailing down vinyl plank flooring is an installation method that homeowners and DIY enthusiasts alike consider when installing a new floor. It is a quick and straightforward process that comes with several advantages.
However, before jumping in, it is crucial to compare nailing down vinyl plank flooring to other installation methods.
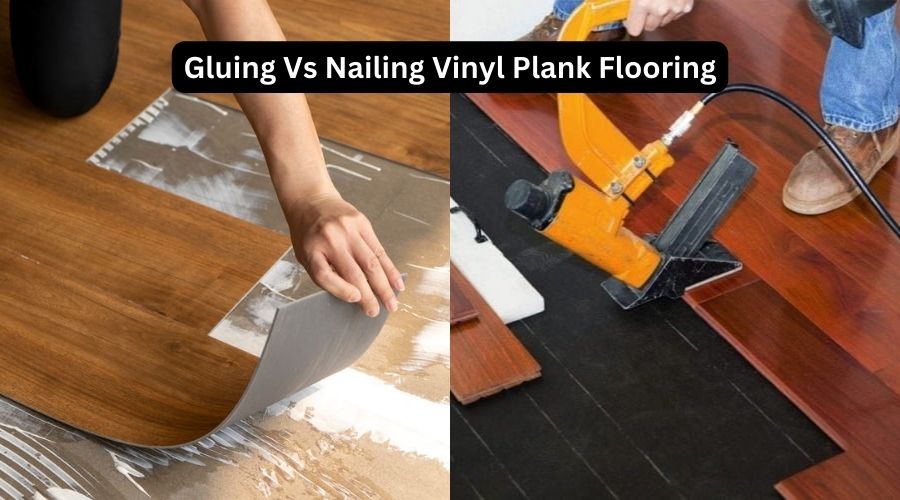
Gluing Vs Nailing Vinyl Plank Flooring
When it comes to installing vinyl plank flooring, homeowners can choose between gluing down and nailing down methods. Here are some key differences between gluing down and nailing down vinyl plank flooring:
- Glue-down vinyl plank flooring is adhered to the subfloor using a special vinyl adhesive, while nailing down vinyl plank flooring is attached to the subfloor with nails or staples.
- Nailing down vinyl plank flooring is a faster installation method compared to gluing down, which requires more time to let the adhesive set.
- Glue-down vinyl plank flooring has better sound-dampening qualities compared to nailing down, which can produce more noise when walked on.
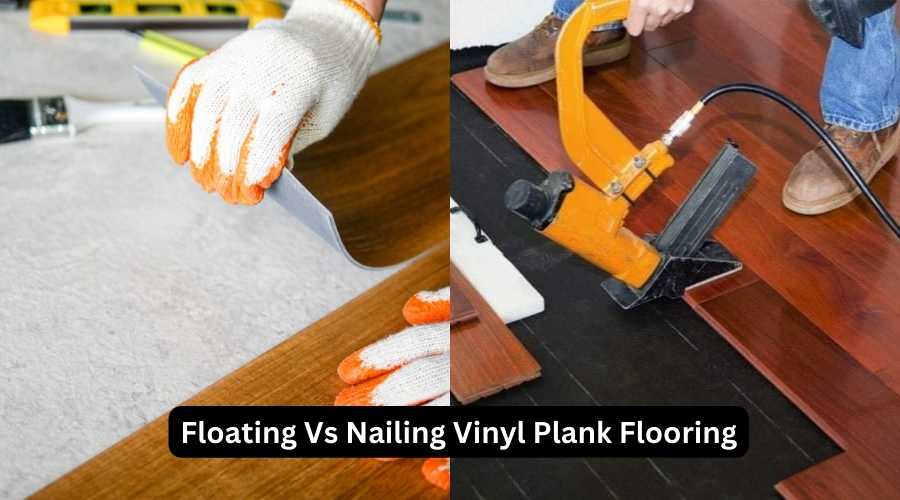
Floating Vs Nailing Vinyl Plank Flooring
Another common installation method for vinyl plank flooring is the floating installation method, where the planks click and lock together without any attachment to the subfloor. Here’s how nailing down compares to floating installation:
- Nailing down vinyl plank flooring is more secure compared to floating installation, which can feel loose and noisy when walked on.
- Floating installation is an excellent DIY option for homeowners who want to install their flooring while nailing down vinyl plank flooring require more expertise and specialized tools.
- Nailing down vinyl plank flooring is a more affordable option compared to floating installation, which requires additional underlayment and padding for soundproofing and moisture management.
Which Option Is The Most Appropriate For Different Scenarios?
The most appropriate installation method for your vinyl plank flooring depends on several factors, including the type of subfloor, room type, budget, and personal preferences.
Here are some scenarios where one installation method might be more appropriate:
- Glue-down vinyl plank flooring is ideal for rooms with high traffic, moisture-prone areas like bathrooms and kitchens and it is an excellent sound dampener.
- Nailing down vinyl plank flooring is a quick and easy installation method that works best for rooms with a stable subfloor and lower traffic areas like bedrooms and living rooms.
- Floating installation is a versatile and cost-effective option that homeowners can install on different types of subfloor and any room type.
Nailing down vinyl plank flooring is a viable option for homeowners who want a quick, secure, and affordable installation method. However, it is crucial to weigh the pros and cons of each installation method and choose the most suitable one for your needs.
Brad Nailing Vinyl Plank Flooring
Brad nailing vinyl plank flooring is a method of securing vinyl planks to the subfloor using a brad nailer, which is a specialized pneumatic or electric tool designed for driving thin nails, called brad nails, into surfaces.
While it’s possible to use this method for vinyl plank flooring installation, it’s important to note a few key points:
Not Recommended for All Types: Brad nailing is typically not the preferred method for installing vinyl plank flooring. Most vinyl planks are designed for floating installations, adhesive installations, or click-lock systems, and brad nailing may not provide the necessary stability and flexibility.
Subfloor Considerations: Before attempting to brad nail vinyl planks, ensure that your subfloor is suitable for this method. It should be smooth, clean, dry, and free of any irregularities.
Risk of Damage: Brad nails are small and may not provide sufficient holding power for vinyl planks, especially if they have a rigid locking system. There is a risk of damaging the planks, causing them to crack or split.
Adhesive May Be Required: Even when using brad nails, it’s often recommended to use adhesive specifically designed for vinyl flooring to provide extra support and prevent planks from shifting over time.
Consult Manufacturer Guidelines: Always follow the manufacturer’s guidelines and recommendations for the specific vinyl plank product you are using. They will provide the best guidance for proper installation methods to ensure a long-lasting and durable floor.
In summary, while brad nailing can be used for vinyl plank flooring installation in some cases, it’s not the most common or recommended method. It’s crucial to consult the manufacturer’s instructions and consider alternative installation methods, such as floating, adhesive, or click-lock, for a more reliable and stable outcome.
Which Direction To Install Vinyl Plank Flooring?
The direction to install vinyl plank flooring typically follows the longest wall or the direction of incoming natural light. This helps create a visually appealing and spacious look in the room.
However, it’s essential to consult the manufacturer’s guidelines for specific recommendations, as some vinyl plank flooring products may have unique installation instructions.

How To Install Glue Down Vinyl Plank Flooring?
Installing glue-down vinyl plank flooring involves adhering the vinyl planks directly to the subfloor using adhesive. Here’s a brief overview of the process:
Prepare the Subfloor:
- Ensure the subfloor is clean, smooth, and free of debris, dust, or irregularities.
- Repair any damaged areas and make sure the subfloor is level.
Acclimate the Planks:
- Allow the vinyl planks to acclimate to the room’s temperature and humidity for the recommended time.
Layout and Planning:
- Plan the layout by starting from the center of the room or along the longest wall.
- Measure and cut the planks as needed to fit at the edges and around obstacles.
Apply Adhesive:
- Spread a recommended adhesive evenly on the subfloor using a notched trowel. Follow the adhesive manufacturer’s instructions for the proper spread rate.
Install Planks:
- Begin placing the vinyl planks in the adhesive, starting in your chosen reference point.
- Press each plank firmly into the adhesive, ensuring it’s flat and well-bonded.
- Leave an expansion gap (typically 1/8 inch) around the perimeter to allow for movement.
Seam Alignment:
- Align the seams of the planks carefully to create a seamless look. Stagger the joints for a natural appearance.
Weight or Roll:
- Use a weighted roller or flooring roller to press the planks firmly into the adhesive and remove air bubbles.
Clean Excess Adhesive:
- Promptly clean any adhesive that may have squeezed out between the seams using a damp cloth or adhesive remover.
Complete the Installation:
- Continue installing planks row by row, working your way across the room.
- Cut planks as needed to fit at the edges and around obstacles using a utility knife or vinyl plank cutter.
Allow to Cure:
- Let the adhesive cure for the time specified by the manufacturer before walking on or moving furniture onto the new floor.
Install Trim:
- After the adhesive has fully cured, install baseboards or trim to cover the expansion gap and create a finished look.
Always follow the manufacturer’s specific instructions and recommendations for the adhesive and vinyl plank product you are using, as they may have unique requirements.
Proper installation ensures a durable and long-lasting glue-down vinyl plank flooring surface.
How To Start First Row Of Vinyl Plank Flooring?
To initiate the first row of vinyl plank flooring, begin by preparing the subfloor, ensuring it’s clean and level. Opt for the longest wall or the most visible area as your starting point, then measure the width of a plank, including an expansion gap, and create a straight guide line parallel to the wall.
Place the first plank along this guide line, tongue side facing the wall, and continue adding planks by locking them together, maintaining alignment with the guide line. When you reach the end of the row, measure and cut the last plank as needed, leaving an expansion gap.
As you proceed to the second row, start with a partial plank if the first row ended with a full one, staggering the seams for a natural appearance.
Repeat this process, adding rows of planks until you’ve covered the entire room, ensuring a straight and visually pleasing installation.
How To Install Vinyl Plank Flooring On Concrete?
Let’s find the steps of installing Vinyl Plank Flooring on concrete below:
- Prepare the Concrete: Ensure the concrete subfloor is clean, dry, and level.
- Moisture Barrier: If needed, install a moisture barrier or vapor barrier to prevent moisture from seeping through the concrete.
- Acclimate the Planks: Allow the vinyl planks to acclimate to the room for the recommended time.
- Layout and Planning: Plan the layout, starting along the longest wall, and measure to ensure even rows.
- Apply Adhesive: Use a recommended adhesive for concrete and apply it evenly using a trowel.
- Start the First Row: Lay the first plank along the starting wall, leaving an expansion gap.
- Continue Installation: Connect planks by clicking or locking them together, ensuring they align correctly.
- Cut as Needed: Measure and cut planks to fit at the edges and around obstacles.
- Weight or Roll: Use a roller to press the planks firmly into the adhesive and remove air bubbles.
- Allow to Cure: Let the adhesive cure according to the manufacturer’s instructions before walking on the floor.
- Install Trim: After curing, install baseboards or trim to cover the expansion gap for a finished look.
How to Install Vinyl Plank Flooring – Flooring Prep and Install Complete Guide
FAQs: Can You Nail Down Vinyl Plank Flooring
Can You Install Vinyl Plank Flooring Over Existing Floors?
Yes, vinyl plank flooring can be installed over existing floors like concrete, tile, or hardwood.
Is It Difficult To Install Vinyl Plank Flooring?
Not difficult, but it requires some basic tools and knowledge of how to cut and lay flooring.
Can You Use A Nail Gun To Install Vinyl Plank Flooring?
No, you cannot use a nail gun to install vinyl plank flooring because they are typically designed for methods like floating, adhesive, or click-lock installations. Nailing them can damage the planks and may not provide the necessary stability and flexibility required for vinyl flooring.
How Do You Maintain Vinyl Plank Flooring?
Maintain vinyl plank flooring by sweeping or vacuuming regularly and using a damp mop with a mild cleaner.
Is Vinyl Plank Flooring Durable?
Yes, vinyl plank flooring is durable and can withstand heavy traffic, spills, and scratches. It is perfect for high-traffic areas.
Can You Use Vinyl Plank Flooring In Bathrooms?
Yes, vinyl plank flooring is a great choice for a bathroom as it is waterproof and moisture-resistant.
Does Vinyl Plank Flooring Fade Over Time?
Vinyl plank flooring is resistant to fading but long-term exposure to sunlight and uv rays may lead to some fading.
Conclusion
Finally, nailing down vinyl plank flooring is definitely achievable. You just need to consider everything from the type of subfloor you have, the quality of your materials, the layout, and spacing, to the right tools and techniques.
Take your time to prepare the area, properly align your planks, and securely fasten them down.
With each piece in place, you can create a beautiful, durable, and long-lasting floor. Don’t forget to clean up any dust or debris before admiring your handiwork.
If you’re still not confident about taking on the job, consider hiring a professional to get it done right.
Nevertheless, with the proper steps, tools, and techniques, nailing down vinyl plank flooring can be an easy, successful, and rewarding DIY project.
Recent Posts
Woodworking is one of the most rewarding hobbies and professions, but it also comes with serious risks if proper precautions are not taken. Whether you're working with a table saw, planer, or simple...
What to Use If You Don't Have a Brad Nailer: Handy Alternatives
You can use a hammer and finishing nails paring with nail set or wood glue if you don't have a Brad Nailer. These tools effectively secure trim and small woodworking projects. So, if you’re in...