
Ah, the world of hardwood flooring, a realm where precision matters. For a task like this, my recommendation would be a pneumatic flooring nailer or stapler. Its ability to drive nails at the perfect angle and depth ensures a seamless installation. Embrace the power of precision, my friend!
In this concise guide, we’ll navigate through the options to answer the burning question: What type of nail gun is best suited for hardwood flooring?
Let’s dive into the key factors that will ensure a seamless and durable installation process.
“Using a high-quality nail gun specifically designed for hardwood flooring is essential for a smooth and efficient installation process. It ensures that the planks are securely fastened, resulting in a sturdy and long-lasting floor.”
John Peters, Renowned Woodworker
Can I Use A Nail Gun To Install Hardwood Floors?
Absolutely, my friend! Using a nail gun for hardwood floor installation is a fantastic choice. It speeds up the process and provides a precise and secure placement of the nails. Go ahead, embrace the efficiency, and let that nail gun do its magic on your hardwood floors!
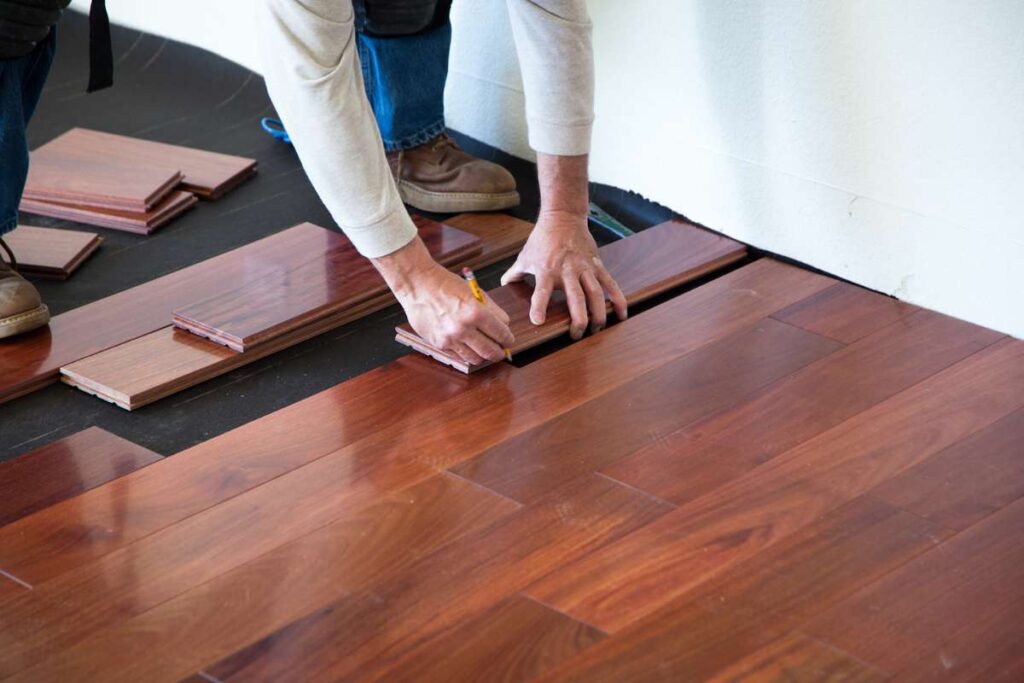
Understanding the Basics of Hardwood Flooring Installation
As we sure that we can use a nail gun to install hardwood floors without issue, next imperative task is to understand the basic of hardwood floors.
Installing hardwood floors requires careful planning, precision, and the use of appropriate tools to ensure a durable and visually appealing result. Therefore, it is essential to select the right size and kind of nail gun.
Here, we will explore the fundamental aspects of hardwood flooring installation, including preparation, layout, and nailing.
Preparation:
Before installing hardwood flooring, it is essential to prepare the subfloor properly. The subfloor should be clean, dry, and level to provide a solid foundation for the hardwood planks.
Any existing flooring, such as carpet or tile, should be removed, and the subfloor should be inspected for any damage or imperfections.
Additionally, it is crucial to acclimate the hardwood planks to the environment in which they will be installed. This involves allowing the planks to adjust to the temperature and humidity of the room for a certain period. Acclimation helps prevent issues such as warping or buckling after installation.
Layout:
Layout planning is a crucial step in hardwood flooring installation. It involves determining the starting point, establishing the direction of the planks, and ensuring a visually pleasing arrangement. Some considerations for layout planning include:
Determining the best starting point: Generally, it is recommended to start the installation from a straight wall and work towards the opposite side of the room. This ensures a consistent and symmetrical layout.
Establishing the direction: The direction in which the hardwood planks are laid can impact the visual appearance of the room. Commonly, planks are installed parallel to the longest wall or in the direction of incoming natural light.
Maintaining proper spacing: It is important to leave a small gap between the hardwood planks and the walls to accommodate expansion and contraction due to changes in humidity. These gaps are later concealed by baseboards or molding.
Nailing:
Nailing is a critical step in securing the hardwood planks to the subfloor. It ensures stability, prevents movement, and contributes to the longevity of the floor. The appropriate method for nailing depends on the type of hardwood flooring being installed and the specific nail gun being used.
Traditionally, hardwood flooring was installed using nails and a hammer. However, advancements in technology have introduced pneumatic and cordless nail guns as efficient alternatives. These nail guns use specialized nails designed specifically for hardwood flooring installation.
Pneumatic nail guns are widely used for hardwood flooring installation. They operate by using compressed air to drive nails into the subfloor at high speed. Pneumatic nail guns offer speed and precision, making the installation process faster and more efficient.
On the other hand, cordless nail guns provide the advantage of portability and ease of use without the need for an air compressor. They are powered by rechargeable batteries and are suitable for smaller installations or areas where power outlets may not be readily available.
Summary:
Understanding the basics of hardwood flooring installation is essential for a successful and visually appealing result. Proper preparation, meticulous layout planning, and the use of the right nail gun are all crucial components of a smooth installation process.
By taking the time to understand these fundamentals, you can ensure a durable, long-lasting hardwood floor that enhances the beauty and value of your space.
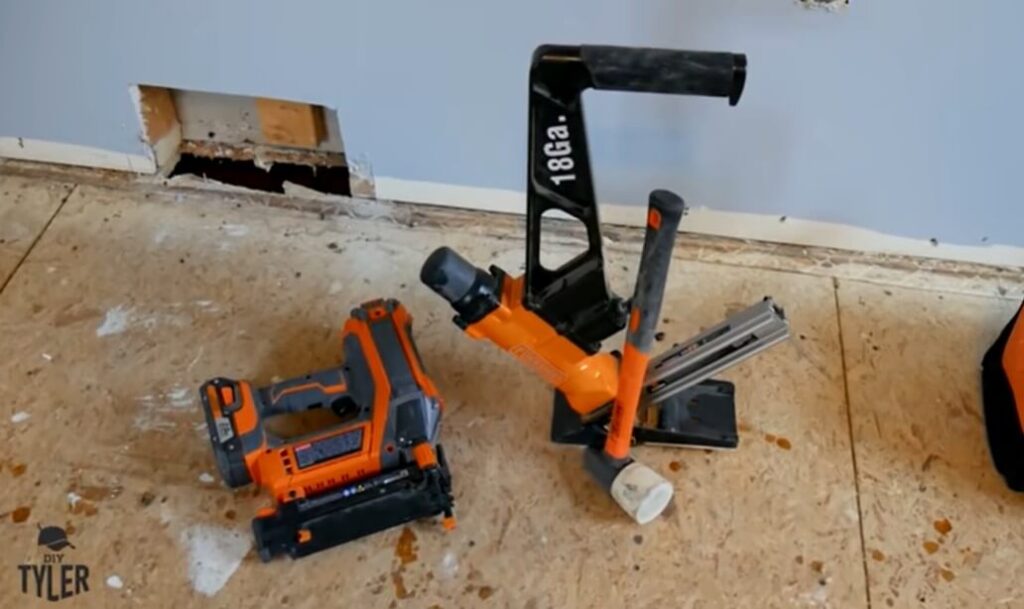
What Are The Different Types Of Floor Nailers?
There are several types of floor nailers designed for various flooring materials and installation methods. The primary types include:
Pneumatic Flooring Nailer:
- Uses compressed air to drive nails into the flooring material.
- Ideal for hardwood and engineered wood flooring installations.
- Provides a powerful and efficient means of securing flooring.
Manual Flooring Nailer:
- Operated by striking the nailer with a mallet.
- Suitable for smaller projects or areas where a pneumatic nailer might be challenging to use.
Flooring Stapler:
- Similar to nailers but uses staples instead of nails.
- Commonly used for engineered wood and thinner hardwood floors.
- Offers a secure and discreet fastening method.
Cleat Flooring Nailer:
- Specifically designed for cleat nails, which have two prongs.
- Often preferred for solid hardwood flooring installations.
Brad Nailer:
- Smaller than traditional flooring nailers.
- Suitable for thinner or more delicate flooring materials.
Combo Flooring Nailer:
- Combines the functionality of both flooring nailers and staplers.
- Offers versatility for different flooring types.
When choosing a floor nailer, it’s essential to consider the specific requirements of the flooring material and the scope of the project. The type of fastener (nails or staples) and the method of installation will influence the choice of the floor nailer.
What Kind Of Nail Gun Is Best For Hardwood Flooring?
The best type of nail gun for hardwood flooring is a pneumatic flooring nailer or stapler. These nailers are specifically designed to drive fasteners into the tongue and groove of hardwood planks, without damaging the surface of the wood. They are also powerful enough to penetrate the subfloor, ensuring that the flooring is securely installed.
The two most common types of nail guns for hardwood flooring are:
Pneumatic flooring nailer: This is the most popular type of nail gun for hardwood flooring because it is powerful and easy to use. It uses compressed air to drive nails into the flooring, so you will need an air compressor to use one.
Pneumatic flooring nailers typically use 15- or 16-gauge nails, which are small enough to not damage the flooring but strong enough to hold the planks securely.
Hardwood flooring stapler: This type of nail gun is similar to a pneumatic flooring nailer, but it uses staples instead of nails. Staples are less likely to damage the flooring than nails, but they are not as strong.
Hardwood flooring staplers typically use 18- or 20-gauge staples.
Here is a table that summarizes the pros and cons of each type of nail gun:
| Aspect | Pneumatic Flooring Nailer | Hardwood Flooring Stapler |
|---|---|---|
| Pros | ||
| Ease of Use | Quick and efficient installation | Easy to handle and maneuver |
| Speed | Rapid nail placement | Fast staple application |
| Holding Power | Provides strong holding power | Delivers secure staple grip |
| Compatibility | Versatile for various hardwoods | Suitable for engineered wood and solid hardwood |
| Cons | ||
| Intial Cost | Higher upfront investment | Generally more affordable |
| Weight | Can be heavy and tiring | Lightweight and user-friendly |
| Wood Splitting Risk | May cause wood splitting | Reduced risk of wood splitting |
| Maintenance | Requires regular maintenance | Low maintenance requirements |
Ultimately, the best type of nail gun for you will depend on your individual needs and preferences. If you are a professional flooring contractor, then you will likely want to invest in a pneumatic flooring nailer.
However, if you are a homeowner who is only installing hardwood flooring in a small area, then a hardwood flooring stapler may be a more affordable option.
Is It Better To Staple Or Nail Hardwood Flooring?
Whether it is better to staple or nail hardwood flooring depends on several factors, including the type of flooring, the thickness of the flooring, and the desired level of security.
Staples are generally considered to be less damaging to hardwood flooring than nails because they are smaller and have a narrower shank. This makes them less likely to split or crack the wood. Staples are also typically easier to remove than nails, which can be helpful if you need to repair or replace the flooring in the future.
Nails, on the other hand, are stronger than staples and provide a more secure hold. This is especially important for high-traffic areas where the flooring is subjected to a lot of wear and tear. Nails are also less likely to work loose over time than staples.
Here is a table summarizing the pros and cons of each method:
| Method | Pros | Cons |
|---|---|---|
| Staples | Less damaging to flooring, easier to remove | Weaker hold, may work loose over time |
| Nails | Stronger hold, more secure | More damaging to flooring, more difficult to remove |
In general, staples are a good choice for thin hardwood flooring, engineered hardwood flooring, and flooring that is not in a high-traffic area. Nails are a better choice for thick hardwood flooring, solid hardwood flooring, and flooring that is in a high-traffic area.
How Do I Choose A Hardwood Flooring Nailer?
Choosing the right hardwood flooring nailer is crucial for a successful installation. Consider the following factors when making your selection:
1. Type of Flooring:
Different flooring nailers are designed for specific materials. Ensure the nailer is suitable for the type of hardwood or engineered wood you are installing.
2. Nail Type:
Consider the recommended nail type for your flooring. Some nailers work with cleats, while others use staples. The choice may depend on your specific project and hardwood type.
3. Installation Method:
Determine whether you need a nailer for tongue-and-groove installation or if face nailing is also required. Some nailers are versatile and can handle both methods.
4. Pneumatic vs. Manual:
Pneumatic nailers are powered by compressed air and are efficient for large projects. Manual nailers, operated with a mallet, are suitable for smaller installations or when a quieter operation is preferred.
5. Cleat or Staple Flooring Nailer:
Consider whether a cleat or staple flooring nailer is more appropriate for your project. Cleats are more traditional and may offer stronger holding power, while staples are suitable for thinner or engineered hardwood.
6. Angle and Depth Adjustment:
Ensure the nailer allows for angle and depth adjustment. This is important for accommodating different tongue-and-groove profiles and achieving the correct fastener depth.
7. Compatibility with Subfloor:
Check if the nailer is compatible with your subfloor material. Some nailers may work better on plywood, while others are suitable for various subfloor types.
8. Portability and Weight:
Consider the weight of the nailer, especially if you anticipate working on a large project. A lighter and more portable nailer can reduce fatigue during extended use.
9. Ease of Jam Clearing:
Opt for a nailer with easy jam-clearing features to minimize downtime and frustration during the installation process.
10. Brand Reputation and Reviews:
Research and consider the reputation of the brand. Read user reviews to get insights into the performance and reliability of the nailer.
11. Cost:
Determine your budget and look for a hardwood flooring nailer that offers the best balance of features and affordability.
12. Warranty:
Check the warranty offered by the manufacturer. A longer warranty period can provide peace of mind regarding the durability and quality of the nailer.
Before making a final decision, it’s advisable to read the product specifications and reviews, and if possible, test the nailer or seek recommendations from professionals in the flooring industry.
What Gauge Nail Gun For Hardwood Floors?
The most common gauge nail gun for hardwood floors is a 16-gauge. This is because 16-gauge nails are small enough to not damage the flooring but strong enough to hold the planks securely. They are also versatile and can be used for a variety of other tasks, such as installing trim and crown molding.
Here is a table that summarizes the different gauge nail guns and their typical applications:
| Gauge | Typical application |
|---|---|
| 15-gauge | Finish carpentry, trim, crown molding |
| 16-gauge | Hardwood flooring, trim, crown molding |
| 18-gauge | Lightweight trim, delicate moldings, upholstery |
| 20-gauge | Very lightweight trim, upholstery |
If you are installing hardwood flooring in a high-traffic area, then you may want to consider using a 15-gauge nail gun. 15-gauge nails are stronger than 16-gauge nails and will provide a more secure hold. However, they are also more likely to damage the flooring, so you will need to be more careful when using them.
If you are installing hardwood flooring in a low-traffic area, then a 18-gauge nail gun may be a good option. 18-gauge nails are the smallest and least likely to damage the flooring. However, they are also the weakest, so they may not be suitable for high-traffic areas.
Ultimately, the best gauge nail gun for you will depend on your individual needs and preferences. If you are unsure which gauge to choose, it is always best to consult with a professional flooring contractor.
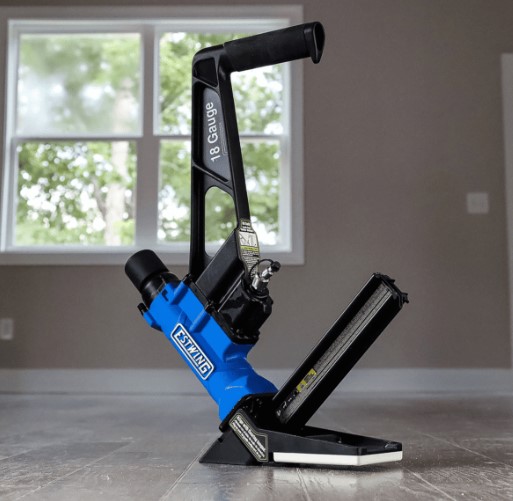
16 or 18 Gauge Nailer For Hardwood Floor
Opt for the 16-gauge nailer when tackling that hardwood floor installation. It provides a sturdy hold without compromising the integrity of your flooring. Remember, precision is the key to perfection, and the 16-gauge nailer is your ally in achieving just that!
What Size Nail For Hardwood Floor?
The size of nails for hardwood flooring typically depends on the thickness of the flooring material. Commonly, cleat nails are used for hardwood floor installations.
The standard size for cleat nails is usually 2 inches (50mm) to 2.5 inches (64mm) in length. However, the exact size may vary based on the thickness of the hardwood flooring.
It’s essential to consult the manufacturer’s recommendations for your specific hardwood flooring product, as they often provide guidelines regarding the appropriate nail size and type. Using the correct nail size ensures a secure and stable installation while minimizing the risk of splitting or damaging the hardwood.
Additionally, the flooring nailer you choose should be compatible with the recommended nail size for your hardwood flooring.
What Size Nails For 3/4 Hardwood Flooring?
When it comes to 3/4 hardwood flooring, you’d want to use 2-inch cleats or nails. This size ensures a secure grip on the hardwood without risking any protrusion on the other side. It’s all about that perfect balance for a flawless installation!
What Gauge Nail For 3/4 Hardwood Floor?
For 3/4 hardwood flooring, I’d recommend using 16-gauge nails. This gauge strikes the right balance between holding power and minimizing the risk of splitting your precious hardwood. Let’s make sure that floor is not just solid but elegantly crafted as well!
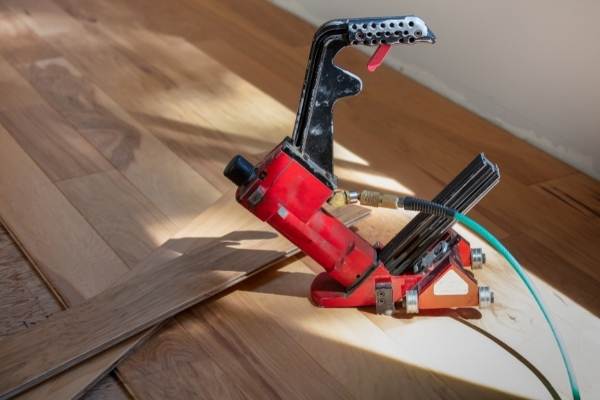
How Do You Use A Hardwood Nail Gun?
Using a hardwood nail gun, also known as a flooring nailer, involves several steps to ensure a secure and efficient installation. Here’s a general guide:
Materials Needed:
- Hardwood flooring
- Hardwood nails (cleats)
- Pneumatic flooring nailer
- Air compressor
- Safety gear (safety glasses, ear protection)
Procedure:
1. Prepare the Subfloor:
- Ensure that the subfloor is clean, dry, and level.
- Install a moisture barrier if necessary, especially for solid hardwood flooring.
2. Acclimate the Hardwood:
- Allow the hardwood flooring to acclimate to the room’s temperature and humidity for the recommended time.
3. Position the First Row:
- Begin in a corner of the room.
- Place the first row of hardwood, leaving an expansion gap against the walls.
4. Load the Nailer:
- Load the pneumatic flooring nailer with the appropriate cleats according to the manufacturer’s instructions.
5. Adjust the Nailer:
- Set the nailer to the proper angle and depth, typically 45 degrees for tongue-and-groove flooring.
6. Nail the First Board:
- Position the nailer at a 45-degree angle to the tongue of the hardwood.
- Place the nailer’s foot against the board and strike the plunger with a mallet to drive the cleat into the tongue.
- Ensure the cleat is fully seated.
7. Continue Installation:
- Insert the next board, engage the tongue and groove, and repeat the nailing process.
- Maintain proper spacing between boards, using spacers as needed.
8. Stagger the Joints:
- Stagger end joints between rows for a more visually appealing and stable floor.
9. Complete the Rows:
- Continue installing rows, moving across the room.
- Trim the last row if necessary to fit the remaining space.
10. Face-Nail the Last Row:
- If the nailer can’t fit in the remaining space, face-nail the last row using a finish nailer.
11. Install Transition Pieces:
- Install transition pieces around doorways and between different flooring types if needed.
12. Finish the Installation:
- Once the installation is complete, remove any remaining spacers and install baseboards or trim.
Always refer to the manufacturer’s instructions for the specific hardwood nailer you are using, as features and operating procedures may vary between models. Additionally, wear appropriate safety gear during the installation process.
“When it comes to installing hardwood flooring, the right nail gun can make all the difference. It allows for precise nailing, reducing the risk of damage to the wood while ensuring a professional finish.”
Sarah Thompson, Master Woodworker
How to install hardwood flooring with a nail gun
Hardwood Floor Nailer Rental Near Me
To get your hands on a hardwood floor nailer for that upcoming project, check out local hardware stores, home improvement centers, or specialized tool rental shops near your location. They’re bound to have the tool you need for your flooring endeavors. Happy flooring!
FAQs: What Type Of Nail Gun For Hardwood Flooring?
What Type Of Nail Gun Do I Need For Hardwood Flooring?
It would be best if you had a flooring nailer or cleat nailer, which uses specific nails designed for hardwood flooring installation.
Do I Need A Pneumatic Or Cordless Nail Gun For Hardwood Flooring?
A pneumatic nail gun is the best option for hardwood flooring since it has the power and consistency needed for the job.
Can I Use A Brad Nailer For Hardwood Flooring?
No, a brad nailer is not strong enough to hold hardwood flooring securely in place. A flooring nail gun is required.
What Size Nail Should I Use For Hardwood Flooring?
The size of the nail you need will depend on the thickness of the flooring you’re installing. For most hardwood floors, 2-inch nails are recommended.
Do I Need To Leave An Expansion Gap When Using A Nail Gun For Hardwood Flooring?
Yes, you should leave a 1/2 inch expansion gap around the perimeter of the room, as well as between planks, to allow for natural expansion and contraction.
Do I Need Experience To Use A Nail Gun For Hardwood Flooring?
While experience is helpful, you can learn how to use a flooring nail gun with some practice. Follow manufacturer instructions and safety guidelines carefully.
Should I Buy Or Rent A Nail Gun For Hardwood Flooring?
If you plan to install hardwood flooring frequently, buying a nail gun is worth the investment. Otherwise, renting is a more cost-effective option.
Can I Use Screws Instead Of Nails For Hardwood Flooring?
Screws are not recommended for hardwood flooring installation, as they can split the wood and aren’t as efficient as nails. Use a flooring nail gun instead.
How Do I Maintain My Nail Gun For Hardwood Flooring?
Regular maintenance, including cleaning and oiling the nail gun, can prolong its lifespan and keep it functioning properly. Follow manufacturer instructions carefully.
Conclusion
Ultimately, choosing the right nail gun for your hardwood flooring installation can make a significant impact on the outcome of the project. With a wide variety of options available in the market, it may seem overwhelming at first, but with a clear understanding of the features and benefits of each type, you can make an informed decision.
Pneumatic flooring nail guns are more powerful, efficient, and versatile, making them an industry favorite, but cordless options have come a long way and are catching up in terms of power and performance. However, ensure that the nail gun you choose is compatible with your flooring and works with the right nail size, thickness, and angle.
We hope that this article has been helpful in demystifying the nail gun options for hardwood flooring and has given you the necessary knowledge to choose the right tool for your project. Happy flooring!
Recent Posts
Woodworking is one of the most rewarding hobbies and professions, but it also comes with serious risks if proper precautions are not taken. Whether you're working with a table saw, planer, or simple...
What to Use If You Don't Have a Brad Nailer: Handy Alternatives
You can use a hammer and finishing nails paring with nail set or wood glue if you don't have a Brad Nailer. These tools effectively secure trim and small woodworking projects. So, if you’re in...