
Can you use a finish nailer for baseboards? The short answer is yes, but there are some factors to consider ensuring the best results.
A finish nailer is an essential tool for carpenters and DIY enthusiasts. It offers precision and ease of use, making it ideal for installing baseboards. This power tool drives nails into the wood with accuracy, ensuring a tight and secure fit.
Using a finish nailer speeds up the installation process and enhances the overall appearance of the baseboard. Whether you are renovating or building a new space, a finish nailer is a reliable choice. Its ability to deliver consistent results makes it a popular option for both professionals and hobbyists. With this tool, you can achieve a polished and durable finish on your baseboards.
What Is A Finish Nailer?
A finish nailer is a type of power nail gun designed to drive smaller nails into wood without leaving large visible marks. These nails are usually 15 or 16 gauge. The nails have small heads. These nails are strong enough to secure trim while providing a clean look, making them a popular choice for baseboards, crown molding, and other finish carpentry projects.
Finish nailers are often pneumatic. That means they use compressed air. Some finish nailers are battery-powered. These are more portable. They don’t need an air compressor.
Common Uses
Finish nailers are versatile. Here are some common uses:
- Installing baseboards
- Attaching crown molding
- Building furniture
- Securing door and window trim
Finish nailers are perfect for detailed work. They make strong, neat connections. This is ideal for visible areas.
Why Use a Finish Nailer for Baseboards?
Using a finish nailer for baseboard installation offers several advantages:
✅ Strong Hold:
The 15- or 16-gauge nails provide enough strength to keep baseboards securely attached to the wall, especially when nailing into studs.
✅ Clean Aesthetic:
Finish nails have small heads, meaning they leave tiny holes that are easy to fill and paint over, ensuring a seamless finish.
✅ Time-Saving:
Compared to hammering in nails manually, a finish nailer speeds up the installation process significantly.
Considerations When Using a Finish Nailer
While a finish nailer is an excellent tool for baseboards, here are a few things to keep in mind:
✅Gauge Size Matters:
A 16-gauge finish nailer is typically the best choice for baseboards, offering a good balance of strength and subtlety. A 15-gauge nailer can also work but may leave slightly larger holes.
✅Nail Length:
Use nails between 1.5 to 2.5 inches, depending on the thickness of your baseboard and whether you’re nailing into drywall or studs.
✅Nailing Technique:
Angle the nails slightly for a more secure hold, and aim for studs whenever possible for maximum stability.
Can You Use a Brad Nailer Instead?
A brad nailer uses 18-gauge nails, which are thinner than finish nails. While a brad nailer can be used for baseboards, it may not provide a strong enough hold, especially for taller or heavier trim. If baseboards are your primary project, a finish nailer is the better choice.

Finish Nailer Vs Brad Nailer: Which One Best for Baseboard?
Though we have established that a finish nailer is the best choice for baseboards, I have elaborated further to provide more clarity. Since finish nailers and brad nailers serve different purposes, understanding their differences will help you make the right choice.
Key Differences of a Finish Nailer and Brad Nailer
| Feature | Finish Nailer | Brad Nailer |
|---|---|---|
| Nail Size | 15-16 gauge | 18 gauge |
| Holding Power | Strong | Moderate |
| Application | Baseboards, crown molding, door frames | Trim, small crafts, delicate woodwork |
| Wood Damage | More likely | Less likely |
Pros and Cons of a Finish Nailer and Brad Nailer
| Feature | Finish Nailer | Brad Nailer |
|---|---|---|
| Pros | ✅ Strong Hold – Can securely attach baseboards, even to uneven walls. ✅ Versatile – Works well for crown molding, door casings, and other trim. ✅ Professional Look – Leaves small holes that are easy to fill. | ✅ Minimal Damage – Less likely to split thin or fragile trim. ✅ Smaller Holes – Requires little to no filling for a smooth finish. ✅ Great for Lightweight Trim – Works well for quarter-round or shoe molding. |
| Cons | ❌ Larger nail holes than a brad nailer (though still small). ❌ Slightly more risk of splitting very thin or delicate trim. | ❌ Weaker Hold – Not ideal for securing baseboards to studs. ❌ Limited Use – May not work well for taller or thicker baseboards. |
Which One is Best for Baseboards?
If you need a strong, durable installation, a finish nailer is the best choice for baseboards. The thicker nails ensure a secure hold, especially when attaching baseboards to studs. However, if you’re working with small, lightweight trim like quarter-round, a brad nailer can be a good option.
Final Verdict:
- Use a finish nailer for standard baseboards and strong attachment.
- Use a brad nailer only for light trim or when working with delicate materials.
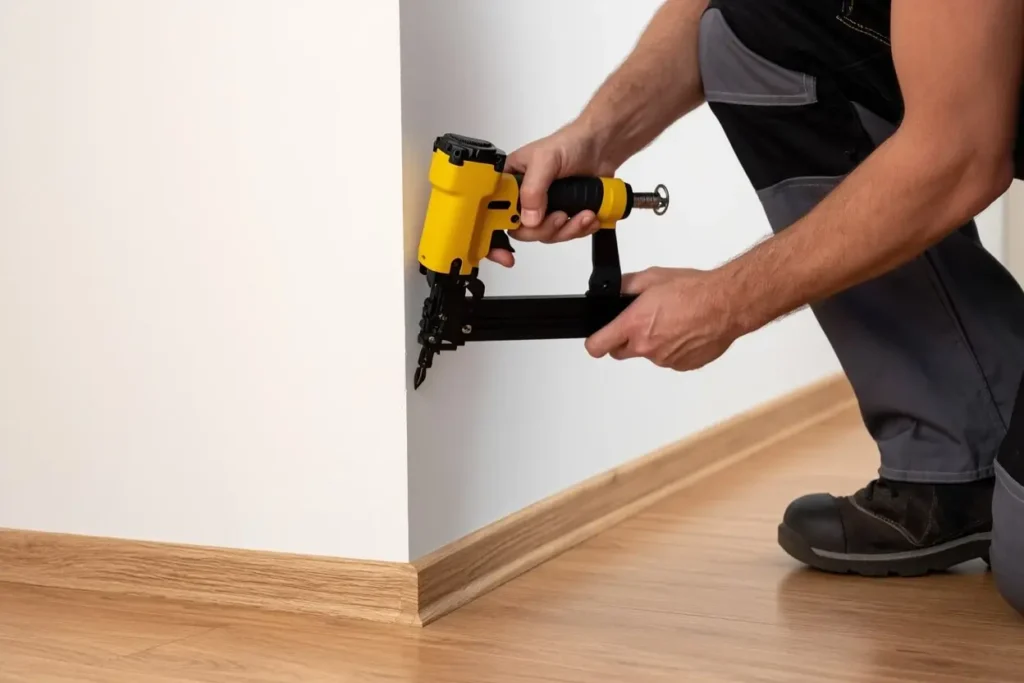
Using A Finish Nailer For Baseboards Installation
Using a finish nailer for baseboards can save time and effort. This tool ensures a clean, professional look. Follow this guide to use a finish nailer effectively and safely.
Materials Needed
Gather all necessary materials before starting the installation.
- Baseboards
- Finish Nailer
- Finishing Nails
- Measuring Tape
- Carpenter’s Pencil
- Level
- Miter Saw
- Wood Glue
- Caulk and Caulking Gun
- Sandpaper
- Paint or Stain
Step-by-step Guide
- Prepare Your Tools: Gather your finish nailer, nails, and baseboards.
- Measure and Cut: Measure the wall and cut your baseboards to fit.
- Load the Nailer: Insert the nails into the finish nailer.
- Position the Baseboard: Hold the baseboard against the wall at the correct height.
- Nail the Baseboard: Press the tip of the nailer against the baseboard and pull the trigger.
- Check Alignment: Ensure the baseboard is straight and secure.
- Fill Nail Holes: Use wood filler to cover the nail holes for a smooth finish.
Safety Precautions
- Wear Safety Gear: Always wear safety glasses and ear protection.
- Check Your Tools: Ensure the nailer is in good working condition.
- Keep Hands Clear: Keep your hands away from the nailer’s firing area.
- Secure the Area: Make sure the work area is clear of obstacles.
- Use Proper Lighting: Ensure you have adequate lighting to see your work clearly.
These steps ensure your baseboards align perfectly. Remember to work carefully. Measure twice, cut once.
Common Mistakes
Using a finish nailer for baseboards can save time and effort. Yet, there are common mistakes many make. These errors can ruin the wood or create an uneven look. Here’s how to avoid them.
Avoiding Splitting Wood
Splitting wood is a frequent issue with finish nailers. To prevent this, follow these tips:
- Pre-drill Holes: For hard wood, pre-drill small holes.
- Choose the Right Nails: Use thinner nails for delicate wood.
- Avoid Edges: Place nails away from the wood’s edges.
These steps help keep your baseboards intact.
Proper Nailing Technique
The correct nailing method ensures your baseboards stay secure. Here’s how to do it right:
- Hold the Nailer Firmly: Keep a steady grip on the nailer.
- Angle the Nailer: Position the nailer at a slight angle.
- Space Your Nails: Place nails about 12 inches apart.
Using the right technique makes a huge difference. Follow these guidelines for a flawless finish.
Tips And Tricks
Using a finish nailer for baseboards can save time and effort. Here are some tips and tricks to achieve the best results. Follow these guidelines for a polished finish and long-lasting performance.
Achieving A Professional Finish
- Choose the Right Nails: Use 1.5 to 2-inch nails for baseboards.
- Set the Depth: Adjust the nailer’s depth setting to avoid over-penetration.
- Angle the Nailer: Hold the nailer at a slight angle for better grip.
- Spacing is Key: Space nails 12 to 16 inches apart for stability.
- Fill Nail Holes: Use wood filler to cover nail holes for a clean look.
- Sand Smooth: Lightly sand the filled holes for a seamless finish.
Maintenance And Care
Proper maintenance of your finish nailer ensures longevity and performance. Here are some essential care tips:
- Regular Cleaning: Wipe down the nailer after each use.
- Lubricate Moving Parts: Apply oil to the moving parts to prevent rust.
- Check Air Pressure: Ensure the air pressure is within the recommended range.
- Inspect Nails: Use the correct type of nails to avoid jams.
- Store Properly: Keep the nailer in a dry place to avoid moisture damage.
Following these tips will keep your finish nailer in top condition, ensuring it performs well every time.
FAQs: Can You Use a Finish Nailer for Baseboards?
Is Brad or Finish Nail Better for Baseboards?
Brad nails are ideal for delicate trim and small projects. Finish nails offer stronger holding power for baseboards. Choose based on project needs.
What Kind Of Nail Gun Do You Use For Baseboards?
Use a 16-gauge or 18-gauge finish nailer for baseboards. These nailers provide strong hold and minimal damage.
Is A Finish Nailer The Same As A Trim Nailer?
No, a finish nailer and a trim nailer are not the same. Finish nailers use larger nails, while trim nailers use smaller nails for delicate work.
What Kind Of Nails Do You Use For Baseboards?
Use 1.5 to 2-inch finishing nails for baseboards. Nail size ensures a secure hold without splitting the wood.
What Is A Finish Nailer Used For?
A finish nailer is used for trim, molding, and baseboards. It provides a clean, professional finish.
Conclusion
Using a finish nailer for baseboards is efficient and effective. It offers precision and a clean finish. Ensure you choose the right nails and settings. This tool simplifies your installation process. Always prioritize safety and follow the manufacturer’s guidelines. Enhance your home’s appearance with ease using a finish nailer.
Recent Posts
15 Ga vs 16 Ga Finish Nailer: Which One Is Right for Your Project?
If you're diving into the world of finish carpentry or simply trying to upgrade your home tool kit, you've probably run into the question: 15 ga vs 16 ga finish nailer—what’s the big deal? They...
Woodworking in 2025 is all about efficiency, precision, and smart technology. Whether you're a beginner or a seasoned craftsman, having the right tools can make all the difference. Here are the top 7...