
Maintenance of tools is essential for any professional carpenter, and a framing nail gun is no exception. Framing nail guns can help carpenters complete projects efficiently and safely, but only if the tool is properly taken care of. It is important to oil a framing nail gun regularly in order to prevent it from becoming corroded and inefficient. Doing so can extend the life of the tool and help ensure it works optimally for the duration of its use.
In this blog post, we will discuss the proper methods of oiling a framing nail gun, including the types of oils to use, the amount of oil needed, and how often the gun should be oiled. Understanding the basics of oiling a framing nail gun is key to keeping the tool in good condition and ensuring it functions to its best ability.
Do You Need To Oil A Framing Nailer?
Using a framing nailer is a great way to quickly and efficiently complete a project, but it is important to understand the maintenance requirements for the tool. One of the most common questions is whether you need to oil a framing nailer. The answer is yes, you absolutely need to oil a pneumatic framing nailer. Proper oiling is necessary to help the internal components stay lubricated, decreasing friction and preventing damage to the internal parts.
It is recommended to oil the nailer before and after each use, as well as at least once a day if the tool is used frequently. The oil should be applied to all internal parts, including the piston and cylinder, O-rings and seals, and the air inlet. This will ensure the nailer is running smoothly and efficiently.
However, check to see if your framing nailer requires oil. Some manufacturers design their pneumatic tools to be oil-free, requiring no oil to operate.
Be sure to use a high-quality oil made specifically for air tools to get the best results. For further advice, consult the manual that came with your framing nailer or contact the manufacturer.
Where To Put Oil In A Framing Nailer?
When refilling or replacing the oil in a framing nail gun, it is important to ensure that it is done correctly. When the main purpose is to protect all moving parts from friction by lubricating them, the following framing nailer components must be oiled correctly.
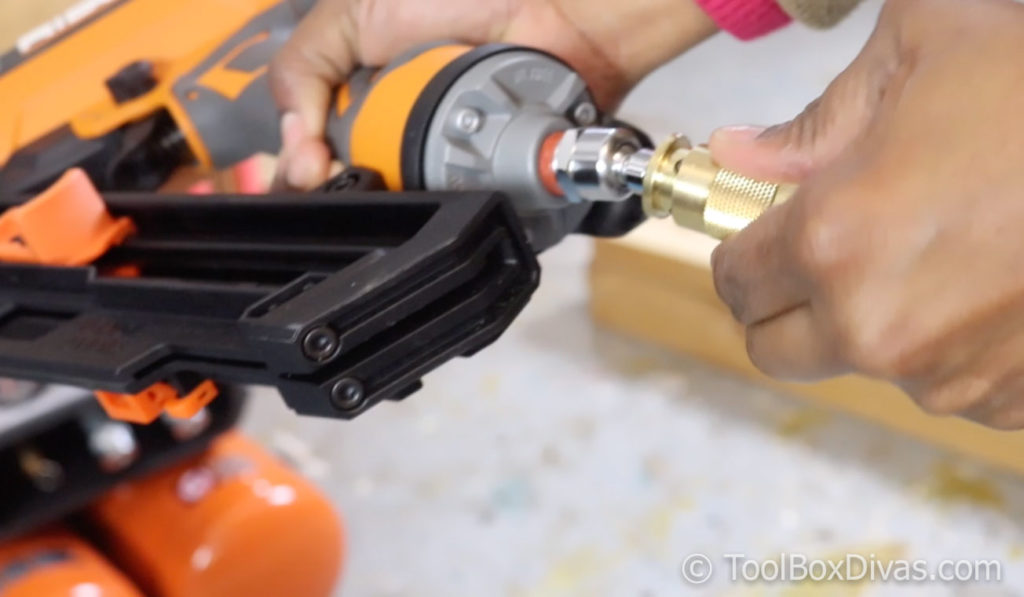
- Air Fittings
- Trigger
- Feed System
The major component that needs to be oiled on a regular basis is the air fitting (air inlet and filter). When oil is introduced into the air inlet, it reaches all internal components and maintains them oiled.
If the trigger fails to function properly, you will experience recurring jamming issues or delays when shooting nails. As a result, it is required to inspect this component and apply oil. You will find a small hole beside the trigger assembly where you need to put oil.
A framing nailer’s feed system must also be lubricated in order for the nail gun to function. If you miss putting oil in the feed system, it may deposit dust and debris, perhaps clogging it.
Let’s learn the details procedures of oiling a framing nailer below.
How To Oil A Nail Gun – 5 Simple Steps
It is not difficult to add oil to a nail gun. You may simply apply oil to your pneumatic framing nailer by completing the steps below.
1. Make Sure The Nail Gun Is Unplugged
The first step in oiling your framing nail gun is to make sure it is unplugged from any power source. This is essential to ensure your safety, as well as to make sure that no oil is accidentally released into the power source.
Also, remove nails from the magazine of the nail gun if left. Once it is unplugged and cleared the magazine, you can then begin to oil it.
2. Remove The Air Filter
The second step to oiling a framing nail gun is to remove the air filter. The air filter is usually located at the back of the nail gun and should be easy to spot. Once you have located it, unscrew the filter and take it out of the nail gun.
Make sure that you store the filter in a safe place so that it won’t get damaged during the oiling process.
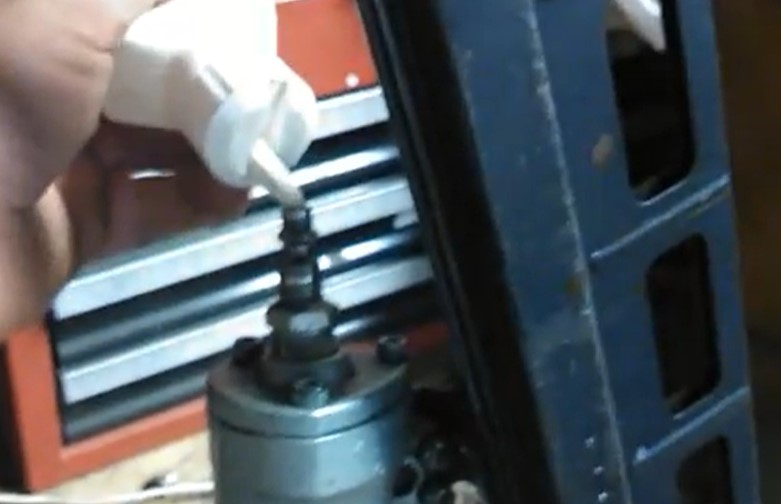
3. Apply A Few Drops Of Oil To The Air Inlet
Once you’ve removed the air filter, take a few drops of oil and apply it to the air inlet where the air filter was previously attached. This is important because this area can become clogged with dust, dirt, and other debris which can cause the nail gun to malfunction.
Make sure the oil penetrates into the small crevices and that it is distributed evenly around the air inlet. You can use a small brush to ensure that the oil reaches all the necessary areas.
Once you’re sure that the oil is properly distributed, you can reinstall the air filter and you’re ready to go.
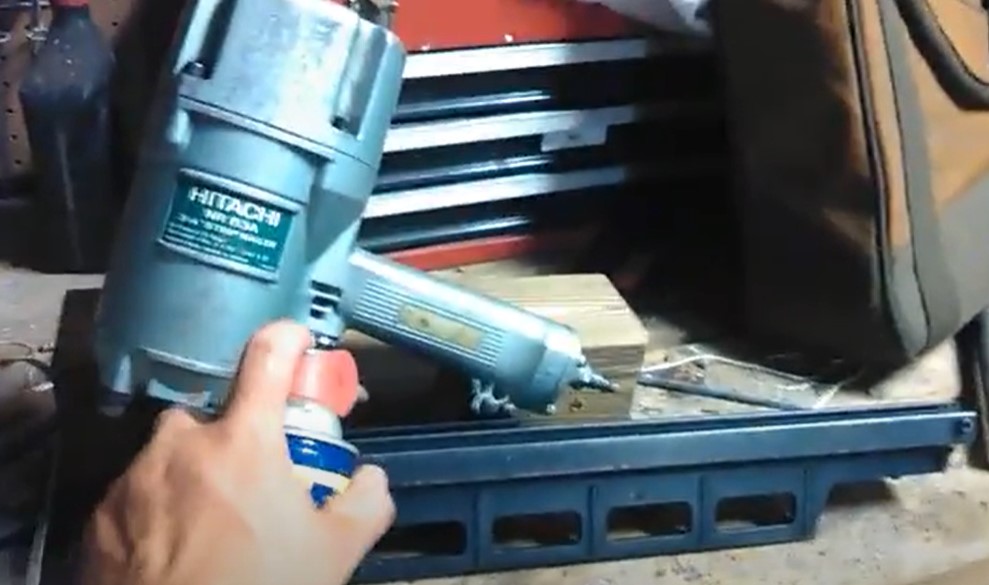
You can also use an oil spray to make it easier to move the nails inside the magazine.
4. Replace The Air Filter
Before beginning the oiling process, you should replace the air filter on your framing nail gun. This will ensure that the air pressure going through your gun is clean and will help keep the tool functioning properly.
To replace the air filter, you should first locate the filter housing and release any locking mechanisms. Once the housing is open, remove the existing filter and replace it with a new one.
Make sure to tighten any locking mechanisms before moving on to the next step.
5. Test The Nail Gun To Make Sure It Is Operating Properly
After you have emptied the old oil, added the new oil, and replaced the plug, it is important to test the nail gun to make sure it is operating properly.
To do this, hold the nail gun in a safe manner, with the muzzle facing away from you and anyone else. Pull the trigger and make sure the nail gun fires.
If it does not, check the air pressure and make sure the air supply is connected properly. If the nail gun still does not fire, contact an experienced technician to further assistance.
What Kind Of Oil For The Nail Gun Should I Use?
To guarantee that a nail gun is correctly oiled and operates as intended, it is crucial to use the right oil while oiling it. It is essential to use a lightweight oil with the right viscosity (22 – 46 centistokes (cSt) @ 100°F) while using a nail gun. The most popular pneumatic tool oils for nail guns are Senco lubricating oil or Paslode pneumatic tool oil or 3-in-1 oil.
It is critical to note that you should not use any lubricant that is not designed for pneumatic tools. For instance, WD40, compressor oil, engine oil, aerosol lubricant, transmission fluid, etc., must not be used with the framing nailer as they can impair its performance, damage the seals and O-rings, and even ignite.
You may choose the proper kind of lubricating oil for your nail gun by adhering to the manufacturer’s instructions.
Additionally, it is important to ensure that all components of the nail gun are periodically oiled to ensure optimal performance. When oiling the nail gun, it is important to wipe away any excess oil and to ensure that the oil has reached all components of the gun. Proper oiling is essential to ensure the longevity of the gun and its performance.
FAQs For How To Oil A Framing Nail Gun
How often should I oil my framing nailer?
Every day, inject 4-5 drops of oil into the air inlet to keep the framing nailer functioning and running longer. If the intensity of the work is considerable, you can also add oil twice a day.
Can I use WD40 to oil a nail gun?
No, WD40 isn’t intended to be used as a pneumatic tool oil. WD40 is a solvent that is commonly used to clean grime by displacing water and freeing seizing. It also evaporates in 15 minutes, making it unsuitable for use in your framing nailer.
Can I Use 3-IN-ONE Oil For Nail Guns?
Yes, as 3-IN-ONE oil is a non-detergent lubricant, you can use it with your pneumatic tools. It may protect your tool from corrosion and be used to clean debris.
Is air tool oil the same as air compressor oil?
Air tool oil and air compressor oil are not the same product. Air tool oil is designed to lubricate machinery and tools that use air power, such as pneumatic tools, whereas air compressor oil is specifically designed for air compressors.
Air compressor oil must contain lubricants that are resistant to chemicals and water, and must be able to withstand the high temperatures and pressures associated with air compressors.
Air tool oil is designed to be used in applications that do not involve high pressure or temperatures, and does not need to meet the same resistance standards. As such, air compressor oil is not suitable for use in air tools, and vice versa.
What happens if you don’t oiling air tools?
If air tools are not regularly lubricated, their performance can be significantly impacted. Without lubrication, the air tool’s components are prone to corrosion, which can create an accumulation of wear and tear.
This can lead to increased friction, generating more heat than usual, and can potentially cause damage to the components. Additionally, not lubricating air tools can lead to a decrease in efficiency and a shortening of their lifespan.
To ensure optimum performance and longevity of air tools, they should be regularly lubricated and maintained according to the manufacturer’s instructions. Doing so will lead to fewer costly repairs, less downtime, and fewer headaches in the long run.
Final Takeaways
In conclusion, oiling your framing nail gun is a simple and quick task that should be done regularly in order to keep your nail gun in optimal condition. If you follow the steps outlined above, you’ll be sure to keep your nail gun running smoothly and reduce any potential future issues. Taking the time to ensure your nail gun is properly oiled will help you get the job done quickly and efficiently.
Recent Posts
Woodworking is one of the most rewarding hobbies and professions, but it also comes with serious risks if proper precautions are not taken. Whether you're working with a table saw, planer, or simple...
What to Use If You Don't Have a Brad Nailer: Handy Alternatives
You can use a hammer and finishing nails paring with nail set or wood glue if you don't have a Brad Nailer. These tools effectively secure trim and small woodworking projects. So, if you’re in...