
The Jigsaw is a versatile and powerful tool for cutting shapes. It can cut straight lines and curves in a variety of materials quickly. No matter if you are into DIY projects or professional woodworking, you need at least a Jigsaw to start. If you are a proud owner of a Jigsaw and wondering how to use a jigsaw to cut curves, we have just the right thing for you.
Cutting curves with a jigsaw is relatively easy. But the degree of the curve depends on the width of the blade. The narrower blade makes the most curve cuts on the wood as well as other materials. On another note, remember to keep the speed at low to medium. That way you would have the smoothest curve without other jigs or guides.
So that’s how you want to make a curve cut with your jigsaw. But if you feel you need more information on the matter, we have a dedicated step-by-step guide next. Feel free to stick around and read more about what our experts have to say on curve cuts with a jigsaw.
Let’s cut right to the chase.
Jigsaw Blade Basics
Before we move into the step-by-step guide, we must have a good understanding of the blades. Jigsaw uses a lot of different types of blades for cutting operations. And it is not limited to only wood cutting. Other blades are highly suitable for ceramics, metal, and all sorts of laminate.
Jigsaw blades can be of 4 types based on the materials they can cut. Such as
Blades for Wood: Suitable for all cutting needs up to 30mm in thickness. Usually, they will have 12 or more teeth per inch.
For metal sheets: These blades have a cutting range of 2-4 mm thickness. In some cases, these blades can cut up to 10mm of metal sheet. The numbers of teeth in these blades are between 12-24 TPI.
Ceramic tiles: High carbon steel blades are most suitable for cutting ceramics and other similar materials. And at the sharp side of the blade, you can find around 50 grit coarse edges.
Plastics/ laminate: These blades sit between wood and metal cutting blades. They usually have fewer teeth and can cut a considerably thick piece of plastic or laminate plate with ease.
On the other hand, jigsaw blades have a different type based on the locking mechanism. For example:
T-Shank: This is the more modern and easy-to-attach blade for jigsaw. Usually, the blade doesn’t need other tightening tools to set it up. Due to the solid mechanism, the blade hangs up tight and nicely. You don’t need to worry about the blade falling from the jigsaw head even with heavy usage.
U-shank: These are the old jigsaw blade designs that have a “u” shape on the top. They were a bit clunky and fell off the jigsaw more often. This happens due to intense vibration and friction. That’s why all the blade manufacturers shifted their design to a T shape just to cope with the inconvenience.
How To Use A Jigsaw To Cut Curves?
To be honest, Jigsaw is one of the few tools that by default is an easy power tool to handle. Give this to anyone, even a person who never held a jigsaw before can operate this tool in just under five minutes of practice. So it wouldn’t be that hard for a newbie who wants to shape a decor piece with the jigsaw.
All that’s left is to learn helpful tricks and ways to do things that only an experienced professional would know how to do. That’s where our step-by-step guide comes into play. Carefully read through and follow every instruction while trying.
Step 1: Wearing Safety Gears
The number one priority when using any power tool is to wear appropriate safety gear. The actual gears may be different depending on the tool but the purpose remains the same, personal protection. Even though a jigsaw seems pretty small compared to other woodworking tools, it’s very powerful.
When operating a jigsaw, use eye, hands, and ear protection gears. Eye protection like safety goggles will protect you from any particle debris in the working environment. The earplugs are extremely helpful in noisy situations. It will protect your ears and let you work in optimum decibel conditions.
Lastly, wear a good pair of safety gloves possibly with leather material. Lather tends to work well, gripping wood, and lasts a lot longer than other materials. Another great benefit of wearing gloves is you can save your hands from tiny splinter bites. This can be very annoying in a woodworking scenario.
Step 2: Selecting the Proper Blade
Now that you have geared up, let’s install a proper blade in the jigsaw curve cutting. As you are aware, narrow blades are best for cutting wood at a high degree of curve. It’s also efficient at moving on tighter curves as the width of the blade is much smaller.
Now you can either select 12 TPI (teeth per inch) or lower 6-8 TPI blades. A higher teeth count will give you a smooth and less chipped-off edge for your precious decor piece. As soon as we have selected the correct blade, let us install it.
Installing a new blade is as easy as just pushing a button.
- First of all, remove any power cord or battery cell from the jigsaw. You don’t want to accidentally turn on the machine while installing the blade.
- There should be a latch to loosen the blade’s grip from the jigsaw head. As we are using a T-Shank blade, we do not need any additional tools or tightening work in changing blades.
- Just make sure after resetting the latch, check the blade for any loose contact with the jigsaw head.
If everything goes ok, we are good to move to the next step.
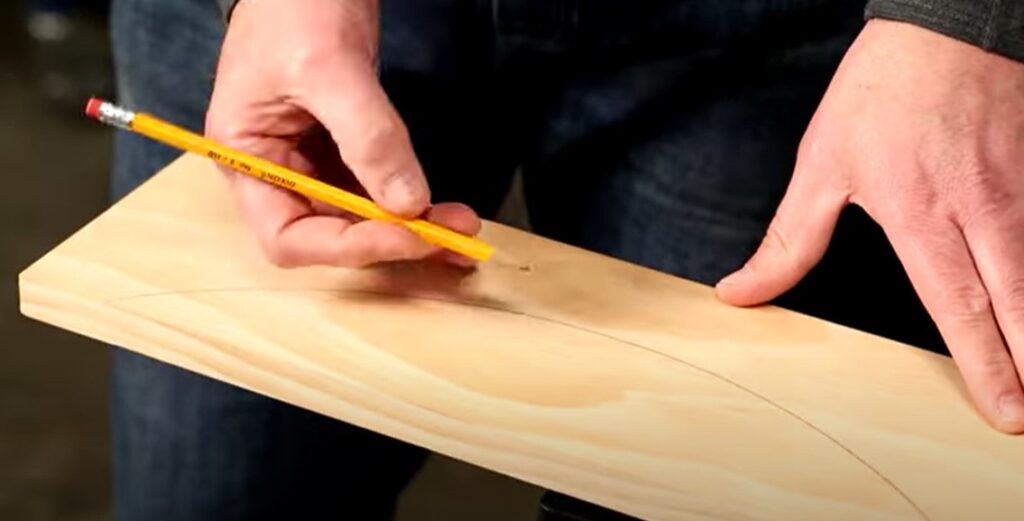
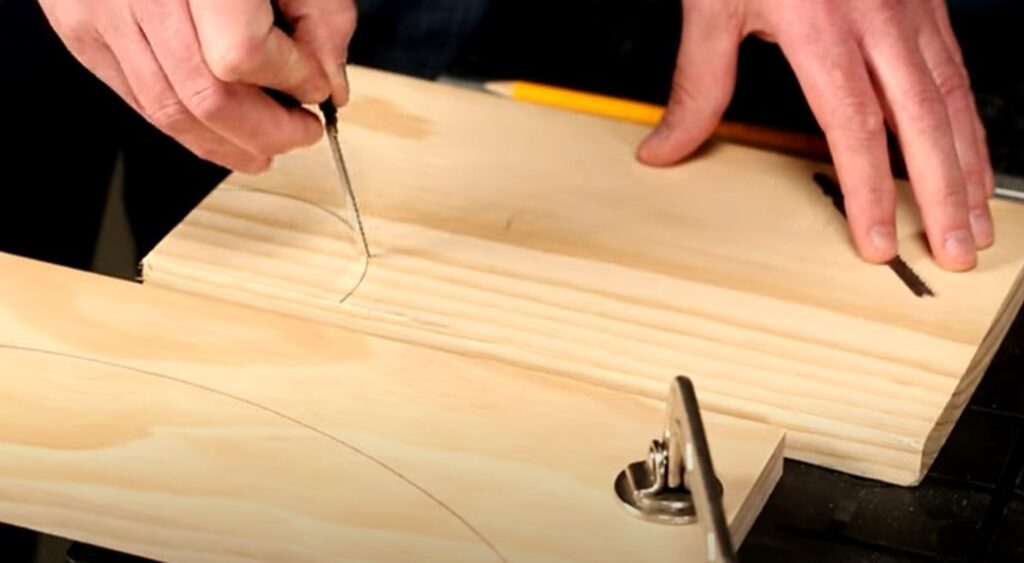
Step 3: Measurement
Making measurements is a generally tedious task but it is also the most vital in terms of achieving a great end result. So no matter how hard it may seem, do the grind properly. If you are planning to fast-cut things, it would be a great idea to leave some buffer zone at each edge.
This will let you cut outside of the measurement for safety and help you avoid grave mistakes. Afterward, you can trim any excess parts and sand them down for final finishing.
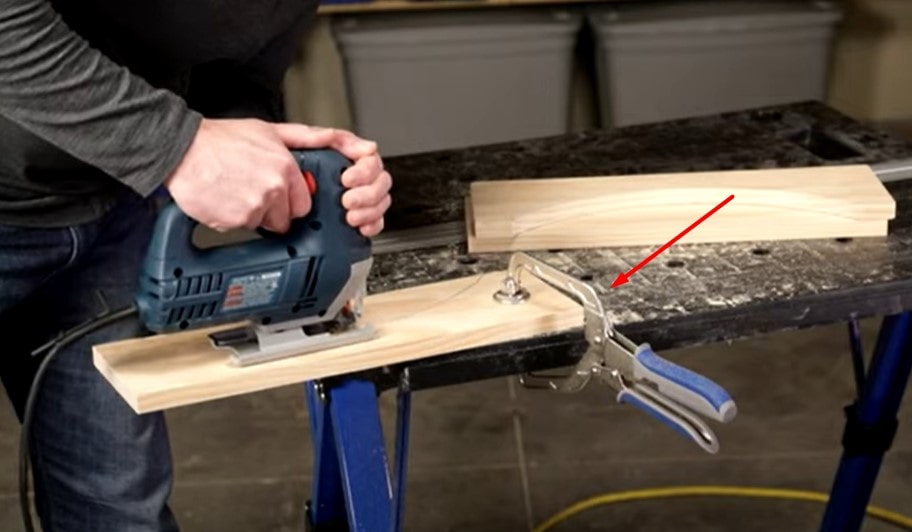
Step 4: Clamping Down The Workpiece
As soon as you have completed all measurements, place the workpiece on the bench with clamps at all four corners. You should also have enough space under the workpiece to freely move the blade while moving through. Anything less than a 3-inch space under the workpiece might face a jamming issue.
Do not clamp over any measurement or places where you want to run the jigsaw blade. You can temporarily place a clamp on measurements, only if necessary.
Step 5: Cut Curves With Jigsaw
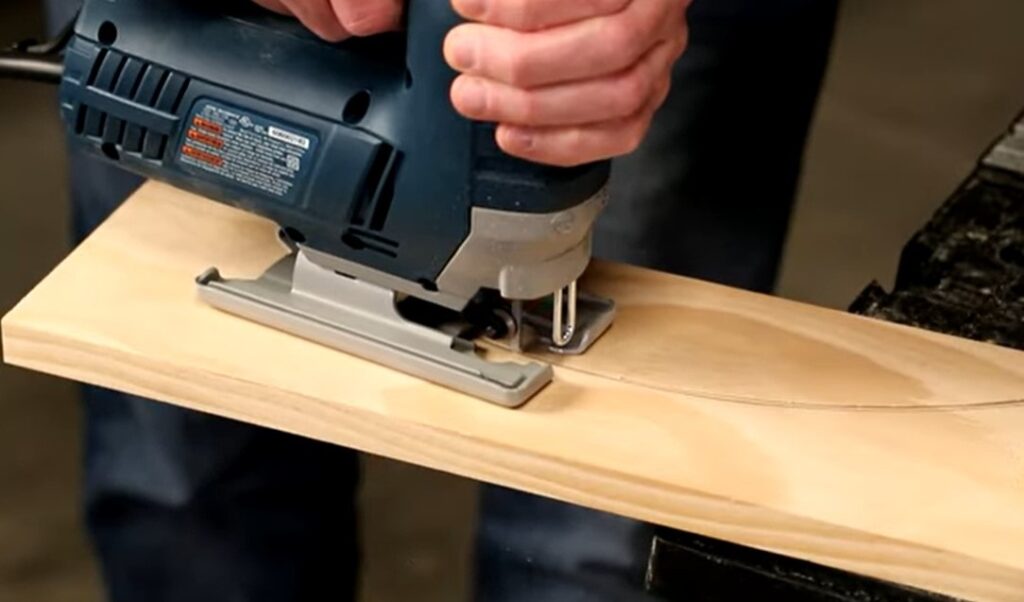
We are at the vital part of cutting curves with a jigsaw. Till the previous step, we have been preparing for this moment. As everything is in place, start your cutting from any edge of the design. Slowly push your way through the outline. If you are having a hard time moving on the curve, slow down the speed a bit.
While cutting with a jigsaw, be careful where you put your hand on the workpiece. Never leave your palm, or fingers on the path of the jigsaw. Maintain a safe distance at all times throughout the whole cutting process.
Step 6: Finish Using Sandpaper
You have successfully completed shaping your workpiece with a jigsaw. Now the process doesn’t really end here. There are a lot of uneven edges in the design that need finishing touch. Start sanding with lower-grit sandpaper for fast particle removal. Then use a higher grit paper then smoothen it out.
After you have done all the steps, your curve shape design will look beautiful and professional. Follow the same procedure if you have multiple workpieces to cut.
FAQ
Q1. Can a Jigsaw blade cut metal?
Yes! There are jigsaw blades that can cut 2-4mm steel plates with ease. Usually, this type of blade has a higher teeth count overall and width. The trick to cutting a metal plate with a jigsaw blade is you have to run the tool at the lowest speed possible.
Q2. Can you use a jigsaw to cut a hole?
Using a jigsaw to cut a hole is a bit tricky as it requires some level of hand-eye coordination. Flip the front side of the jigsaw and pull it towards you. As the blade scratches the surface, you need to slowly plunge the blade into the panel. That’s how you cut a hole into a wooden panel.
Q3. What type of saw is used for cutting curves in wood?
Jigsaws can be the most inexpensive way to cut curves in the wood. For this method use a narrow and high tooth count blade for the best result.
Wrapping Up
Cutting curves with a jigsaw has never been easy as the above steps have shown. Hope this article clears out any confusion you have on using a jigsaw to cut curves. Don’t hesitate to use this step-by-step guide for professional work, DIY projects, and other use cases. And remember to share it with your friends and anyone who needs it.
Related Posts:
Recent Posts
Woodworking is one of the most rewarding hobbies and professions, but it also comes with serious risks if proper precautions are not taken. Whether you're working with a table saw, planer, or simple...
What to Use If You Don't Have a Brad Nailer: Handy Alternatives
You can use a hammer and finishing nails paring with nail set or wood glue if you don't have a Brad Nailer. These tools effectively secure trim and small woodworking projects. So, if you’re in...