
To use a power drill for screw removal, first, ensure you have the correct drill bit size for the screw head. Insert the bit into the drill, set it to reverse mode, place the bit into the screw head, and gently squeeze the trigger while applying steady pressure until the screw is loosened and can be easily extracted.
The process is not as straightforward as mentioned above, though. Especially when dealing with old or stubborn screws. On top of that, removing screws by hand is a frustrating and time-consuming process. However, with the correct technique and tools, it may be a piece of cake.
In this blog post, we will be discussing how to use a power drill to remove screws, a task that can seem daunting to even the most experienced DIY-ers.
By the end of this post, you’ll be equipped with the knowledge and confidence to tackle any screw removal project with ease. So, let’s get started!
“Efficiency in DIY tasks comes from understanding your tools. A power drill isn’t just for drilling – it’s your ticket to overcoming stubborn screws with ease.”
Understanding Your Tools
A power drill is a versatile tool that is used to make holes in various materials such as wood, metal, concrete, and plastic. It is a portable and handheld device that operates by an electric motor.
The drill bit is attached to the chuck, which spins rapidly to create the hole.
Power drills come in different sizes and types, including corded and cordless models.
They also have different functions, such as hammer drills for tough materials, and angle drills for tight spaces.
Additionally, power drills can be used for driving screws and bolts, sanding, polishing, and wire brushing.
Power drills are essential tools for DIY enthusiasts, woodworkers, construction workers, and professionals in various industries.
Should I Use A Power Drill To Remove Stubborn Screws?
When faced with stubborn screws, using a power drill may seem like a quick and efficient solution. However, it is important to carefully consider the potential risks and drawbacks of this approach.
For instance, using excessive force or the wrong drill bit can damage the screw and surrounding materials, leading to costly repairs. Additionally, power drills can generate significant heat and noise, which can be dangerous if not properly managed.
Before attempting to remove stubborn screws with a power drill, it is advisable to evaluate the situation carefully and consider alternative methods, such as lubricants or specialized screw extractors.
If unsure, seeking the advice of a professional is always recommended.
Preparing The Power Drill
While there is a risk to removing screws with a power drill, it is one of the quickest and effortless ways among other methods. Once you become sure to use a power drill to remove your old or stubborn screws, you have to take some pre-preparation to ensure safety, efficiency, and successful results.
This stage involves considering safety measures, selecting the right tools, and ensuring your power drill is ready for action.
1. Safety Measures and Protective Gear:
Using a power drill, especially for screw removal, involves mechanical movement and potential hazards. Prioritize safety by adhering to the following measures:
Safety Goggles: Always wear safety goggles to protect your eyes from flying debris and metal shavings while drilling or removing screws.
Gloves: Depending on the project, gloves can offer added grip and protect your hands from potential injuries.
Appropriate Clothing: Avoid loose clothing or accessories that could get caught in the drill’s moving parts.
Closed-toe Shoes: Wear closed-toe shoes with a sturdy sole to protect your feet from any falling debris.
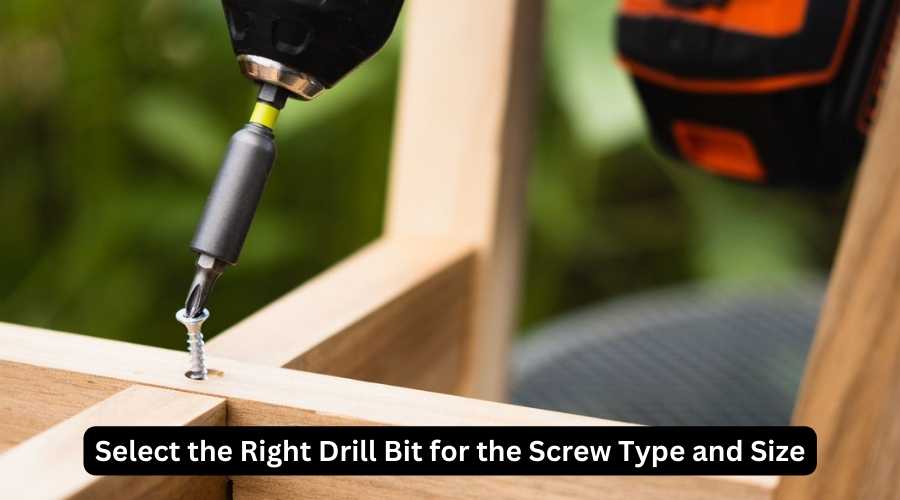
2. Selecting the Appropriate Drill Bit for the Screw Type and Size:
The right drill bit is essential for effective screw removal. Follow these steps to ensure a proper match:
Identify Screw Type: Determine whether the screw is a Phillips, flathead, or Allen type. Each requires a specific bit.
Screw Size: Choose a drill bit that corresponds to the screw’s size. A bit that’s too small may not grip properly, while one that’s too large could damage the screw head.
3. Ensure the Power Drill is Properly Charged or Plugged In:
Before starting, confirm that your power drill is ready to perform. This step varies based on whether you’re using a cordless or corded drill:
Cordless Drill:
- Charge the Battery: Ensure the drill’s battery is fully charged to prevent interruption during the process.
- Spare Battery: If you’re working on a larger project, having a spare charged battery on hand can be beneficial.
Corded Drill:
- Power Source: Make sure the drill is plugged into a power outlet with the appropriate voltage.
- Extension Cord: If your project requires you to work away from an outlet, use an extension cord that’s rated for power tools.
Taking these pre-preparation steps will set the foundation for a smooth and productive experience when using a power drill to remove screws.
By prioritizing safety, selecting the right tools, and ensuring your drill’s power source is ready, you’ll be well-prepared to tackle your DIY projects with confidence and precision.
Note: If you want to know how to use a cordless drill, you can read our article on this. There, we will discuss elaborately the steps from scratch to the final process so that any beginner can learn drilling easily.
Techniques For Screw Removal
After preparing your power drill, it is critical to understand the various screw removal techniques. You’ll find several effective methods to remove screws with a power drill. Choosing the proper procedure will assist you in successfully removing screws.
Here are some of the most popular methods:
1. Forward Drilling:
Scenario: This method is suitable for screws that are not too tight and can be easily loosened.
Process: Set the drill to forward (clockwise) rotation, insert the appropriate screwdriver bit, place it onto the screw head, and gently squeeze the trigger. The drill will rotate the screw in the loosening direction.
2. Reverse Drilling (Counter-Clockwise):
Scenario: Ideal for removing tight or stubborn screws.
Process: Set the drill to reverse (counter-clockwise) rotation, attach the correct screwdriver bit, align it with the screw head, and gradually squeeze the trigger. The drill’s rotation in the opposite direction helps to unscrew the fastener.
3. Impact Mode:
Scenario: Useful for screws stuck due to rust or corrosion.
Process: Some power drills have an impact mode that delivers short, powerful bursts of torque. Use this mode with the appropriate screwdriver bit to break the screw free from rust or resistance.
4. Hammer Drill Function:
Scenario: Suitable for removing screws that are deeply embedded.
Process: If your power drill has a hammer drill function, engage it to provide a combination of drilling and hammering action. This can help dislodge stubborn screws by creating impact as you turn them.
5. Manual Override:
Scenario: Useful when power drilling isn’t an option.
Process: In case the power drill isn’t working, or you want a more controlled approach, you can switch to manual mode. Use a wrench or pliers to turn the screwdriver bit while applying downward pressure.
6. Extraction Bits:
Scenario: Designed for stripped or damaged screw heads.
Process: Use specialized extraction bits that grip onto the damaged screw head, allowing you to turn it counterclockwise with the power drill. These bits are designed to bite into the screw for removal.
7. Lubrication and Penetrating Oil:
Scenario: Effective for removing screws stuck due to rust or tightness.
Process: Apply penetrating oil to the screw head and let it sit for a while to loosen rust and corrosion. Then use your power drill to remove the screw with less resistance.
8. Rubber Band Grip:
Scenario: Helpful when dealing with stripped screw heads.
Process: Place a wide rubber band over the screw head and press the screwdriver bit into the rubber. This added grip can sometimes provide enough traction to remove a stripped screw.
Remember to always select the appropriate screwdriver bit, use the correct rotation direction, and apply steady pressure to avoid damaging the screw or the surrounding material.
Experiment with these methods to find the one that works best for your specific screw removal situation.
Step-by-Step Process: How to Remove Screws with a Power Drill:
Greetings, fellow DIY enthusiast! Today, let’s delve into the art of using a power drill to remove screws. Whether you’re tackling a home improvement project or restoring old furniture, mastering this skill will prove invaluable. So, grab your power drill, and let’s dive into a unique step-by-step process that promises efficient screw removal.
1. Place the Screwdriver Bit in the Screw Head:
Assemble your power drill with the appropriate screwdriver bit. Make sure it’s a perfect match for the screw’s head type and size. The right bit ensures a snug fit, preventing slippage that can damage the screw.
Align the bit with the screw head’s grooves or slots, ensuring a secure engagement.
2. Apply Downward Pressure:
Before activating the power drill, apply gentle downward pressure onto the screw head. This pressure keeps the bit seated firmly and minimizes the chances of it slipping off during the drilling process.
A steady hand at this stage ensures a confident start.
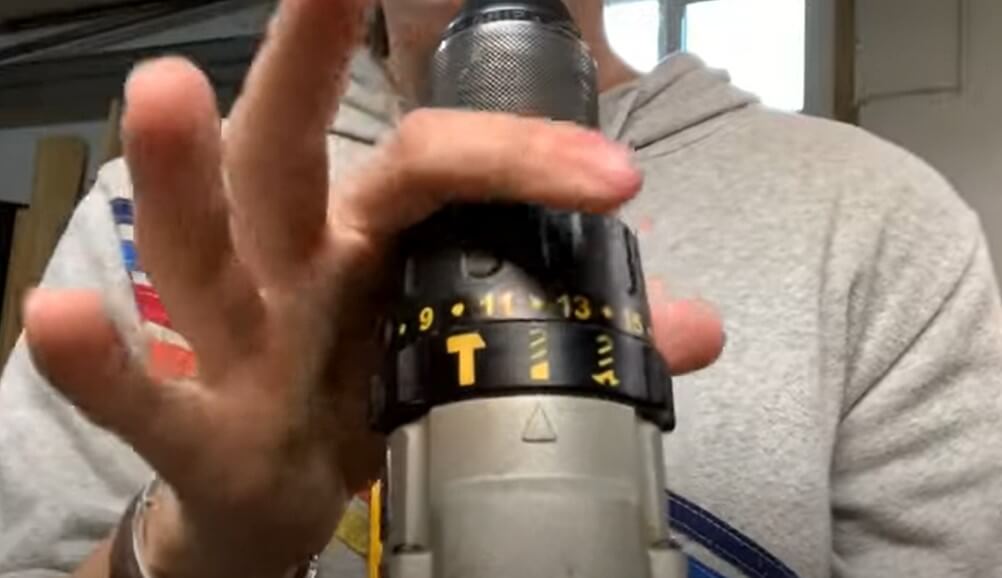
3. Set the Drill Direction:
Check and confirm that the power drill’s direction is set to “reverse” or counterclockwise mode.
This configuration is essential as it readies the drill to turn the screw in the unscrewing direction, loosening its grip.
4. Slowly Start Drilling:
Now, it’s time to bring your power drill to life. Begin by squeezing the trigger gently.
Allow the drill to turn the screw gradually.
The initial slow speed prevents sudden jerks and maintains control, preventing any sudden disengagement.
5. Increase Speed Gradually:
As you sense the screw loosening its grip, confidently increase the drill’s speed.
Gradually ramping up the speed helps maintain a consistent and controlled removal process.
This step showcases your finesse in handling the power tool.
6. Monitor the Screw’s Movement:
As the power drill works its magic, keep a keen eye on the screw’s movement. You’ll notice it gradually lifting from its place.
Continue to apply steady pressure and keep the drill aligned with the screw head.
Your watchful eye ensures you’re in sync with the screw’s progress.
7. The Satisfying Finish:
Witness the moment when the screw finally surrenders! As the screw becomes entirely free, you’ll feel a slight release of resistance.
At this point, release the trigger, halt the drill’s motion, and admire your successful removal.
By following these steps, you’ve not only removed a screw but mastered a skill that’s essential for various DIY endeavors. Remember, each step showcases your finesse and understanding of the power drill’s mechanics.
Now, armed with this knowledge, you’re ready to confidently tackle any screw removal challenge that comes your way.
Happy drilling, DIY maestro!
Dealing With Stubborn Screws
Ah, the joys of woodworking! But every craftsman encounters the challenge of stubborn screws at some point. These maddening little devils seem determined to thwart your progress.
Fret not, for I, a seasoned woodworker, am here to impart my wisdom on taming even the most unruly screws.
Let’s embark on a journey of finesse and craftsmanship.
Introducing the Conundrum of Stuck or Rusted Screws:
Picture this: an antique cabinet restoration project. You’ve patiently disassembled the piece, only to encounter screws that refuse to budge. Stuck due to years of rust and grime, they demand your strategic touch.
Method 1: The Elegance of Penetrating Oil:
Envision a bottle of penetrating oil as your secret potion. Drip this elixir onto the screw head, allowing it to seep into the rusted threads. Patience is your ally here; give the oil time to work its magic.
A few gentle taps with a hammer on the screw head can help the oil penetrate further.
Now, with a renewed sense of purpose, wield your power drill with a suitable screwdriver bit, following the process mentioned earlier.
The once-unyielding screw will surrender its grip, thanks to your meticulous approach.
Method 2: The Dance of the Hammer and Chisel:
When a screw is truly determined to resist, bring forth your hammer and chisel – a dynamic duo.
Gently position the chisel’s edge against the screw head and deliver measured blows with the hammer.
The purpose? To create a new grip point on the screw head, breaking its bond with rust and paint.
Once this new grip emerges, your power drill can be summoned once again to perform its artistry.
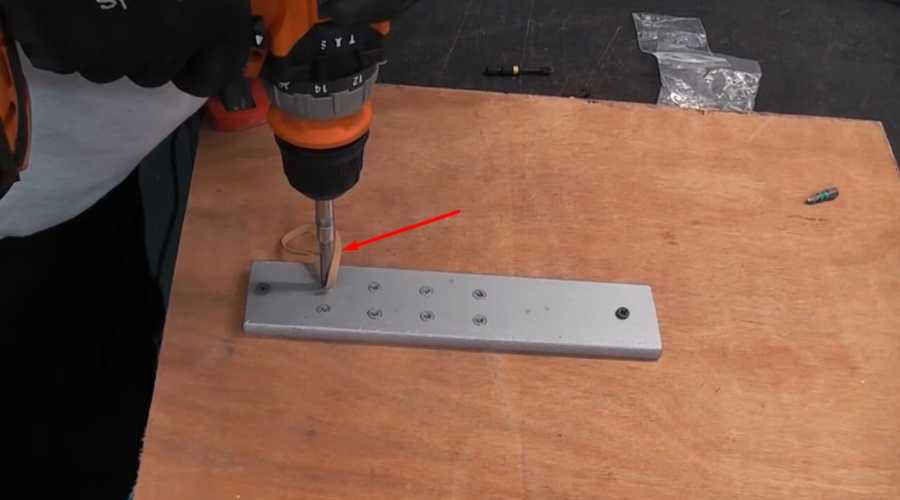
Method 3: The Grace of a Pilot Hole:
Picture a ballet dancer preparing for a flawless performance. In the world of screws, a pilot hole is your prelude to seamless extraction.
Select a drill bit slightly smaller than the screw’s diameter. With precision, create a pilot hole in the center of the screw head.
This pilot hole acts as a guide, leading the screw out with minimal resistance.
The Symphony of Triumph:
As the stubborn screw finally concedes, releasing its hold on the wood, a sense of accomplishment washes over you. Your craftsmanship, your knowledge, and your strategic finesse have prevailed.
You’ve not just conquered a stuck screw; you’ve demonstrated your mastery over the art of woodworking.
So, fellow woodworker, armed with these unique methods, you are ready to tackle any rebellious screw that comes your way. Each twist of the screwdriver, each drop of penetrating oil, and each tap of the hammer is a note in your symphony of triumph.
With patience, skill, and a touch of ingenuity, you can conquer any challenge woodworking presents. Onward, to crafting perfection!
How to remove stripped screws – 7 different ways
Troubleshooting and Avoiding Pitfalls in Screw Removal: Expert Insights
As a craftsman committed to the precision of your work, it’s essential to anticipate and tackle challenges that may arise during screw removal.
Let’s delve into the world of troubleshooting, empowering you to navigate these pitfalls with finesse.
Addressing the Dreaded Drill Slip:
Ah, the heart-sinking moment when the power drill slips off the screw head, leaving you with a scratched surface and an impending repair. Fear not, for prevention is your ally here.
Prior to drilling, ensure the screwdriver bit is securely seated in the screw head’s slots. Apply downward pressure evenly, maintaining a steady grip.
This foundation minimizes the likelihood of slips, allowing you to control the drill’s movement with precision.
Solutions for Preventing Over-Tightening and Stripping Screws:
Over-enthusiastic tightening can lead to a frustrating outcome: stripped screws.
To avoid this, remember the mantra “gentle persuasion.” When driving screws, don’t force them beyond their snug fit. If you sense resistance, pause and reverse the drill, allowing the screw to realign before proceeding. Additionally, employing the right screwdriver bit size and type is crucial.
It ensures optimal engagement, preventing the bit from slipping within the screw head.
The Proactive Approach to Perfect Screw Removal:
Indeed, the best way to handle pitfalls is to sidestep them entirely. Employ these proactive strategies:
- Pre-Drilling Pilot Holes: For hardwoods or materials prone to splitting, pre-drill pilot holes. These guide the screw’s path, reducing the risk of splitting and ensuring a smoother insertion.
- Choose Quality Screws: Opt for high-quality screws with precisely formed heads. Inferior screws are more likely to strip, leading to frustration and delays.
- Lubrication for Resistance: When dealing with stubborn screws, a touch of penetrating oil can work wonders. It reduces friction, easing the screw’s journey out of its snug spot.
- Appropriate Pressure: Remember, the drill’s pressure shouldn’t resemble a wrestler’s grip. Gentle and controlled pressure allows you to maintain command without damaging the material.
In the realm of craftsmanship, troubleshooting is a testament to your dedication. By anticipating challenges and equipping yourself with these solutions, you’re primed to conquer any screw-related obstacle with confidence.
As you continue on your journey, each flawless screw extraction reaffirms your status as a true artisan of your craft.
FAQs: How To Use A Power Drill To Remove Screws
Can You Drill Through A Screw To Remove It?
Yes, you can drill through a screw to remove it if other methods fail. Use a drill bit slightly smaller than the screw’s diameter to create a hole, then use pliers or a screwdriver to turn and remove the remaining portion.
How To Remove Small Stripped Screws Without A Drill?
To remove small stripped screws without a drill, use a rubber band between the screwdriver bit and the screw head to provide better grip. Apply downward pressure while turning the screwdriver counterclockwise.
How To Drill Out A Screw Without Extractor?
To drill out a screw without an extractor, use a drill bit slightly larger than the screw’s shaft. Carefully drill into the screw until it’s removed, taking care not to damage the surrounding material.
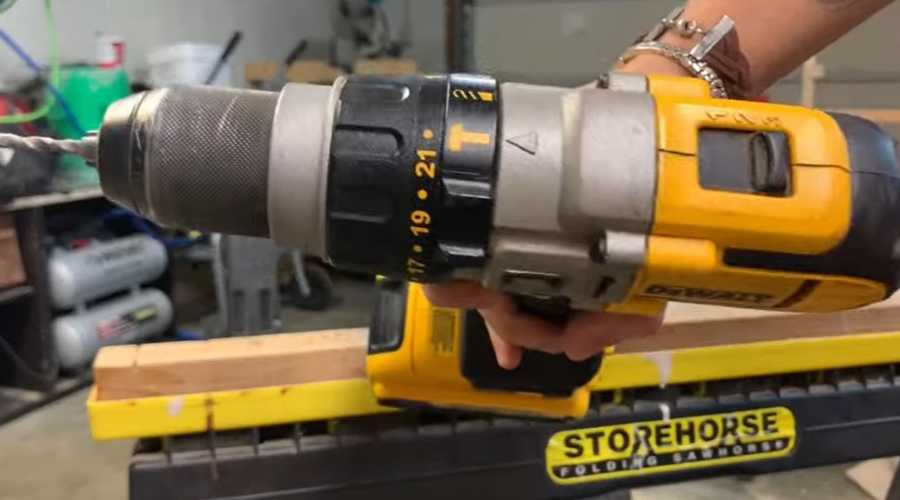
How To Use Dewalt Drill To Remove Screws?
To use a DeWalt drill to remove screws, insert the appropriate screwdriver bit, place it in the screw head, set the drill to reverse (counterclockwise), and apply steady pressure while gradually increasing the speed until the screw loosens.
How To Use A Drill To Screw Into Wall?
To use a drill to screw into a wall, select the appropriate drill bit for the wall material, mark the desired location, gently start drilling at a perpendicular angle, and then switch to the screwdriver bit to drive the screw into the wall.
How To Use A Drill To Screw Into Wood?
To use a drill to screw into wood, select a drill bit slightly smaller than the screw’s diameter, mark the spot, drill a pilot hole, switch to the screwdriver bit, and gently drive the screw into the wood.
How To Remove A Stripped Screw With A Drill Bit?
To remove a stripped screw with a drill bit, use a bit that’s larger than the screw head but smaller than the screw’s outer diameter. Carefully drill into the stripped head until it’s gripped enough to turn and remove.
Conclusion
And there you have it! A simple and effective way to use a power drill to remove pesky screws that just won’t budge. With these tips and tricks, you’ll be able to tackle any DIY project with ease.
So, grab your power drill, put on some tunes, and get to work! Don’t be afraid to show those stubborn screws who’s boss. Happy DIYing!
Recent Posts
Woodworking is one of the most rewarding hobbies and professions, but it also comes with serious risks if proper precautions are not taken. Whether you're working with a table saw, planer, or simple...
What to Use If You Don't Have a Brad Nailer: Handy Alternatives
You can use a hammer and finishing nails paring with nail set or wood glue if you don't have a Brad Nailer. These tools effectively secure trim and small woodworking projects. So, if you’re in...