
A miter saw is a versatile power tool used for cutting angles in a variety of materials such as wood, plastic, and metal. The saw is designed with a blade mounted on a swinging arm that pivots to make precise angled cuts up to 45 degrees.
With a miter saw you can make crosscuts, bevel cuts, compound cuts, and trim work with minimal effort and high accuracy. This tool is indispensable for professional carpenters, woodworkers, and DIY enthusiasts who need to make accurate angled cuts quickly and efficiently.
Whether you’re building a deck, framing a house, creating furniture, or making intricate decorative woodwork, a miter saw is an essential tool to have in your workshop. It delivers clean, precise cuts every time, saving you time, effort, and money.
So, if you’re looking for a powerful tool for your next woodworking project, a miter saw is an excellent investment.
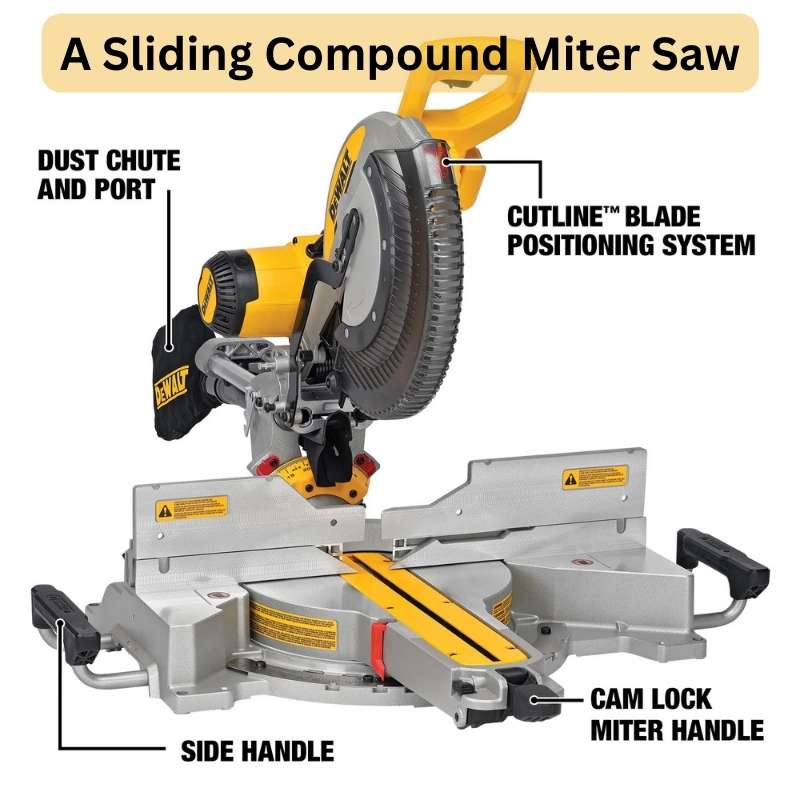
Overview Of Miter Saw
If you’re a DIY enthusiast or a professional woodworker, you’re probably familiar with a miter saw. This power tool is an essential piece of equipment for many tasks, from cutting crown molding and baseboards to making picture frames and other intricate cuts.
A miter saw has a circular blade mounted on an arm that can pivot, allowing you to cut at precise angles. It can also slide back and forth to make crosscuts. This tool is versatile, reliable, and easy to use, making it a favorite among woodworkers.
Types Of Miter Saws Available
There are three main types of miter saws to choose from, and each one has its own strengths and weaknesses:
- Standard miter saw: This type of saw can only pivot left or right, making it ideal for trimming work such as picture frames. It’s an affordable option for beginners.
- Compound miter saw: This type of saw has a blade that can tilt left or right, making it perfect for bevel cuts. It’s a great option for intermediate woodworkers.
- Sliding compound miter saw: This type of saw has all the features of a compound miter saw, but it also has a sliding arm that allows you to cut wider boards. It’s the most expensive option but also the most versatile.
Features Of A Miter Saw
A miter saw has several features that make it a useful and efficient tool. Here are a few key features to look for when choosing a miter saw:
- Laser guide: This feature projects a laser line onto your workpiece, making it easier to see where the blade will cut.
- Dust collection system: A dust bag or vacuum attachment will help to keep your workspace clean and free of sawdust.
- Blade size: Most miter saws come with 10 or 12-inch blades. The size you choose will depend on the size of the boards you’ll be cutting.
- Blade guards: These safety features protect your fingers from the sharp blade and prevent debris from flying toward you during the cutting process.
Safety Precautions
As with any power tool, it’s essential to use a miter saw safely. Here are some tips to keep in mind:
- Always wear safety goggles and ear protection.
- Keep your hands away from the blade and use a push stick to guide the workpiece.
- Use the blade guard and a dust collection system to prevent injury and keep your workspace clean.
- Before making any adjustments to the saw, unplug it first.
By following these safety precautions, you can ensure that you’ll have a safe and enjoyable experience using your miter saw.

What Can You Do With A Miter Saw?
A miter saw is a versatile tool that can be used for a wide variety of cutting tasks. From precision cuts to angled cuts, this tool can handle it all. Its accuracy and precision make it ideal for joinery work, such as creating perfect angles for frames or cutting intricate designs into wood.
Additionally, it is perfect for trim work, such as cutting baseboards or crown molding to fit perfectly around corners.
With a little creativity, a miter saw can also be used for unique and creative projects, such as creating custom shapes or cutting angles for unique designs.
Overall, a miter saw is an essential tool for any woodworker or DIY enthusiast looking to achieve precise and accurate cuts.
In the following sections, we’ll go through the jobs you can utilize a miter saw. I hope this discussion has helped you determine whether a miter saw is right for you.
Cutting Job Of Miter Saw
A miter saw is a powerful and versatile tool that is a must-have for any woodworking enthusiast or professional carpenter. It is designed to make precise cuts at different angles, making it ideal for a wide range of woodworking projects. One of the main advantages of a miter saw is its ability to make crosscuts, bevel cuts, and compound cuts with ease.
Let’s dive into each of them.
A. Crosscuts
Crosscuts are the most basic type of cuts performed on a miter saw, and it involves cutting a piece of wood across the grain at a perpendicular angle. This type of cut is commonly used to create precise cuts for framing, trim work, and other woodworking projects.
As a result, the crosscut with a miter saw is an essential technique for any woodworker looking to achieve accurate and professional-looking results.
Here are the key points to keep in mind when performing a crosscut with a miter saw:
- It is important to align the blade with the pencil mark on your piece of wood before cutting.
- You should use clamps or a vise to keep your wood in place during cutting.
- Always start the blade before bringing it down onto the wood to avoid an uneven cut.

B. Bevel Cuts
Bevel cuts are done by tilting the blade of a miter saw to cut through wood at an angle other than 90 degrees.
This technique is commonly used with a miter saw to create angled cuts for joinery, such as for crown molding or picture frames. Bevel cuts can also be used for decorative purposes, such as to create unique shapes or designs in woodwork.
The precision and accuracy of a miter saw make it an ideal tool for creating bevel cuts with ease and efficiency.
Here are the key points to keep in mind when performing a bevel cut with a miter saw:
- Tilt the blade to the desired angle and adjust the bevel angle before making the cut.
- Align the blade with the pencil mark on your piece of wood before cutting.
- You should make sure that your wood is correctly positioned on the saw table.
C. Compound Cuts
Compound cuts are used when both a bevel and a miter angle are required for a project. This technique is typically used to generate angled cuts on two planes at the same time.
This procedure is great for crown molding, which needs to be tilted both horizontally and vertically to fit precisely into a corner. The miter saw can perform accurate compound cuts with ease by changing the saw blade to the correct angles.
This approach enables precise and efficient cuts, making it an invaluable tool for carpenters, woodworkers, and DIY enthusiasts.
Here are the key points to keep in mind when performing a compound cut with a miter saw:
- Always start with the bevel cut first before making the miter cut.
- Align the blade with the pencil mark on your piece of wood before cutting.
- Use a scrap piece of wood for test cuts before making the final cuts on your actual wood.
Learning how to cut with a miter saw is essential for anyone who works with wood. Performing crosscuts, bevel cuts, and compound cuts only requires a little practice and patience.
With the proper techniques and safety measures, you can create precise cuts that will help take any woodworking project to the next level.
Joinery With A Miter Saw
Joinery with a miter saw involves creating precise cuts at precise angles, enabling woodworkers to create strong and visually appealing joints.
The benefits of using a miter saw for joinery include the ability to create clean, accurate cuts quickly and easily, resulting in tight-fitting joints that require minimal sanding or shaping. Additionally, miter saws are capable of making complex cuts for a variety of joint types, including miter, bevel, and compound joints, making them a versatile tool for any woodworking project.
Overall, joinery with a miter saw is an efficient and effective way to achieve high-quality, professional-looking joints.
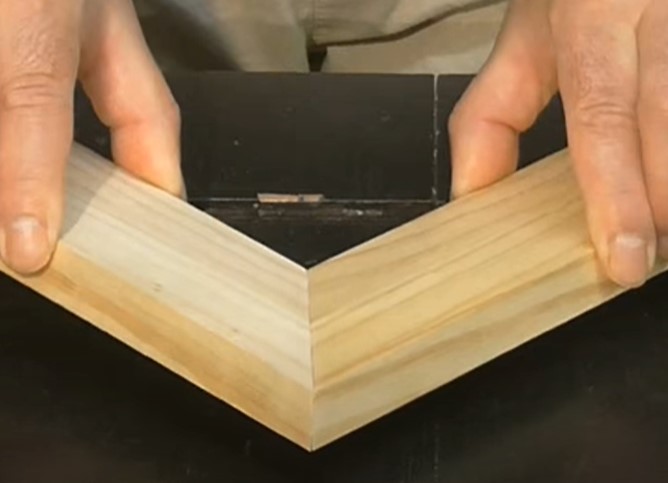
A. Cutting Miters
A miter saw is a versatile tool that can be used for a variety of woodworking projects, including making cuts for joinery. One common use for a miter saw is cutting miters. Miter cuts have the following features:
- A miter is a joint where two pieces of wood meet at an angle.
- To cut a miter, the saw blade is angled to the desired degree and the wood is then cut at the corresponding angle.
- Miter saws typically have a range of degree settings that can be adjusted to make precise cuts at specific angles.
- Common miter angles include 45 degrees and 90 degrees.
Uses Of Miters
- Miters are used to create clean and seamless joints in woodworking projects.
- They are commonly used in frames, trim work, and furniture making.
- The angle of the miter depends on the project and can range from simple 45-degree cuts to more complex angles.
Step-By-Step Guide To Cutting Miters
- Set the miter saw to the desired angle.
- Place the wood on the saw table, with the end flush against the saw fence.
- Hold the wood securely in place with your hands or clamps.
- Begin cutting through the wood with the saw blade.
- Slowly lower the blade through the wood until the cut is complete.
B. Making A Box Joint
In addition to cutting miters, a miter saw can also be used to make box joints.
The features of a box joint are:
- A box joint, also known as a finger joint, is a joinery technique that uses interlocking fingers to create a strong and decorative joint.
- Box joints are commonly used in box making, drawers, and other furniture projects.
Step-By-Step Guide To Making A Box Joint With A Miter Saw
- Set the miter saw to make a series of cuts that are the same width as the wood you are using.
- Cut a piece of wood to the desired length for your project.
- Clamp the wood to the saw table, ensuring that it is flush against the fence.
- Make a series of cuts along the length of the wood, stopping just before the end each time.
- Repeat the same cuts on a second piece of wood.
- Interlock the two pieces of wood together to create the box joint.
- Repeat the process until you have created the desired number of box joints for your project.
By following these steps, you can create precise and seamless cuts for joinery using a miter saw.
With practice and experience, you can also use your miter saw to create a wide range of other cuts for woodworking projects including half-lap, rabbet, or dado cuts.
Trim Work With Miter Saws
Trim work is a crucial process for making a house aesthetically pleasing and creating a polished look and feel. A miter saw is a valuable tool for this process, and it can make cutting crown molding, baseboards, and chair rails a breeze.
In this section, we will discuss the key points and step-by-step guides for cutting these trim work elements with a miter saw.
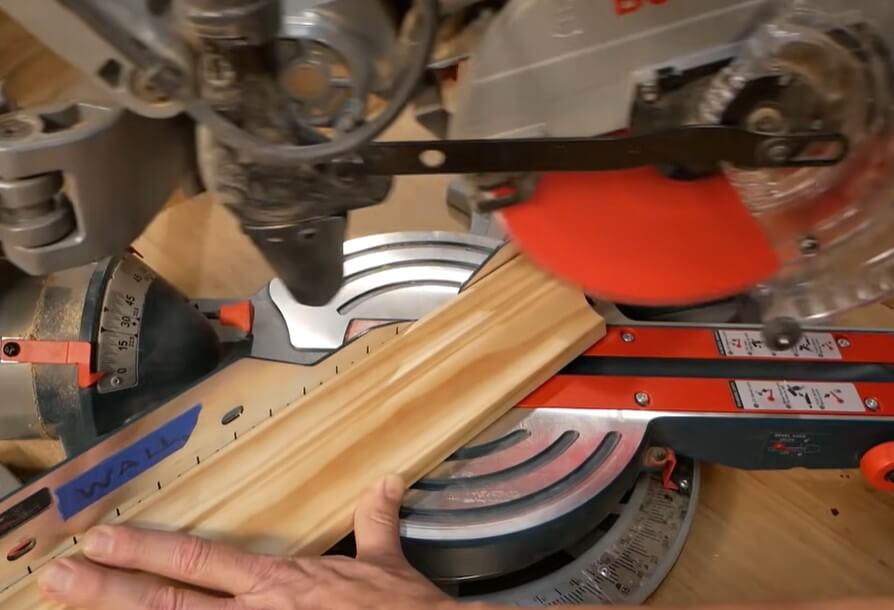
A. Cutting Crown Molding
Crown molding is an excellent addition to any room, giving it a sleek, elegant look. However, the challenging part is cutting the crown molding at the correct angle to fit perfectly with the wall and ceiling.
Here are the key points to be aware of:
- Crown molding is cut at a 45-degree angle.
- The saw blade must be placed at a 90-degree angle to the saw fence while cutting the crown molding.
- Crown molding needs a precise measurement to be cut into the desired shape.
What is Crown Molding?
Crown molding is a decorative trim that can be used to join the wall and ceiling, enhancing the style and refinement of the room. Crown moldings have a wide variety of styles, such as colonial, builder, and standard profiles, giving homeowners a broad range of options to choose from for their homes.
Step-By-Step Guide To Cutting Crown Molding With A Miter Saw
Cutting crown molding using a miter saw requires precision, but it is relatively simple.
Here is a step-by-step guide to help you obtain the perfect cuts:
Step 1: Determine the wall angle.
Step 2: Measure the crown molding.
Step 3: Use a coping saw to cut the joints.
Step 4: Set up the miter saw.
Step 5: Cut the crown molding.
B. Cutting Baseboards
Baseboards are an ideal choice for finishing off the look of a room. They are a practical and decorative way of covering the joint where the wall meets the floor.
Here are the key points to be aware of:
- Baseboards require a 90-degree angle cut.
- Cutting baseboards properly requires exact measurements.
- You need to check the accuracy of your cuts before installation.
What are Baseboards?
Baseboards are the most frequently used type of trim work in houses. They provide a seamless and clean look to a room while concealing the gap between the floor and the wall. Baseboards come in various styles, such as contemporary, transitional, or traditional, to match a room’s overall design.
Step-By-Step Guide To Cutting Baseboards With A Miter Saw
If you have a miter saw, cutting baseboards can become a straightforward task.
Here is a step-by-step guide to help you cut baseboards properly:
Step 1: Measure the length of the baseboard.
Step 2: Decide on the required angle.
Step 3: Set up the saw.
Step 4: Cut the baseboard at a 90-degree angle.
C. Cutting Chair Rails
Chair rails are a tasteful way to divide a room and protect the walls’ lower portion. They have been a popular decorative element since the 18th century.
Here are the key points to be aware of:
- Chair rails require a 45-degree angle cut.
- Chair rails are cut based on the room’s dimensions.
- A good measurement is essential before cutting the chair rails.
What are Chair Rails?
Chair rails provide a unique touch to a wall, creating a more formal and elegant look. They can be used to break up space, provide a contrasting color, or create a visual interest in a room.
Chair rails come in various designs, such as classical or modern, and the height can also vary depending on the room’s size.
Step-By-Step Guide To Cutting Chair Rails With A Miter Saw
Professionals use a miter saw to cut chair rails, and with consistent practice, you can also make the perfect cuts.
Here is the step-by-step guide for cutting chair rails with a miter saw:
Step 1: Determine the angle required.
Step 2: Measure the dimensions of the room.
Step 3: Set up the saw.
Step 4: Cut the chair rails at a 45-degree angle.
A miter saw is an excellent tool for any trim work that requires accuracy and precision. By following these step-by-step guides, you can create captivating and high-quality trim work for your home.
Creative Uses Of Miter Saws
A miter saw is an essential tool for any DIY enthusiast or professional woodworker. Its versatility and precision make it perfect for a wide range of projects. In this section, we’ll explore some of the creative uses of a miter saw.
From making DIY picture frames to building bookshelves and creating woodworking jigs, a miter saw can help you take your woodworking skills to the next level.
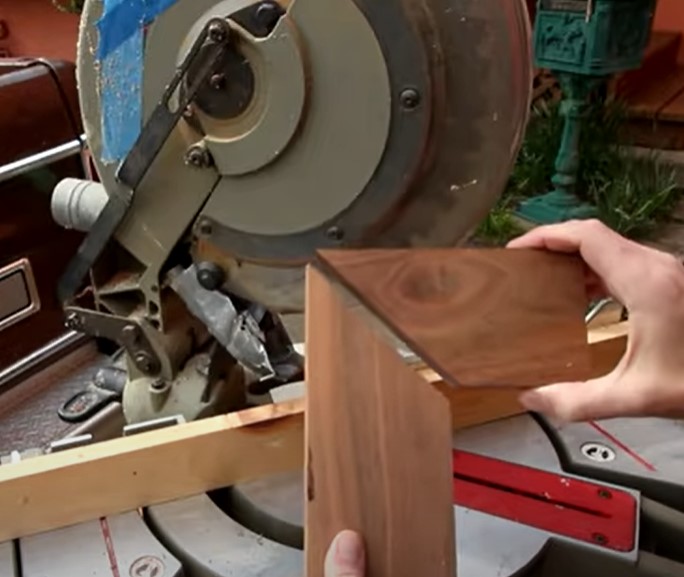
A. DIY Picture Frames
Making picture frames with a miter saw is an excellent way to showcase your favorite photographs or artwork.
Here’s a step-by-step guide on how to make picture frames using a miter saw:
- Choose your wood: Pick a type of wood that fits the style of your home. Common types of wood for picture frames include oak, maple, walnut, and cherry.
- Cut the wood: Use a miter saw to cut the pieces of wood to the desired size. Make sure to measure and mark the wood accurately to avoid any mistakes.
- Sand the edges: Use sandpaper to smooth out any rough edges on the pieces of wood.
- Create the frame: Attach the pieces of wood together using wood glue and clamps. Allow the glue to dry overnight.
- Add the picture: Once the glue has dried, add a mat and your picture to the frame. Secure the back of the frame with a saw tooth hanger or wire.
B. Building A Bookshelf
A miter saw can also be used to build a bookshelf. Here’s a step-by-step guide on how to construct a bookshelf using a miter saw:
- Measure and plan: Determine the size and shape of your bookshelf and measure the space where it will be placed.
- Cut the shelves and sides: Use a miter saw to cut the shelves and sides of the bookshelf to the desired size.
- Assemble the pieces: Use wood glue and clamps to attach the shelves and sides together.
- Add the back panel: Cut a piece of plywood to the size of the back of the bookshelf and attach it with screws or nails.
- Sand and paint: Use sandpaper to smooth out any rough edges, and then paint or stain the bookshelf to your liking.
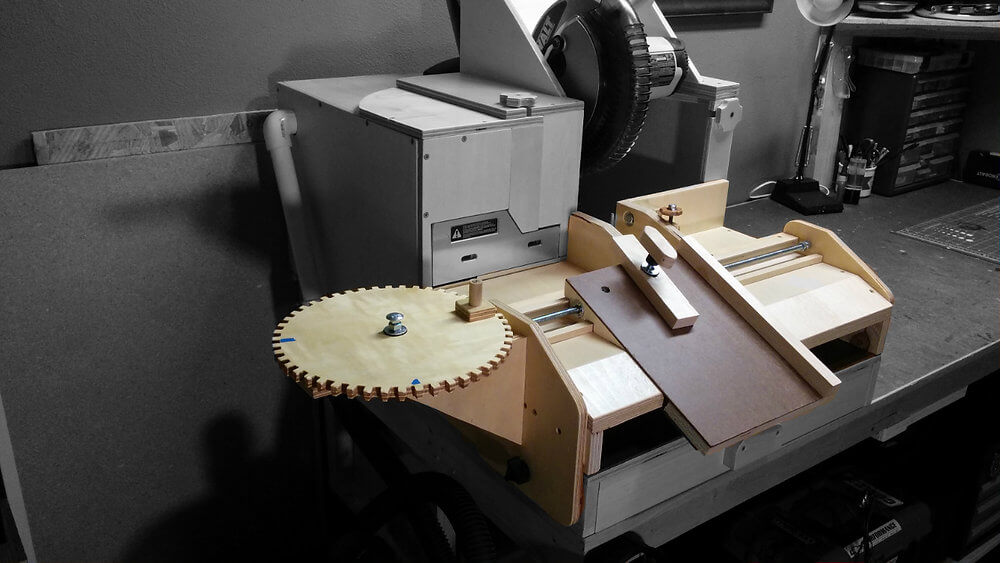
C. Creating Woodworking Jigs
Woodworking jigs are specialized tools that help make precise cuts and repetitive tasks more manageable. Here’s a step-by-step guide on how to create woodworking jigs using a miter saw:
- Choose the wood: Select a type of wood that is sturdy and suitable for the project.
- Plan and measure: Plan out the size and shape of your jig and measure the dimensions precisely.
- Cut the wood: Use a miter saw to cut the pieces of wood to the desired shape and size.
- Drill holes: Drill holes into the wood that will serve as guides for your saw or router.
- Assemble the jig: Use wood glue and clamps to put the pieces of the jig together. Allow time for the glue to dry.
- Test the jig: Test the jig with your saw or router to make sure it works as intended.
A miter saw is a versatile tool that can help you tackle a wide range of woodworking projects.
Whether you’re making DIY picture frames, building bookshelves, or creating woodworking jigs, a miter saw is an essential tool in any woodworking arsenal.
Tips For Making Accurate Cuts With A Miter Saw
A miter saw is a versatile tool that can make precise cuts for various woodworking projects. However, using a miter saw can be intimidating, especially for beginners.
Here are some tips for making accurate cuts with a miter saw.
Choosing The Right Blade:
- Using the correct blade for the material you are cutting is essential to make accurate cuts.
- The number of teeth on the blade determines the smoothness of the cut, with more teeth resulting in a smoother cut.
- A crosscut blade is best for cutting wood at a 90-degree angle, while a miter blade is suitable for cutting angles.
Marking The Wood:
- Before cutting, it is crucial to mark the wood accurately.
- Use a square to ensure that the marking lines are perpendicular to the edge of the wood.
- Mark the position of the blade on the wood to avoid cutting too shallow or too deep.
Adjusting The Angle And Bevel:
- To make precise cuts at an angle, adjust the saw’s angle accordingly. Most miter saws have pre-set angles for popular cuts.
- Bevel adjustments allow you to tilt the blade to make angled cuts on the wood’s thickness.
- Always check the angle and bevel before making a cut to ensure accuracy.
Practice Makes Perfect:
- Like any skill, practice makes perfect.
- Starting with scrap wood, practicing angles, and bevels can help you master using a miter saw.
- Gradually increase the difficulty of the cuts as you become more comfortable with the tool.
A miter saw is a powerful tool that can make precise cuts for all your woodworking projects. A few essential tips such as choosing the right blade, marking the wood correctly, adjusting the angle and bevel, and practicing can help you achieve accurate and flawless cuts.
Remember to follow safety protocols when using a miter saw and always wear protective gear to avoid injuries.
Frequently Asked Questions For What Can You Do With A Miter Saw
What Is A Miter Saw?
A miter saw is a power tool used to make accurate crosscuts and miters in wood, metal, and other materials.
What Kind Of Cuts Can A Miter Saw Make?
A miter saw can make crosscuts, bevel cuts, miter cuts, and compound cuts, depending on the type of saw and blade attached.
What Materials Can Be Cut With A Miter Saw?
A miter saw can cut through various materials, such as wood, metal, plastics, and laminates, depending on the blade and saw type.
How Should I Choose A Miter Saw Blade?
Choose a blade based on the type of material you’ll be cutting and the type of cut you want to make, considering the blade’s tooth count, size, and material.
Can A Miter Saw Be Used For Crown Molding?
Yes, a miter saw is great for cutting crown molding, especially when adjusted to make angled, bevel, and miter cuts.
What Safety Precautions Should I Take When Using A Miter Saw?
Wear personal protective equipment (PPE), keep your hands away from the blade, avoid cutting loose materials, and keep your work area clean.
What Can You Do With a Miter Saw? Should You Get One?
Conclusion
After exploring the various projects and cuts that can be made with a miter saw, it’s clear that this versatile tool is a must-have for any DIY enthusiast or professional woodworker. From framing to molding to furniture-making, the miter saw is essential for accurate and efficient cutting.
With its ability to make angled cuts and precise measurements, any woodworking project can be brought to life with ease. Moreover, the selection of different blades and accessories means that the miter saw can perform a wide range of tasks.
The time and effort saved by using a miter saw make it one of the best investments for any woodworker. Now that you know what a miter saw can do, it’s time to add it to your collection of tools and take your woodworking to the next level.
Recent Posts
Woodworking is one of the most rewarding hobbies and professions, but it also comes with serious risks if proper precautions are not taken. Whether you're working with a table saw, planer, or simple...
What to Use If You Don't Have a Brad Nailer: Handy Alternatives
You can use a hammer and finishing nails paring with nail set or wood glue if you don't have a Brad Nailer. These tools effectively secure trim and small woodworking projects. So, if you’re in...