
Miter saws are indispensable when it comes to cross-cutting a piece of wood. No other tool can reproduce the exact result, whether it is a 45 degree or an acute angle cut for your decor. However, you might easily run into problems if you don’t know how to use a miter saw to cut angles.
The best way to cut angles on a miter saw is to follow the Miter scale. If you are at “0” on the miter scale, each cut will be equivalent to 90 degrees. And every increment on the miter scale left or right will be less than 90 degrees. For example, if you are at 15 on the miter scale, your angle will be 90-15 = 75 degrees.
Need more information on the miter saw and cutting angles? The rest of the article provides comprehensive knowledge and a step-by-step guide to using a miter saw.
What Is A Miter Saw?
A Miter saw is a very popular woodworking tool that allows you to cross-cut wooden beams. The cutting scope is not necessarily limited to cutting beams; it can also cut décor pieces accurately.
Types Of Miter Saw
In the world of woodworking, the miter saw has been an irreplaceable tool for many years. Due to its high performance and capability of repeating the same cut angle, it will always be a fan favorite.
Despite that, the tool went through some major development over the years. It not only makes the tool more versatile, but it also widens the working scope for all sorts of enthusiasts.
Vertical Miter Saw: This is the most basic form of miter saw that only has a vertical cutting motion. You can effectively cut wood pieces at a 90-degree angle. It’s great for cutting length and trimming. Nonetheless, if you have the skills, you can make jigs or guides for various angles of cutting.
Compound Miter Saw: The next iteration of the miter saw comes with an angle scale. The scale allows you to cut not only at 90 degrees but also at any angle up to 45 degrees. In most construction situations where bevel and miter are imperative, a compound miter saw is the way to go.
Sliding Miter Saw: This is technically a vertical miter saw with a sliding mechanism. The problem with the traditional vertical saw is that it only has a particular cutting length. But when you add a sliding rail to that, it significantly increases the cutting length. Now you can trim wider wood pieces in one swoop.
Sliding Compound Miter Saw: Well, that’s your compound miter saw, along with the sliding feature. With this, you can cut wider beams at various angles if you desire. You should know that this is where miter saws start to get expensive.
Dual Sliding Compound Miter Saw: This is the most feature-packed miter saw you can find on the market. It not only comes with a sliding rail and miter scale, but you can also tilt the blade. You won’t have to rotate your workpiece when cutting both ends. Just slide your beam and tilt the blade for the same cutting action on the other end.
Miter Saw Angle Cut Type
It doesn’t matter what type of miter saw you use; your cut will match one of the following three types. Nevertheless, it is a powerful machine with lots of motion and angle access. The actual variation in cuts depends entirely on your skill level.
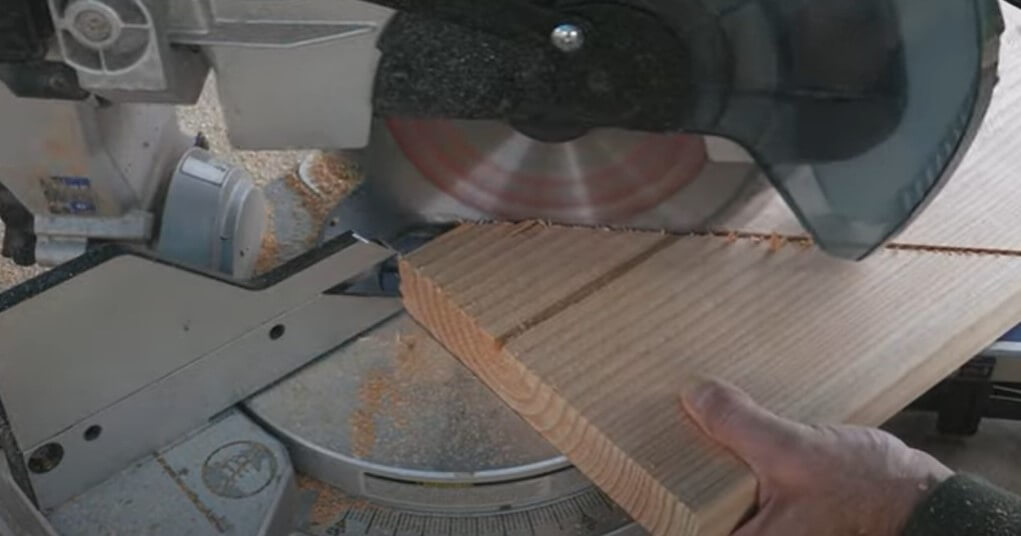
Length cut: It’s a pretty standard miter saw cut that can be performed. You just place the wooden piece in place and push the blade down on top of it. The cutting angle on this would be exactly 90 degrees.
Most of the time, you will use this method to cut a certain length of a wooden beam. How long, if you ask? As much as your design requirements. It’s exceptionally quicker than other similar cutting tools.
Bevel Cut: The bevel is essentially a cutting method through the thickness or sideways of the beam. When you make a door frame, the three beams connect at a 90-degree angle. Each beam is precisely beveled at 45 degrees at the connecting point. Similarly, you can use bevel cuts in so many construction line window frames, bed frames, and so on.
Miter Cut: An angle cut is more of a horizontal angle cut across the face of the wood piece. Let’s say you are building a picture frame that has a nice design on it. You need a 45-degree miter cut if you want this design to wrap around your entire fame.
The same method applies to a door with beautiful carving on the edges. Two 45-degree miter cuts make 90-degree angles on each corner. And you can have your carvings on all edges.
Generally, these are the types of miter saw cuts you would see in carpentry. However, it is not necessary to always aim for a 90-degree angle unless your design requires it.
How To Measure Angle Cuts In Wood?
Measuring and making accurate angle cuts in wood is essential for achieving precise and professional-looking woodworking projects. Here’s a step-by-step guide on how to measure angle cuts in wood:
Materials and Tools You’ll Need:
- Protractor
- Pencil
- Workpiece (wood)
- Miter saw or handsaw (depending on your tools)
Steps: Understand the Basics:
Before you begin, familiarize yourself with some woodworking terminology:
- Miter Cut: An angle cut made across the width of the wood, often used for creating corners or joints.
- Bevel Cut: An angle cut made along the thickness of the wood, usually used for creating angled edges.
We discussed different angle cuts in our previous section as well.
Identify the Angle:
Determine the angle at which you need to make the cut. This could be a specific angle measurement (e.g., 45 degrees) or a complementary angle to a desired joint (e.g., 90 degrees minus the desired angle).
Use a Protractor:
Place the protractor on the edge of the wood, aligning its baseline with the edge of the wood and its center point with the wood’s corner. Read the angle measurement where the baseline meets the protractor scale.
Mark the Wood:
Using a pencil, mark the wood at the point where the angle measurement aligns. This mark will guide you during the cutting process.
Adjust Your Tools:
If you’re using a miter saw, adjust the saw’s angle settings to match the measured angle. Most miter saws have clear markings or knobs for angle adjustments. If you’re using a handsaw, you’ll need to make sure the angle is accurately maintained while cutting.
Position the Wood:
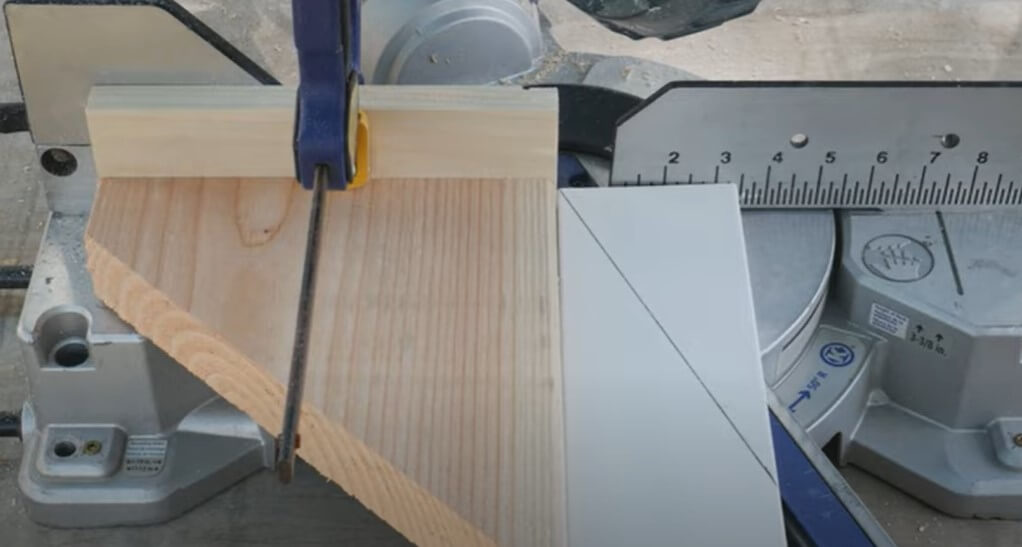
Place the wood on the miter saw table or in the miter box, aligning the marked line with the saw blade’s path. Ensure that the wood is securely held in place to prevent movement during cutting.
Make the Cut:
If you’re using a miter saw, gently lower the saw blade onto the wood and make the cut according to the marked line. If using a handsaw and miter box, carefully follow the guides and cut along the marked line.
Check the Fit:
After making the cut, check the angle joint by fitting the cut piece with another piece of wood. This step ensures that the joint fits snugly and accurately.
Remember that practice makes perfect when it comes to measuring and cutting angles in wood. If you’re new to woodworking, it’s a good idea to practice on scrap pieces before working on your main project. Additionally, always prioritize safety by wearing appropriate protective gear and using tools according to their instructions.
How To Cut 45-Degree Angles On A Miter Saw?
You need to cut at a 45-degree angle the most. To achieve accuracy and precision, you must follow a few steps while cutting 45-degree angles on a miter saw. Let’s look at how to use a miter saw to cut a 45-degree angle, below:
1. Set Angle: Adjust the miter saw to a 45-degree angle using the angle adjustment knob.
2. Position Wood: Place the wood on the miter saw table, aligning the intended cut line with the saw blade’s path.
3. Secure the wood: Hold the wood firmly against the fence to prevent movement during cutting.
4. Make a Cut: Activate the miter saw and slowly lower the blade onto the wood to make the 45-degree angle cut.
5. Check Fit: Test the cut piece’s angle by fitting it with another piece of wood to ensure accurate alignment.
6. Safety: Always wear safety gear and follow proper procedures while using power tools.
Remember, practice and caution are key to achieving clean and accurate angle cuts using a miter saw.
Cutting Acute Angles On A Miter Saw
Anything less than 90 degrees is an acute angle. In most miter saw-scale, you can go up to a 45-degree angle cut. There are only a few miter saw variations that have an angle option less than 45 degrees. If yours doesn’t have one, you can make a jig and use that to cut below 45 degrees.
How To Cut A 25-Degree Angle With A Miter Saw?
As we said, with most miter saws, you can only cut as low as 45 degrees at a time. So if you need a 25-degree angle, it will be a tricky one, but not too difficult.
Step 1: First, make a 45-degree cut in a small wood piece. This will be your guide to all the angles below 45 degrees. On a miter scale, it would be 45 as well.
Step 2: Place the angled piece just before the blade line or as close to the blade path.
Step 3: Now place the other workpiece parallel to the Angle of the guide.
Step 4: Select 20 on the miter scale. So the math behind this is as you’ve already subtracted 45 degrees through the guide, and another 20 through the miter scale you effectively get 90- (45+20) = 25 degrees at the end.
Use this method to achieve any acute angle cut, even if you don’t have an option after 45 on the scale.
How To Create An Obtuse Angle With The Miter Saw?
If you create an angle that is over 90 degrees, it’s an obtuse angle. For example, you have a décor piece that has a 120-degree angle. So to get this 120-degree angle, you will need two 60 degrees angle cut pieces.
Set your miter scale to 30, because 90 minus 30 equals 60. Cut two identical pieces; when you join them together, it will be 120 degrees.
How To Cut More Than 45 Degrees On A Miter Saw?
To cut more than 45 degrees on a miter saw, you’ll need to make a few adjustments to your tool and technique.
First, adjust the saw’s bevel angle to the desired degree, which should be greater than 45 degrees.
Next, adjust the saw’s miter angle to the opposite side of the desired angle.
For example, if you want to cut at 60 degrees, set the bevel angle to 30 degrees and the miter angle to 30 degrees on the opposite side. This will allow the blade to cut at the desired angle.
Always use caution when making adjustments on a miter saw and wear appropriate safety gear.
Miter Saw Angle Chart
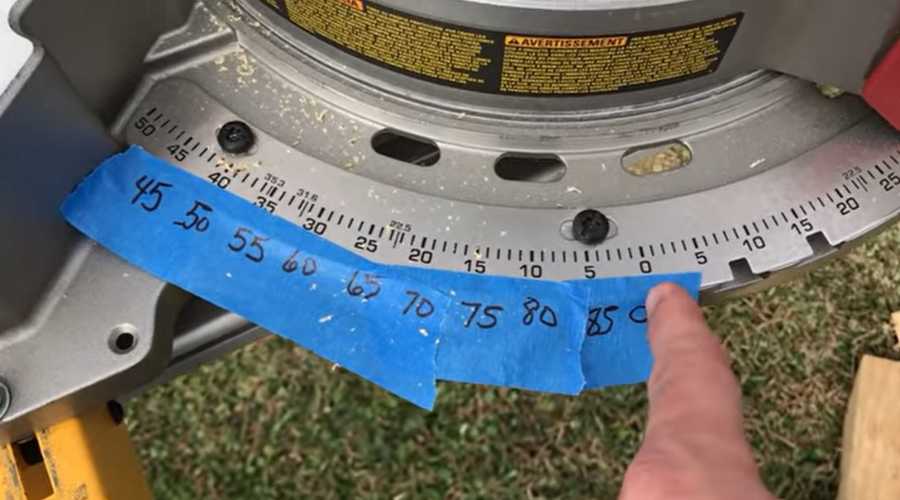
If you don’t know how to read the miter scale, it’s easy to make mistakes. The markings on the scale do not represent the final output degree. In the same way, a zero on the scale doesn’t mean it’s a zero (0) degree angle.
The best way to go on about this is anything on the miter scale is subject to subtraction from 90 degrees. So zero means 90 degrees, as 90-0 = 90. The rest are the same.
Here is a quick chart for the Miter saw angle
| Miter Scale Markings | Final Cut Angle |
|---|---|
| 0 | 90 Degree |
| 5 | 85 Degree |
| 10 | 80 Degree |
| 25 | 75 Degree |
| 45 | 45 Degree |
| 50 | 40 Degree |
Angle Cut Calculator
An angle cut calculator for a miter saw is an indispensable tool for any professional woodworker or DIY enthusiast. This device helps to accurately determine the correct angles for making precise cuts on a variety of materials. That’s why we developed an angle cut calculator for your assistance.
You may eliminate the factor of guesswork from cutting angles by using this calculator. Additionally, it will guarantee accuracy in every cut, saving time and effort while delivering a flawless outcome. Overall, this equipment is essential for everyone who wishes to complete their woodworking projects precisely and effectively.
So let’s try it out.
Angle Cut Calculator
Related Reviews:
- How To Make A Plunge Cut With A Jigsaw
- Which Saw Should I Use For DIY Projects
- Miter Saw Vs Circular Saw: Which Is Most Useful?
- How To Use A Miter Saw Box?
Recent Posts
Woodworking is one of the most rewarding hobbies and professions, but it also comes with serious risks if proper precautions are not taken. Whether you're working with a table saw, planer, or simple...
What to Use If You Don't Have a Brad Nailer: Handy Alternatives
You can use a hammer and finishing nails paring with nail set or wood glue if you don't have a Brad Nailer. These tools effectively secure trim and small woodworking projects. So, if you’re in...