
Is your trusty Drill Master drill suddenly refusing to cooperate, leaving you with unfinished projects and frustration? Don’t fret; you’re not alone.
There could be various reasons behind your Drill Master drill not working as it should. From battery woes to motor malfunctions and everything in between, these issues can often halt your DIY aspirations.
Troubleshooting your Drill Master drill is not just a mere inconvenience—it’s the key to unlocking the potential of your favorite power tool.
In this guide, we’ll dive into the common culprits causing your drill to go silent and explore step-by-step solutions to resurrect it. When it comes to tackling those DIY tasks, a functional drill is your trustiest sidekick, and it’s time to get it back in action!
So, let’s roll up our sleeves and get ready to bring that Drill Master drill roaring back to life.
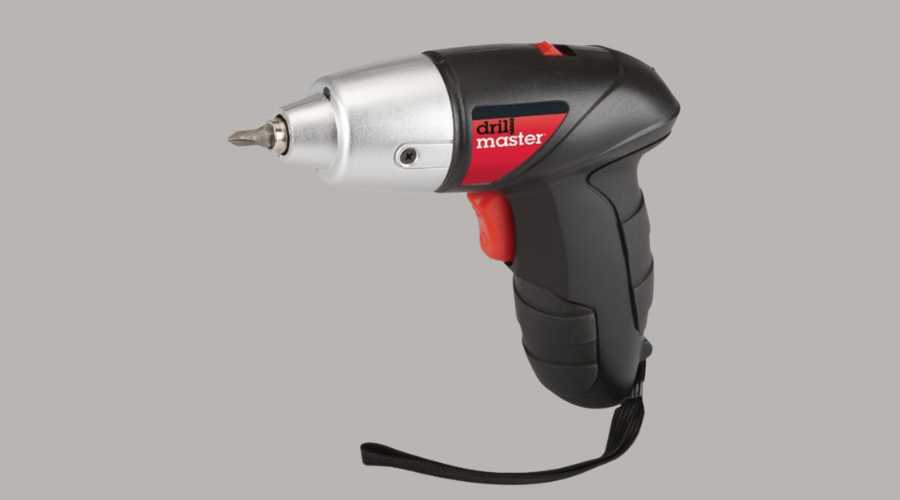
Understanding Your Drill Master Drill
Drill Master Drill is a high-quality power tool that is designed to provide superior performance and reliability for professional contractors and DIY enthusiasts alike.
This drill features a powerful motor that can deliver up to 3000 RPM, which makes it ideal for drilling through tough materials such as metal, concrete, and wood.
However, every drill machine may fall into trouble during work, and the Drill Master is no exception. Therefore, understanding the functions and parts of the Drill Master drill is essential for any user to troubleshoot it.

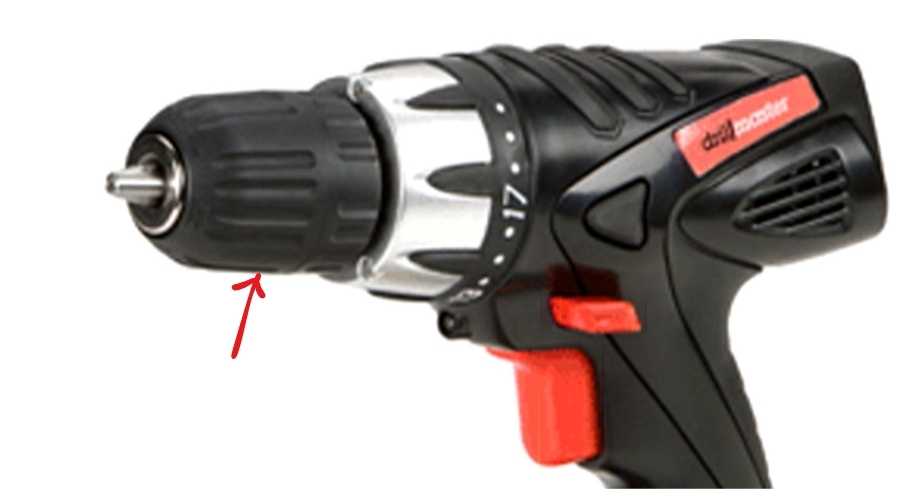
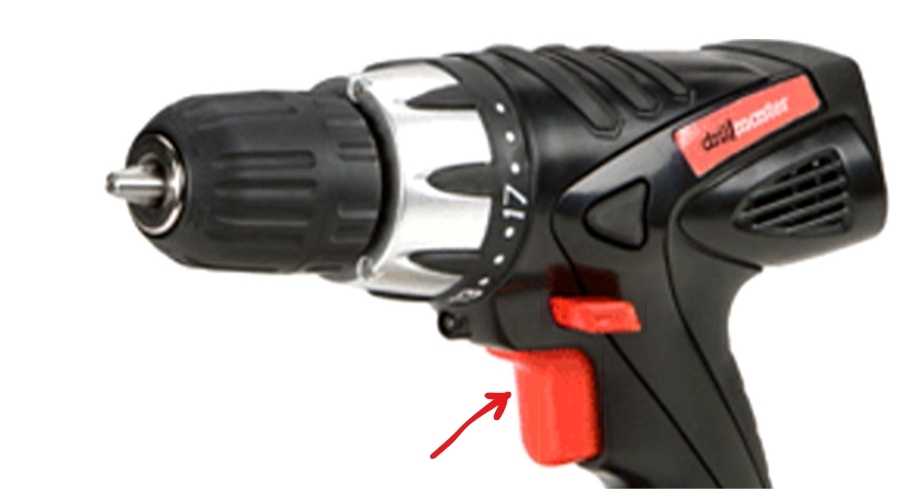
The key components of the Drill Master drill include the chuck, motor, trigger, and speed control.
The keyless chuck enables for simple attachment and detachment of drill bits, while the powerful motor offers enough power to push the bit through even the most difficult drilling operations.
The drill’s speed is controlled by the trigger, and the speed control allows for fine changes. It has variable speed control, allowing the user to alter the speed to match the work at hand.
When troubleshooting the Drill Master drill, users should inspect the power cord, brushes, and switch to ensure they are in good condition.
By understanding its functions and key components, users can easily troubleshoot and maintain their Drill Master drill.
If you’re an absolute beginner and don’t know how to use a cordless drill, you can read our post on it then.
Common Reasons for Drill Master Drill Malfunctions
There could be various reasons why your Drill Master drill not working properly. For your convenience, we have compiled a list of common cordless drill problems that you may encounter when operating with a Drill Master drill here:
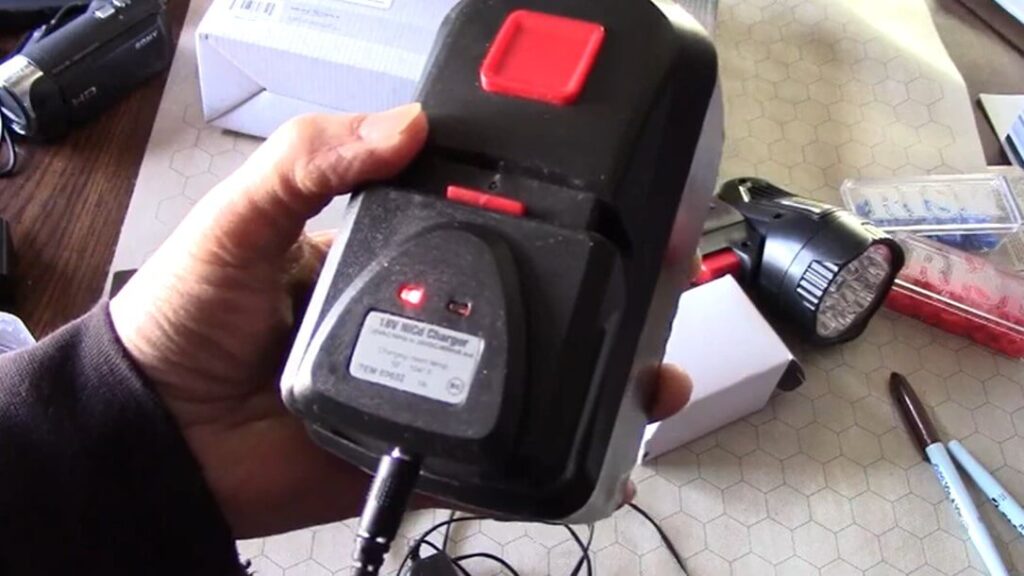
1. Dead Battery Blues: The drill won’t start because the battery is dead or not charged properly. Charge the battery properly, or replace it if it’s no longer holding a charge.
2. Motor Whining: A high-pitched noise from the motor could indicate issues. You can inspect for debris or consider motor maintenance. To clean the motor, disassemble the drill and clean it. If the issue persists, consider motor maintenance or replacement.
3. Chuck Jam: The chuck won’t release the bit or won’t hold it securely. Clean and lubricate the chuck or replace it if necessary.
4. Overheating Woes: If the drill gets excessively hot during use, it may need a break to cool down, or there might be motor issues. Allow the drill to cool down during extended use. If it consistently overheats, investigate motor or gear issues.
5. Trigger Troubles: The trigger isn’t responsive or is erratic. Check the switch and wiring connections. If any issue, it’ll be better to replace the faulty component.
6. Noisy Operation: Unusual grinding or rattling noises could indicate worn-out gears or bearings that need replacement.
7. Weak Torque: If the drill lacks the power it once had, it might be time to replace brushes or inspect the gearbox.
8. Battery Drainage: The battery drains quickly even when not in use. It could be due to a faulty battery or charger. Replace the battery or charger if they are faulty.
9. Inconsistent Speed: The drill doesn’t maintain a constant speed. Clean or replace the variable speed control components.
10. Excessive Vibration: Too much vibration during operation may suggest imbalanced or damaged components. Investigate for imbalanced or damaged components and replace them if necessary.
11. Loss of Grip: If the handle or grip is loose or uncomfortable, it might affect your control and precision. Tighten or replace handles for a secure and comfortable grip.
12. Sudden Stoppages: The drill stops abruptly during use. Check the power source and ensure the battery or cord connections are secure.
13. Smoking Drill: Smoke or a burning smell indicates a serious problem. Immediately disconnect the drill and seek professional assistance.
14. Bit Slippage: The drill bit slips or spins within the chuck, affecting drilling accuracy. Ensure the chuck is properly tightened. If the chuck is worn due to excessive use, replace it with a new one.
15. Lack of Forward/Reverse: The drill won’t switch between forward and reverse modes. Inspect the switch and wiring. Repair or replace faulty components if necessary.
16. Trigger Sticking: The trigger gets stuck in the ‘on’ position. Investigate the trigger mechanism for obstructions.
Remember that safety should always be a priority when troubleshooting and repairing your Drill Master drill. When in doubt, consult the manufacturer’s manual or seek professional assistance for complex issues.
A Step-By-Step Guide On How To Identify The Specific Problem With Your Drill Master Drill
Identifying the specific problem with your Drill Master drill is a prerequisite for effective troubleshooting.
Here’s a step-by-step guide to help you pinpoint the issue:
Step 1: Safety First
- Before you begin, ensure your drill is disconnected from the power source (unplugged or battery removed) to prevent accidents.
- Use safety goggles and gloves for added protection.
Step 2: Visual Inspection
- Start with a visual examination of the drill’s exterior.
- Look for obvious signs of damage, loose parts, or debris that might be causing the problem.
- Check the drill’s cord (if applicable) for any cuts or exposed wires.
Step 3: Listen Carefully
- Power on the drill and listen for unusual sounds.
- Grinding, squealing, or rattling noises could indicate internal issues.
- Pay attention to any unusual vibrations as well.
Step 4: Battery Check (If Cordless)
- If your drill is cordless, check the battery’s charge level.
- Ensure it’s fully charged, or replace it if it’s old and not holding a charge.
Step 5: Trigger and Switch Examination
- Operate the trigger and switch to check for responsiveness.
- Ensure the trigger returns to the off position when released.
- If it’s sticking or erratic, this might be the issue.
Step 6: Chuck Inspection
- Open the chuck (the part that holds the drill bit) and inspect it for any debris, damage, or misalignment.
- Make sure it’s clean and gripping the drill bit securely.
Step 7: Smell Test
- While the drill is running, pay attention to any unusual odors, such as burning smells or smoke.
- These could indicate motor or electrical problems.
Step 8: Temperature Check
- Touch the drill’s body to check for excessive heat during operation.
- Overheating can be a sign of motor or gear issues.
Step 9: Test Different Functions
- If your drill has various functions like drilling, driving, or hammering, test each one to see if the issue persists across all modes.
Step 10: Evaluate Torque and Speed
- Assess whether the drill delivers the expected torque and maintains a consistent speed.
- Inconsistent performance might indicate gearbox or motor problems.
Step 11: Research and Consult
- If you still can’t identify the problem, consult the manufacturer’s manual or online resources for common issues related to your specific Drill Master drill model.
- Consider reaching out to the manufacturer’s customer support or an experienced DIY community for guidance.
Step 12: Document Your Findings
- Take notes of your observations, including any unusual sounds, smells, or behaviors.
- This information will be helpful if you decide to seek professional repair assistance.
Identifying the specific problem with your Drill Master drill is the first step towards resolving it effectively.
Once you’ve pinpointed the issue, you can proceed with the appropriate troubleshooting and repair steps, or seek professional help if needed.
How To Fix Your Drill Master Drill: Professional Guidelines
We learned about the kind of problems we can encounter while working with our Drill Master drill machine from the talk above. We also learn how to recognize those issues.
It is now time to learn some repair hacks.
Discover expert advice on how to fix common problems with your Drill Master Drill here:
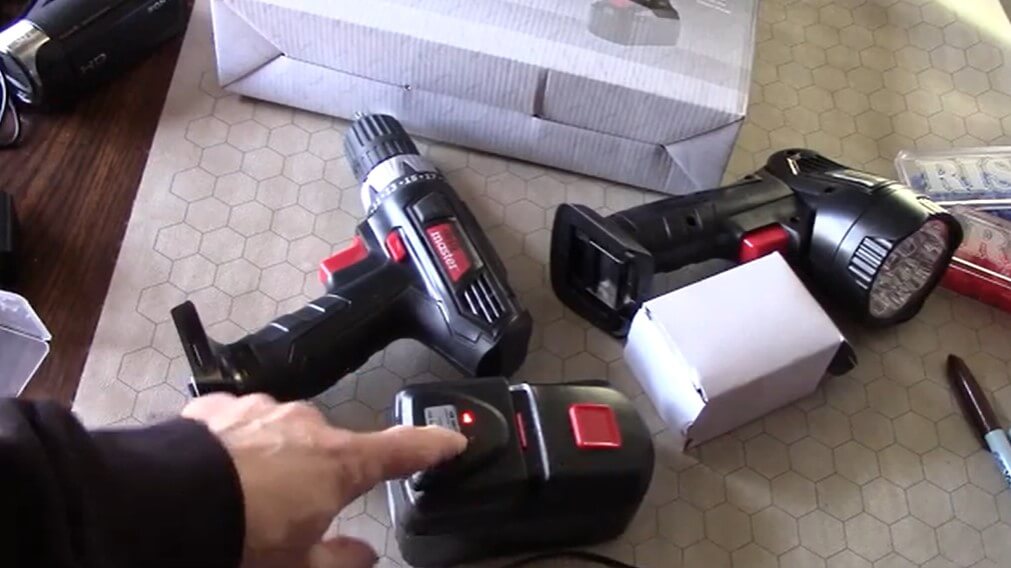
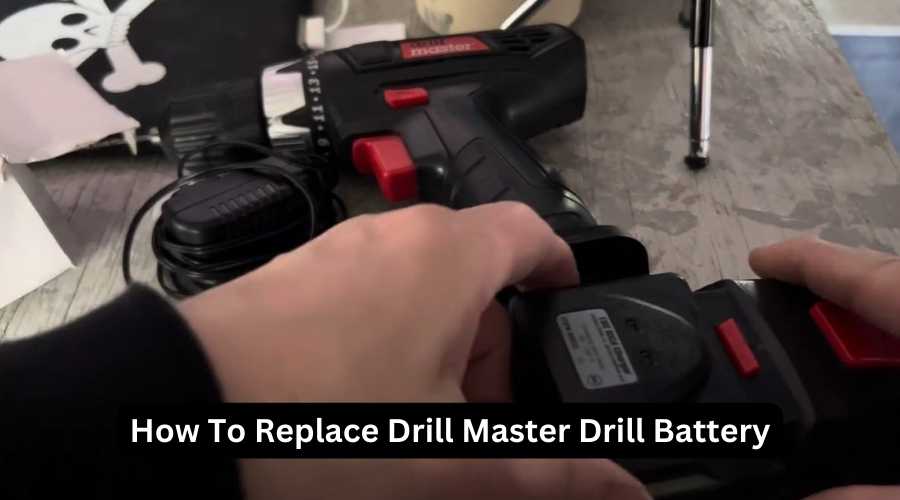
A. Battery Replacement
- Safety First: Disconnect the drill from the power source or remove the battery.
- Locate the Battery: Find the battery compartment on your drill.
- Remove the Old Battery: Typically, there will be a release button or latch. Press or slide it to remove the old battery.
- Insert the New Battery: Slide the fully charged replacement battery into the compartment until it clicks securely in place.
- Test the Drill: Reconnect the power source or battery and test the drill to ensure it’s working properly.
- Dispose of the Old Battery Safely: If the old battery is not rechargeable, dispose of it according to your local regulations.
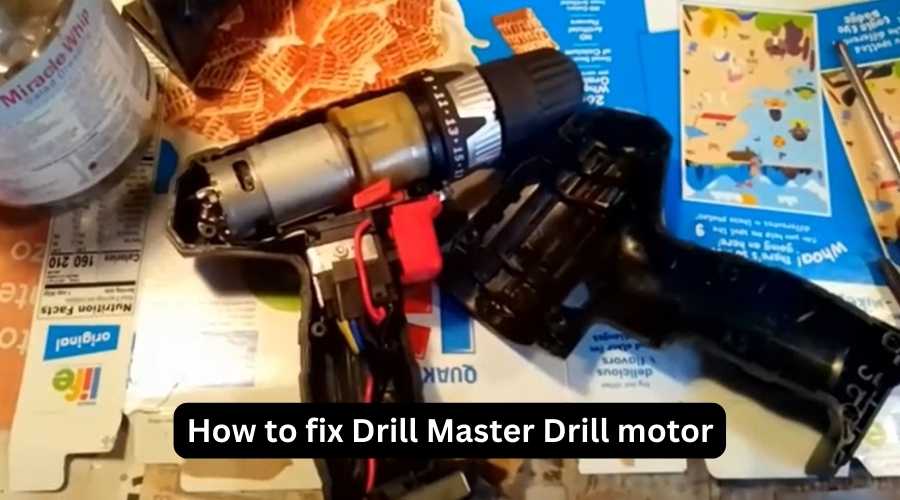
B. Motor Repair
- Diagnose the Motor: Identify if the motor is the issue by listening for unusual sounds or examining it for visible damage.
- Disassemble the Drill: Safely disassemble the drill to access the motor. Refer to the manufacturer’s manual for guidance.
- Inspect and Clean: Examine the motor for debris or dust buildup. Clean it carefully using compressed air or a soft brush.
- Check for Loose Connections: Ensure all motor connections are secure. Reattach any loose wires.
- Replace the Motor (if necessary): If the motor is damaged or beyond repair, replace it with a compatible one, following the manufacturer’s instructions.
- Reassemble the Drill: Put the drill back together in reverse order.
- Test the Drill: Reconnect the power source or battery and test the drill to confirm the motor issue is resolved.
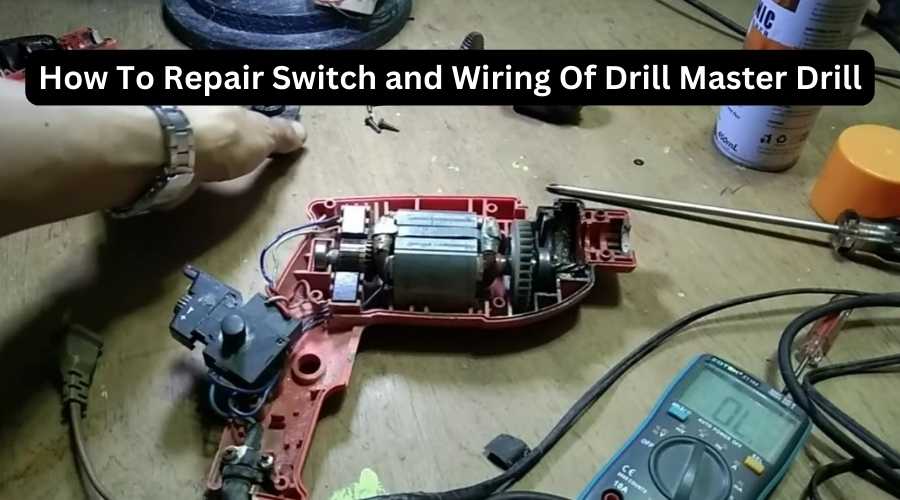
C. Switch and Wiring Repairs
- Examine the Switch: Inspect the drill’s switch for damage or wear.
- Check Wiring Connections: Look for loose or frayed wires.
- Repair or Replace the Switch: If the switch is faulty, replace it following the manufacturer’s guidelines. Ensure the new switch is compatible.
- Secure Wiring: If there are loose wires, carefully reconnect and secure them. Use electrical tape or wire connectors as needed.
- Test the Drill: Reconnect the power source or battery and test the drill to ensure the switch and wiring issues are resolved.
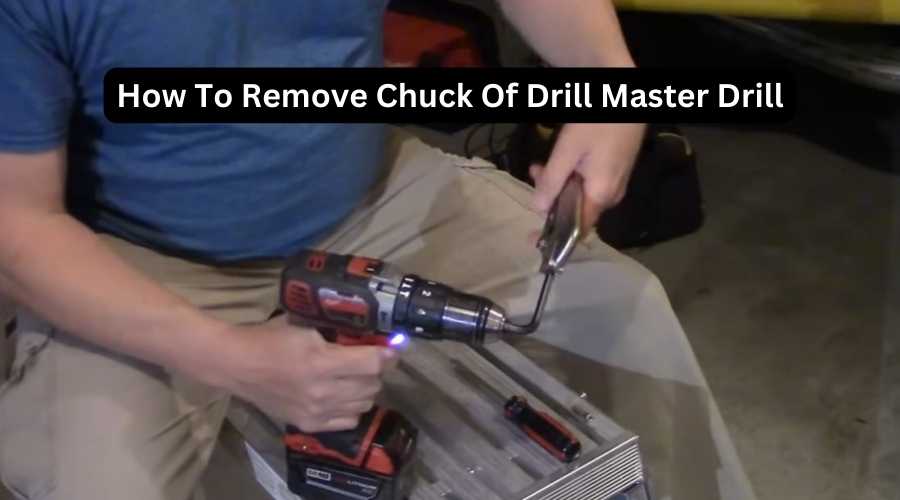
D. Chuck and Bit Maintenance
- Release the Chuck: Open the Chuck fully to access the bit.
- Inspect the Chuck: Check for debris, rust, or damage inside the chuck jaws.
- Clean the Chuck: Remove any debris using a brush or compressed air. Lubricate it with a small amount of oil if needed.
- Inspect the Bit: Examine the drill bit for wear, damage, or blunt edges.
- Replace the Bit (if necessary): If the bit is damaged, replace it with a suitable one.
- Choose the Right Bit: Select the appropriate bit for your drilling task based on material and size.
- Tighten the Chuck: Securely tighten the chuck around the bit.
- Test the Drill: Reconnect the power source or battery and test the drill to ensure the chuck and bit are functioning correctly.
Remember to follow safety guidelines and use proper tools when repairing your Drill Master Drill.
If you encounter challenges during the repair process or have doubts about your abilities, it’s advisable to seek professional assistance.
When to Seek Professional Help
Knowing when to seek professional help for repairing your Drill Master drill is essential to ensure safety and proper functioning.
Here are situations where it’s best to consult a professional:
- Electrical Issues:
If you suspect a complex electrical problem, like a malfunctioning control board, wiring deep within the drill, or issues with the power supply, it’s safer to involve a professional electrician or technician who can diagnose and repair these intricate components.
- Motor Replacement:
Replacing a drill motor can be a challenging task, as it requires disassembling the drill, matching the correct motor model, and reassembling it correctly. Professionals have the expertise and tools to do this job accurately.
- Severe Chuck or Gearbox Damage:
If the chuck or gearbox is severely damaged, repairing or replacing these components may require specialized equipment and knowledge. A professional can ensure they are correctly installed and calibrated.
- Warranty Concerns:
Attempting to repair the drill on your own might void any existing warranties. Professionals can provide authorized service that preserves the warranty coverage, if applicable.
- Lack of Expertise:
If you’re not confident in your DIY skills or the repair involves complex technical knowledge, it’s wise to leave it to professionals who are trained and experienced in drill repair.
Electric Drill Stopped Working
When an electric drill stops working, the first step is to determine the cause of the issue. The most common cause is a dead or low battery, which can be easily remedied by charging or replacing the battery.
If the battery is not the issue, check the power source and ensure the drill is properly plugged in. Additionally, check for any visible damage or loose connections.
If these steps do not solve the problem, it may be necessary to take the drill to a professional for repair or replacement. It is important to prioritize safety and avoid attempting any repairs without proper knowledge and equipment.
Drill Battery Charged But Not Working
If you find that your drill battery is charged but not working, it can be a frustrating experience. There are several potential reasons why this could be happening, such as a faulty charger, a damaged battery, or a problem with the drill itself.
First, check that the battery is inserted correctly and securely in the drill. Then, try charging the battery again, making sure that the charger is functioning properly.
If the battery still does not work, it may be time to replace it.
It’s important to have properly functioning tools in order to complete tasks efficiently and safely, so don’t hesitate to address this issue promptly.
Brushless Drill Not Working
A brushless drill that is not working can be a frustrating issue.
To troubleshoot the problem, first ensure that the battery is fully charged. Next, check the connections between the battery and the drill to ensure that they are securely in place. If the drill still does not work, it may be a more serious issue and professional repair may be necessary.
It is important to address any issues with power tools promptly to avoid any safety hazards and to ensure that they are working at their highest capacity.
Milwaukee Drill Master Drill Not Working
The Milwaukee Drill Master Drill is a trusted tool in the construction industry, but occasionally, its performance may falter.
There can be several reasons for this, including:
- Low battery charge or dead battery
- Overheating of the motor due to extended use
- Worn-out brushes or bearings
- Malfunctioning trigger or switch
To resolve these issues, follow these solutions:
- Charge or replace the battery.
- Take a break and allow the motor to cool down.
- Replace worn-out brushes or bearings.
- Replace the malfunctioning trigger or switch.
It is essential to maintain your Milwaukee Drill Master Drill regularly to keep it in optimal condition and avoid any of these issues from occurring.
Makita Drill Light On But Not Working
If you’re experiencing issues with your Makita drill, such as the light turning on but the tool not working, there are several potential causes. It could be due to a battery problem, a trigger switch stuck, or the motor parts worn or damaged.
To diagnose and fix, first, check the battery to ensure it is fully charged and properly inserted. If the battery is not the issue, try resetting the tool by disconnecting it from the power source and removing the battery for a few minutes before reassembling it.
If these steps do not resolve the issue, it may be necessary to inspect the motor or other internal components for damage or wear.
It’s recommended to seek the assistance of a professional technician if you are unsure how to proceed or if the issue persists.
Troubleshooting a Cordless Drill, Battery and Charger
FAQs: Drill Master Drill Not Working
Why is my Drill Master drill not turning on?
Check the battery charge if it’s cordless. For corded drills, ensure the power source is functional. If both are okay, there may be a switch or wiring issue that requires inspection.
What should I do if my drill overheats during use?
Allow the drill to cool down. If overheating persists, it could indicate motor or gear problems. You may need to replace the motor with a new one. However, it’s advisable to consult a professional to get the right suggestion.
My Drill Master drill makes a grinding noise. What’s wrong?
Unusual grinding noises may point to worn-out gears or bearings. Consider disassembling the drill for cleaning and inspection. If the noise continues, consult a professional.
Can I replace the chuck on my Drill Master drill myself?
Yes, you can replace the chuck yourself. It involves opening the chuck fully, removing the old one, and installing a new chuck. Be sure to follow the manufacturer’s instructions and use the right tools for a secure replacement.
When should I seek professional help for my Drill Master drill issues?
Consider professional help for complex electrical issues, motor replacement, severe damage, warranty concerns, and if you lack the expertise to conduct the repair safely and accurately. Professionals ensure safety and quality repairs, preserving your tool’s performance.
Conclusion
In the world of DIY, a non-functioning Drill Master drill can be a frustrating roadblock, but armed with the knowledge we’ve explored here, you’re well-equipped to tackle these challenges head-on.
From troubleshooting the battery to addressing motor issues, switch malfunctions, and chuck maintenance, you’ve gained valuable insights into reviving your trusty tool.
Remember, safety and precision should always be at the forefront of your efforts. While we’ve covered many common scenarios and solutions, every drill has its unique quirks.
So, whether you’ve successfully resurrected your Drill Master drill or you’re still in the midst of troubleshooting, we invite you to share your experiences and questions in the comments below.
Together, as a DIY community, we can conquer the “Drill Master Drill not working” conundrum and keep our projects moving forward!
Recent Posts
Woodworking is one of the most rewarding hobbies and professions, but it also comes with serious risks if proper precautions are not taken. Whether you're working with a table saw, planer, or simple...
What to Use If You Don't Have a Brad Nailer: Handy Alternatives
You can use a hammer and finishing nails paring with nail set or wood glue if you don't have a Brad Nailer. These tools effectively secure trim and small woodworking projects. So, if you’re in...