
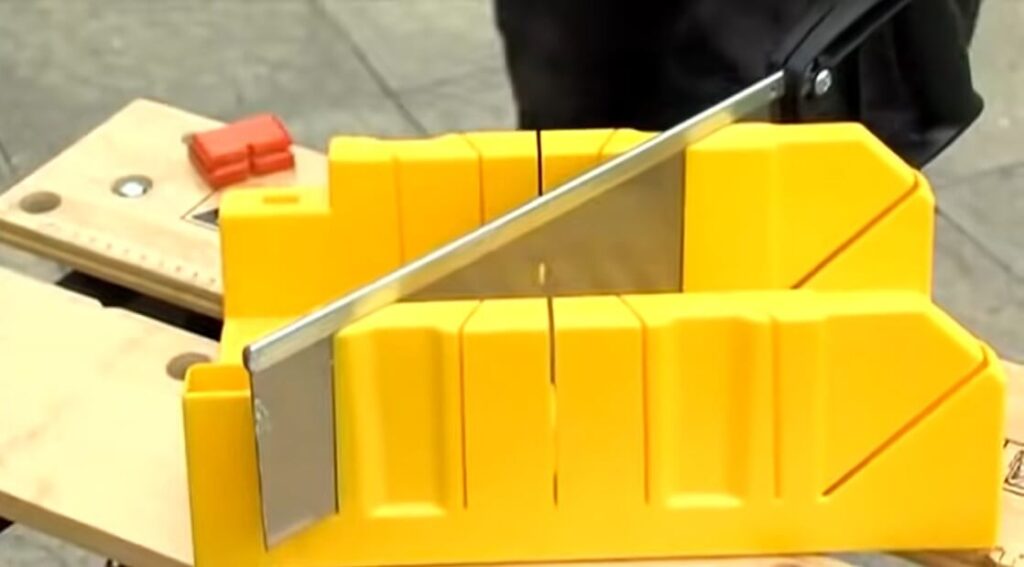
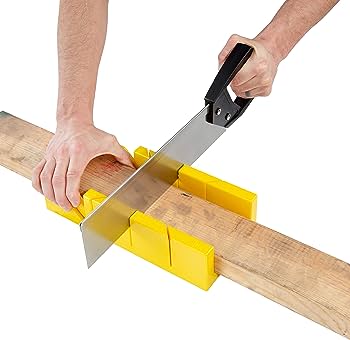
To use a miter saw box, place the material to be cut inside the box and adjust the saw blade accordingly. The box provides a stable and secure cutting surface for precise and accurate cuts.
Miter saw boxes are essential tools for woodworkers and DIY enthusiasts who require precision in their cuts. They allow you to cut material at accurate angles, ensuring that the pieces fit together perfectly. The saw box usually has pre-set angles, making it easy to cut repetitive angled pieces of the same size.
It’s also ideal for stopping debris from flying around since the saw blade cuts inside the enclosed box. By using a miter saw box, you can get uniform cuts quickly.
This article will go into more detail on how to use a miter saw box for precise cuts and provide some tips for selecting the right one for your needs.
Miter Saw Box: An Overview
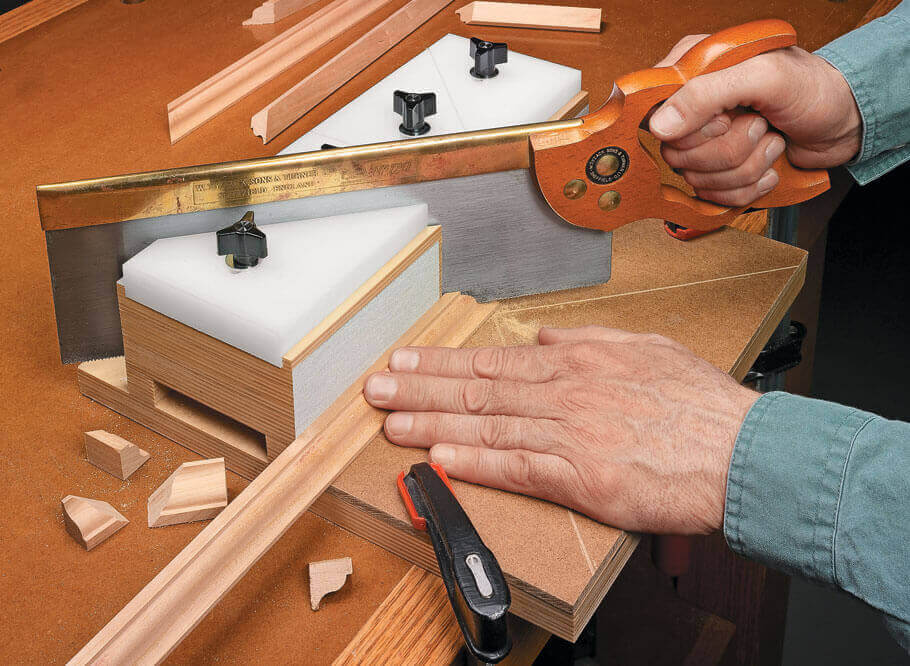
A miter saw box, also known as a miter box or miter guide, is a tool designed to assist in making precise angled cuts in woodworking and carpentry projects. It consists of a box-like structure with guides or slots that allow a hand saw or miter saw to cut materials at specific angles, such as 45 or 90 degrees.
Miter saw boxes are particularly useful for creating accurate joints, frames, and trims, and they come in various types, including traditional, compound, and adjustable angle versions, catering to different cutting needs and skill levels.
Different Types of Miter Saw Box:
Miter saw boxes come in various types, each suited for specific purposes. Here’s an explanation of the different types of miter saw boxes:
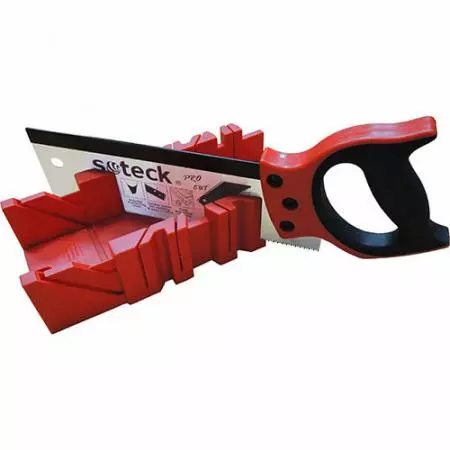
Traditional Miter Box:
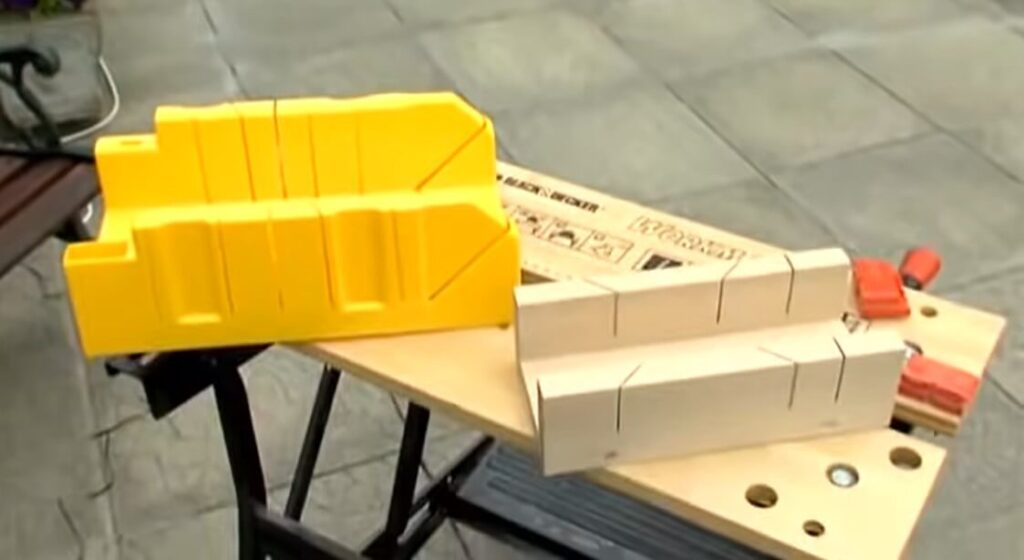
A traditional miter box is a basic, straightforward tool made of wood, plastic, or metal. It features slots to guide a handsaw at specific angles, usually 45 and 90 degrees. These boxes are suitable for DIY enthusiasts or occasional use, offering simple and affordable options for making precise cuts.
You will find basic miter boxes of various kinds, but yellow plastic is the most common. You can buy them starting at $9 to $30.
Our recommendation for a traditional miter box is the Stanley 1-20-112 Saw Storage Miter Box. It’s made of durable plastic, and you can cut 45, 90, and 22.5-degree angles with it.

Power Miter Saw with Built-in Box:
Many power miter saws come with built-in miter guides or boxes. These saws allow you to make accurate cuts quickly and efficiently. They are ideal for professionals or frequent woodworkers who need to make precise cuts regularly. The built-in guide ensures consistent angles and reduces the risk of errors.
The ultimate tool for any expert is a power miter saw, and depending on how intricate they are, they may cost anywhere from $100 to $1000.
We recommend the Metabo HPT 10-Inch Compound Miter Saw for your regular work. You can cut miter angles of 0–52 degrees to the right or left with this electric miter saw. Moreover, it can cut bevel angles between 0 and 45 degrees.

Adjustable Angle Miter Box:
Adjustable angle miter boxes offer a wider range of cutting angles beyond the standard 45 and 90 degrees. These boxes are versatile and allow you to make custom cuts for specific projects. They are valuable for projects that involve unique angles or complex designs.
In our opinion, one of the greatest adjustable angle miter boxes with a built-in saw is the CRAFTSMAN Miter Saw. You can use it with ease for a variety of woodworking tasks that call for different cutting angles without having to invest in an expensive power miter saw.

Together with the aforementioned, there are numerous miter boxes available according on the task required. Metal miter boxes, coving miter boxes, skirting board miter boxes, and guitar fret miter boxes are all available. Yet for a novice woodworker, the aforementioned standard or adjustable miter boxes will do the trick.
Benefits Of Using A Miter Saw Box For Accuracy
Using a miter saw box offers a range of benefits that contribute to precise, efficient, and accurate woodworking and cutting tasks. Here are some key advantages:
- Precision Cutting: Miter saw boxes provide a reliable guide for making precise angle cuts, ensuring accuracy, and minimizing errors in your woodworking projects.
- Consistent Angles: The built-in angle guides or adjustable stops on miter saw boxes help maintain consistent cutting angles, resulting in uniform pieces that fit seamlessly together.
- Time Savings: With a miter saw box, you can quickly set up the desired angle, allowing you to make accurate cuts without the need for trial and error. This saves valuable time during projects.
- Reduced Mistakes: Miter saw boxes help reduce the risk of mistakes and waste by eliminating guesswork and ensuring that your cuts are aligned according to your project’s specifications.
- Versatility: Different types of miter saw boxes accommodate a variety of angles, from common ones like 45 and 90 degrees to more specialized angles. This versatility enables you to work on a wide range of projects.
- Complex Cuts: Some miter saw boxes, like compound miter boxes, allow you to make complex compound angle cuts, such as beveled cuts along with angled cuts. This versatility is especially valuable for intricate woodworking projects.
- Beginner-Friendly: Miter saw boxes are ideal for beginners as they provide a user-friendly guide for making accurate cuts, giving novice woodworkers confidence and helping them develop their skills.
- Portability: Portable miter saw boxes or stands equipped with miter guides offer mobility, making it easier to work on different job sites or move around within your workshop.
- Cost-Effective: Miter saw boxes are often more affordable than power miter saws, making them a cost-effective option for individuals or hobbyists who require accurate cuts without a significant investment.
- Minimal Equipment: Unlike power miter saws that require electricity or batteries, miter saw boxes only need a hand saw, or a basic miter saw, minimizing the need for additional equipment.
- Learning Tool: Using a miter saw box can help you understand the principles of angle cutting and improve your overall woodworking skills.
- Precise Joints: Miter saw boxes enable you to create tight-fitting joints, which are essential for projects like picture frames, furniture, and trim work.
- Safety: Miter saw boxes provide a secure and controlled environment for making cuts, reducing the risk of accidents and injuries compared to freehand cutting.
- Custom Cuts: Adjustable angle miter boxes allow you to create custom angles that may not be easily achievable with standard power tools, enhancing your creative possibilities.
Whether you’re a DIY enthusiast, a hobbyist, or a professional woodworker, a miter saw box is a valuable tool that helps you achieve accurate and clean cuts, leading to well-crafted projects with professional results.
Materials Needed To Use A Miter Saw Box
Miter saw boxes have numerous benefits over using power miter saws. If you decide to use a miter saw box, you will need some additional tools, however. Here are all the materials you will need to get started with using a miter saw box:
- Miter Saw Box: The miter saw box is an essential tool that helps you make accurate and precise cuts from various angles. It is designed to hold your saw securely in place and guide it as you cut through the workpiece.
- Saw: A saw is an essential tool for using a miter saw box. It is used to make cuts, and without it, you cannot use the miter saw box. Be sure to use a saw that is compatible with your miter saw box to avoid any issues.
- Measuring Tape: Measuring tape is used to measure the length of the workpiece you plan to cut. Accurate measurements are necessary to get the right dimensions for your project and avoid any errors that could ruin the workpiece.
- Pencil: A pencil is used to mark measurements on the workpiece and the miter saw box. This is crucial for ensuring you make the right cuts and avoid mistakes that could lead to wastage.
- Clamps: Clamps are used to hold the workpiece in place while you make the cuts. This ensures that the workpiece remains steady and allows for more accurate cuts. You should use clamps that are suitable for your miter saw box and workpiece.
Using all these materials together will ensure that you get accurate and precise cuts, making your woodworking projects look professional and polished.
With these materials, you will have everything you need to get started with your miter saw box and woodworking.
Setting Up The Miter Saw Box
A miter saw box is an essential tool for any woodworker. It helps the user make precise cuts at different angles, resulting in perfect corners and joints. However, before using a saw box, you need to ensure that it’s correctly set up.
Here’s a step-by-step guide on how to assemble your saw box, tips for leveling your work surface, and an explanation of different types of saw boxes and the best one for different projects.
Step-By-Step Instructions For Assembling The Miter Saw Box
Assembling a miter saw box is a straightforward process that may vary slightly based on the type and design of the box you have. Here are the general step-by-step instructions to assemble a basic miter saw box:
- Gather Components: Ensure you have all the components needed to assemble the miter saw box. Lay them out on a clean and spacious work surface.
- Inspect Components: Check each component for any defects, damage, or missing parts. This ensures that the assembly process goes smoothly.
- Orientation: Identify the sides, bottom, and guides of the miter saw box. Some boxes might have pre-drilled holes or guides for accurate assembly.
- Align Sides: Hold two sides of the miter saw box together, aligning them at the corners. If there are pre-drilled holes, make sure they match up.
- Fastening: Depending on the design of the box, you may need to use screws, fasteners, or other methods to secure the sides together. Use the appropriate tools to fasten them securely. If using screws, ensure they’re evenly tightened.
- Attach Bottom: If your miter saw box has a separate bottom piece, align it with the sides and secure it using screws or fasteners. This provides stability to the box.
- Check Angles: If your miter saw box is meant for angled cuts, double-check that the guides or slots are aligned accurately. This is crucial for making precise cuts.
- Test: Test the miter saw box by placing a scrap piece of wood or material inside and aligning it with the guides. Ensure that the angles are correct and that the material fits snugly.
- Secure Guides (If Applicable): If your miter saw box has adjustable guides for different angles, make sure they are securely attached and can be easily adjusted.
- Practice Cuts: Before using your miter saw box for a project, practice making cuts on scrap material to ensure that the angles are accurate and the box functions as intended.
Tips For Ensuring You Have A Level Work Surface
Leveling your work surface is vital when using a miter saw to ensure your cuts are precise. Here are some tips:
- Start by ensuring that the surface of your saw box is stable and doesn’t wobble.
- Use a bubble level to ensure that the saw box is level both from left to right and front to back.
- Check that the saw blade is perpendicular to the saw box base and its fences.
Choosing the Right Miter Saw Box for Your Project:
Choosing the right miter saw box depends on various factors. These are:
- Project Type: Consider the type of projects you’ll be working on. If you’re tackling simple DIY tasks, a traditional miter box might suffice. For more intricate projects or professional work, a compound miter box or a power miter saw with a built-in box could be better suited.
- Accuracy: If precision is crucial, opt for a miter box that offers adjustable stops or built-in guides to ensure consistent and accurate cuts.
- Mobility: Depending on whether you work in a fixed workshop or on different job sites, choose a miter saw box that suits your mobility needs. A portable stand with an integrated box might be the right choice for contractors on the move.
- Budget: Miter saw boxes vary in price based on features and quality. Consider your budget and balance it with the features you need for your projects.
- Future Projects: Think about your future projects as well. Investing in a versatile miter box might save you from having to buy additional tools down the line.
By evaluating your specific needs, project requirements, and preferences, you can choose the right miter saw box that will enhance your woodworking or DIY endeavors.
Using a saw box that’s not correctly set up can affect the quality of your cuts. Ensure that you follow the step-by-step assembly guide, level your work surface, and choose the right saw box for your project.
If you do this, you’ll be sure to make precise, accurate, and perfect cuts every time.
How To Make Accurate Cuts With Miter Saw Box?
A miter saw box is an essential tool for woodworkers who want precision and accuracy when cutting wood. This tool ensures that your cuts are perfectly angled and that your workpiece is secure when cutting with a miter saw.
Here, we’ll explore how to make accurate cuts with a miter saw box.
1. Measure And Mark Your Material
Before making any cuts, you must measure and mark your material properly. Here are the steps to follow:
- Measure the length of the board or piece of wood that you want to cut.
- Mark the board at the desired length using a pencil and a square, ensuring that the line is straight and centered.
- Use a t-bevel to check the angle of the cut that you want to make, aligning the blade of the t-bevel with the marked line.
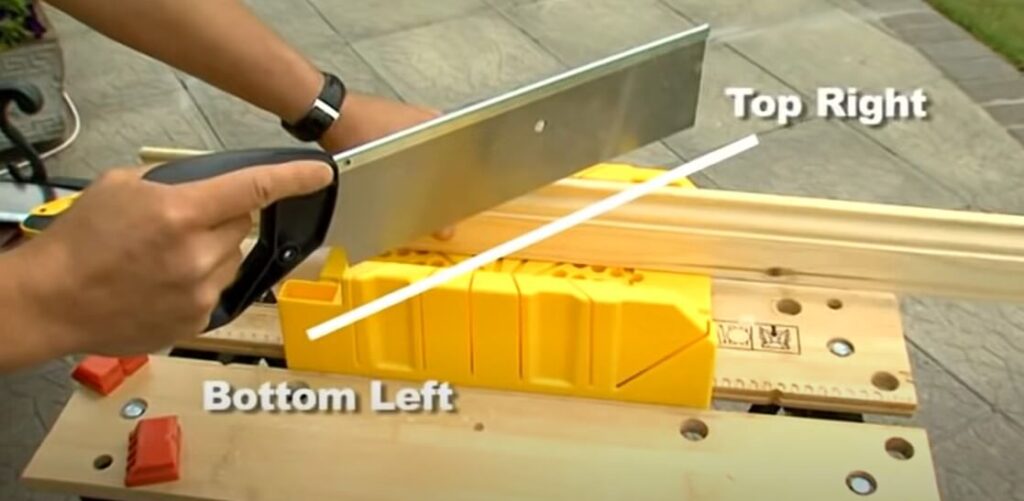
2. Aligning Your Saw For A Precise Cut
After measuring and marking, aligning your saw is the next essential step in achieving a precise cut. Follow these best practices when aligning your saw:
- Ensure that the blade is aligned with the marked line on your workpiece.
- Adjust the saw according to the angle you want to cut by adjusting the bevel and miter angles.
- Secure your workpiece in the miter saw box to prevent it from moving while cutting.
3. Ensuring Your Blade Is Properly Adjusted For Your Project
The final step to getting accurate cuts is to ensure that your blade is correctly adjusted for your project. Here are some tips to follow:
- Check if the blade is sharp and clean. Dull blades can lead to inaccurate cuts and can damage your workpiece.
- Adjust the blade height to the thickness of the workpiece.
- Make sure that the blade is perpendicular to the workpiece to avoid uneven cuts.
How To Use A Back Saw And Miter Box?
Using a back saw and miter box is a straightforward process. To begin, ensure that you have the necessary materials and tools, including a back saw, miter box, and wood.
Here are the steps to follow:
- Measure the length of the wood piece you want to cut and mark it on the wood.
- Place the wood in the miter box, ensuring that it is secure and stable.
- Adjust the angle of the miter box to your desired angle.
- Hold the back saw at a 45-degree angle and place it in the miter box’s slot.
- Begin cutting the wood, using a smooth and steady motion.
- Once you complete the cut, remove the wood from the miter box and inspect the cut for accuracy.
- Sand the cut edges as necessary to achieve a clean finish.
How To Use A Miter Box Hand Saw?
To use a miter box hand saw, follow these steps:
- Secure the miter box to a stable surface such as a workbench or sawhorse.
- Determine the angle of the cut and set the saw’s miter gauge accordingly.
- Place the material to be cut into the miter box, ensuring that it is snugly fitted against the saw guide.
- Use one hand to hold the material in place, while the other hand guides the saw along the guide slots of the miter box.
- Make the cut using short, steady strokes, keeping the saw blade perpendicular to the material.
- Repeat steps 2-5 for additional cuts, making sure to adjust the miter gauge as needed.
- Once all cuts are complete, remove the material from the miter box and inspect the cuts for accuracy and smoothness.
How To Use A Miter Box and Tenon Saw?
A miter box and tenon saw are essential tools for any woodworker or carpenter who wants to create accurate and precise cuts. A miter box is a tool that helps with making angled cuts, such as when creating picture frames or molding.
The tenon saw, on the other hand, is a hand saw that is used for cutting tenons, or small, square projections at the end of a piece of wood.
Together, these tools can be used to create precise cuts in a variety of woodworking projects, from simple picture frames to complex furniture pieces.
To properly use a miter box and tenon saw, follow these steps:
Set-Up:
- Place the miter box on a stable work surface.
- Ensure the material you’re cutting fits securely in the miter box.
Mark the Cut:
- Mark the exact point where you want to make the cut on the material.
Select Angle:
- Choose the appropriate angle on the miter box for your cut (e.g., 45 or 90 degrees).
Position Material:
- Align the marked point with the corresponding angle guide on the miter box.
Secure Material:
- Hold the material firmly against the angle guide to prevent shifting during the cut.
Sawing:
- Hold the tenon saw perpendicular to the material’s surface.
- Start the cut with a slow and controlled motion, ensuring the saw’s teeth engage the material.
Maintain Alignment:
- Keep the saw aligned with the angle guide throughout the cut.
Steady Cutting:
- Apply steady and even pressure while sawing, allowing the saw to do the work.
Complete the Cut:
- Continue sawing until you’ve cut through the entire material.
Inspect the Cut:
- Examine the cut to ensure it’s clean and accurate.
Using a miter box and tenon saw combination can help you achieve precise angled cuts in woodworking projects. Remember to practice proper safety measures and maintain control throughout the cutting process.
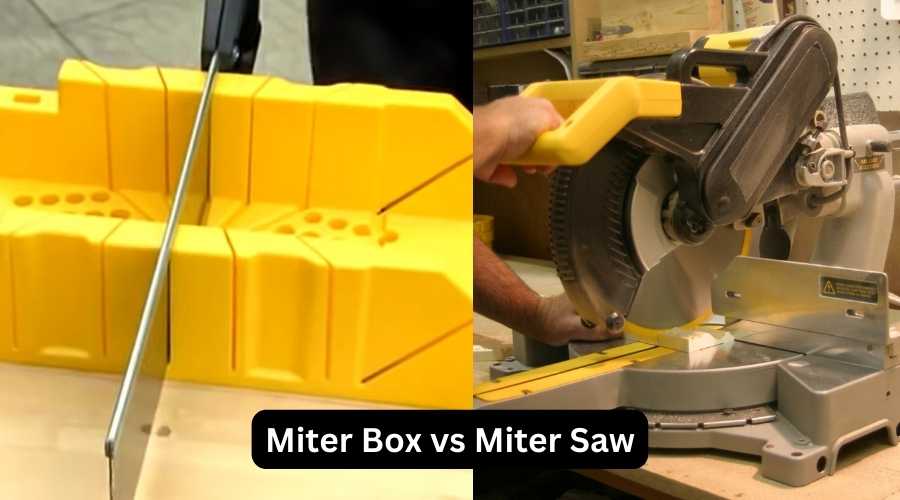
Is a miter box as good as a miter saw?
A miter box and a miter saw serve similar purposes but have different levels of precision and convenience.
A miter box is a simple tool used for making accurate crosscuts and angled cuts in wood or other materials. It consists of a box-like frame with slots or guides where you place your workpiece. You then use a handsaw to cut along the predetermined angles indicated on the miter box. While a miter box can provide decent accuracy for basic cuts, it heavily relies on your manual skills and can be time-consuming, especially for large projects.
On the other hand, a miter saw is a power tool designed specifically for making precise crosscuts and angled cuts. It uses a circular saw blade mounted on a hinged arm, and you can easily adjust the angle and bevel settings to make accurate cuts. Miter saws are more efficient, consistent, and quicker than using a miter box and a handsaw. They are widely used by professionals and DIY enthusiasts for tasks like framing, trim work, and woodworking projects.
In summary, if you’re looking for efficiency, precision, and versatility, a miter saw is generally a better choice compared to a miter box. However, if you have limited space, budget constraints, or are working on smaller projects where precision isn’t as critical, a miter box can still be a useful tool.
Safety Tips For Using Miter Saw Box
Using a miter box involves operating cutting tools, so safety precautions are crucial. Here’s a brief overview of safety measures to take:
- Eye and Hand Protection: Wear safety goggles to shield your eyes from debris. Gloves provide protection for your hands during the cutting and handling of materials.
- Stable Work Surface: Ensure your miter box is set up on a stable and level work surface to prevent wobbling or tipping during use.
- Secure Material: Hold the material firmly against the miter box guides to prevent it from shifting while cutting.
- Proper Body Position: Stand to the side of the cutting path to avoid potential contact with the saw blade.
- Start and Stop Slowly: Initiate and end cuts gradually to maintain control and reduce kickback.
- Clear Work Area: Keep the work area clean from clutter and other materials to prevent accidents.
- Follow Guidelines: Adhere to the manufacturer’s guidelines and user manual for the specific miter box model.
- Use Sharp Tools: Ensure that your hand saw or miter saw is sharp. Dull blades can cause binding and accidents.
- Mind Blade Clearance: Be aware of the clearance between the blade and your hands or body during the cut.
- Disconnect Power: If using a power miter saw, unplug it when changing blades or making adjustments.
- Practice First: If you’re new to using a miter box, practice on scrap material before tackling your project.
- No Rushing: Take your time while cutting to maintain control and prevent mistakes or accidents.
By following these safety measures, you can mitigate risks and create a safer environment when using a miter box for your woodworking tasks.
Troubleshooting Tips For Miter Saw Box
A miter saw box is an excellent tool for making angled cuts, but it’s not uncommon to encounter challenges when using it. If you’re aware of the most common issues and how to resolve them, it can save you both time and materials.
Here are some troubleshooting tips for using a miter saw box:
- The most typical issue is an imprecise cut. There are two main reasons for this: incorrect placement and misaligned saw blade. To avoid this issue, make sure the miter saw box is properly secured, and the blade is precisely aligned with the cut line.
- If the saw blade is binding or not cutting smoothly (creating rough edges), check if it’s dull or damaged and replace it if necessary.
- Additionally, ensure that the saw blade is tightened correctly and that the miter box is securely clamped to the work surface.
- Clear sawdust and debris from the guides to prevent interference with the material and the saw blade.
- Lastly, inspect the alignment of the saw blade and adjust it accordingly to ensure that it’s cutting straight.
Remember that a miter saw box may take some time to get used to. If you’re experiencing issues with your cuts, don’t hesitate to halt and make adjustments. Proper troubleshooting techniques not only save you time and materials but also make your task significantly safer.
By following the tips mentioned in this section, you can achieve great outcomes with your miter saw box and complete the job without waste.
FAQs: How To Use A Miter Saw Box?
What Is A Miter Saw Box Used For?
A miter saw box is used to guide saw cuts at precise angles, ensuring accurate cuts.
How Do I Set Up A Miter Saw Box?
First, attach the saw to the box. Next, adjust the angle and depth of the saw blade to the desired specifications.
What Materials Can I Cut With A Miter Saw Box?
A miter saw box can be used to cut wood, plastic, and soft metals such as aluminum.
What Safety Precautions Should I Take When Using A Miter Saw Box?
Miter boxes are hand tools. Hence, it is less destructive than a power miter saw. But, since you’ll be handling sharp objects, you should exercise caution, and it’s safer to wear gloves.
Can A Miter Saw Box Be Used By Beginners?
Yes, a miter saw box is a great tool for beginners to use. It helps ensure accurate cuts while providing added safety.
What Are The Advantages Of Using A Miter Saw Box?
Using a miter saw box allows for precise angle cuts and increased accuracy compared to freehand cutting. Most importantly, it won’t cost you a fortune to get a bevel or miter cut. It also helps promote safety during use.
How Often Do I Need To Maintain My Miter Saw Box?
To maintain a miter box, regular cleaning, and inspection are sufficient. As it’s a straightforward hand instrument, it won’t need as much maintenance as an electrical miter saw. For best results, keep the saw blade sharp and check for loose parts.
Conclusion
As we reach the end of this guide, it’s clear to see that a miter saw box can be an invaluable tool for any DIY enthusiast. From increasing precision to improving safety, this versatile piece of equipment is a must-have for anyone looking to take their woodworking skills to the next level.
By following the steps we’ve outlined, you’ll be able to use your miter saw box in a range of projects, all while saving time and reducing the risk of accidents.
So, whether you’re cutting crown molding or creating custom picture frames, be sure to invest in a quality miter box and take advantage of all its benefits.
With a little practice, you’ll soon see just how much of a difference it can make to your DIY projects.
Related Posts:
- How To Use A Miter Saw To Cut Angles?
- What Can You Do With A Miter Saw?
- Miter Saw Vs Circular Saw: Which Is Most Useful?
Recent Posts
Woodworking is one of the most rewarding hobbies and professions, but it also comes with serious risks if proper precautions are not taken. Whether you're working with a table saw, planer, or simple...
What to Use If You Don't Have a Brad Nailer: Handy Alternatives
You can use a hammer and finishing nails paring with nail set or wood glue if you don't have a Brad Nailer. These tools effectively secure trim and small woodworking projects. So, if you’re in...