
Yes, you can hammer a nail into Hardie board, but it’s not as straightforward as it may seem. Hardie board, renowned for its durability, poses unique challenges when it comes to nailing.
In this comprehensive guide, we’ll explore the art of nailing into Hardie board, equipping you with the knowledge and techniques needed to conquer this rugged material.
So, if you’ve ever wondered, “Can You Hammer A Nail Into Hardie Board?” – the answer is yes, and we’re here to show you how to do it right. Let’s dive in.
What Is Hardie Board Siding?
It is critical to understand the nature of Hardie board siding before attempting to apply it with a hammer. Let’s learn what a Hardie board is.
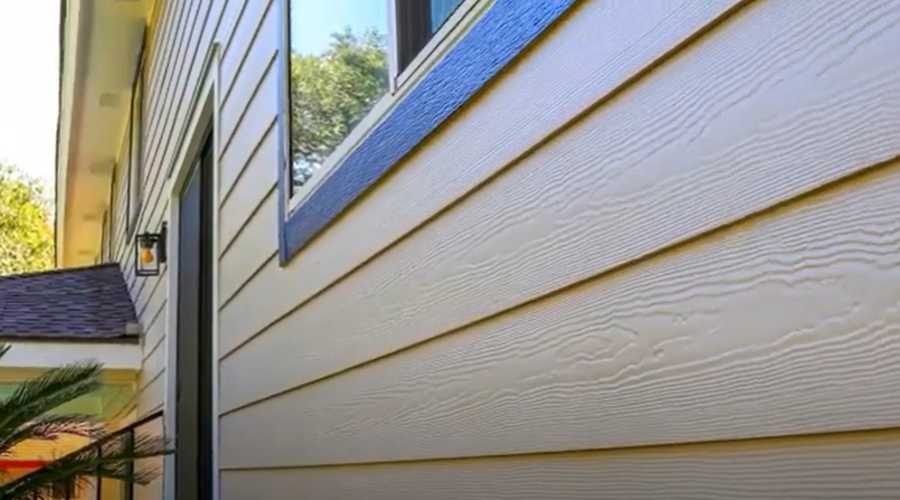
Hardie board siding, also known as fiber cement siding, is a popular building material renowned for its durability and versatility in construction projects. It’s composed of a mixture of cement, sand, and cellulose fibers, resulting in a sturdy yet lightweight material that mimics the appearance of traditional wood siding.
Advantages of Hardie Board Siding:
One of the key advantages of Hardie board siding is its ability to withstand various environmental factors, making it a preferred choice for both residential and commercial applications.
It offers the following benefits:
Durability: Hardie board is resistant to rot, pests, and fire, making it an ideal choice for areas prone to extreme weather conditions.
Low Maintenance: Unlike wood siding, Hardie board requires minimal maintenance and is less susceptible to peeling, cracking, or fading over time.
Versatility: It comes in a wide range of styles, textures, and colors, allowing homeowners and builders to achieve various architectural aesthetics.
Longevity: Hardie board siding often comes with extensive warranties, ensuring its longevity and peace of mind for property owners.
Energy Efficiency: When installed properly, it provides excellent insulation, helping to reduce energy costs and maintain indoor comfort.
Overall, Hardie board siding has become a popular choice for those seeking a durable, aesthetically pleasing, and low-maintenance exterior cladding solution for their homes or buildings.
However, working with Hardie board, particularly when it comes to nailing into it, requires some specialized knowledge and techniques due to its density and composition. This brings us to the central question: “Can You Hammer A Nail Into Hardie Board?”
“When nailing into Hardie board siding, it’s crucial to follow our guidelines for fasteners and installation techniques. Proper preparation, including pre-drilling pilot holes, and using our recommended nails or screws, ensures a secure attachment without compromising the integrity of the siding.”
– James Hardie
Can You Hammer A Nail Into Hardie Board?
Imagine you’re embarking on a home improvement project, armed with determination and a trusty hammer, ready to tackle any challenge that comes your way.
But then you encounter Hardie Board, a formidable opponent known for its toughness.
The burning question arises: “Can you nail into a hardie board?”
The answer is: Yes, you can indeed hammer a nail into a Hardie board. However, it’s essential to approach this task with caution and the right techniques, as nailing into Hardie board presents unique challenges.
Challenges Of Nailing Into Hardie Board:
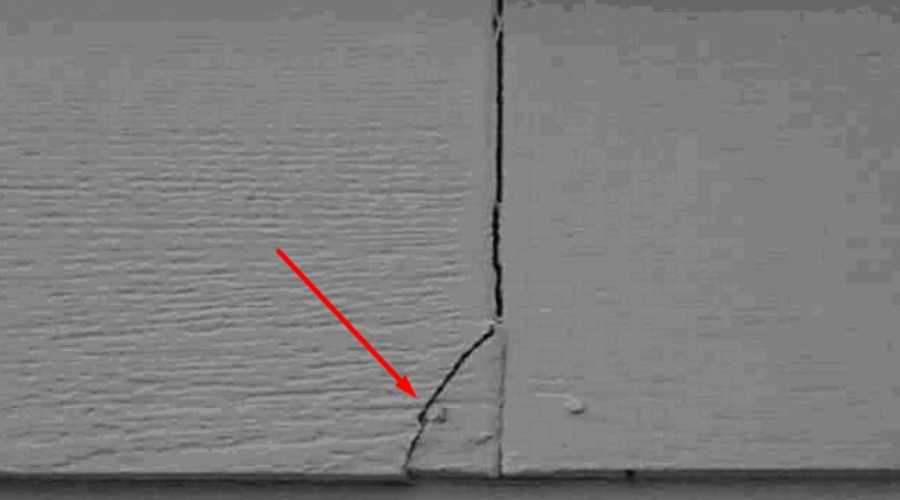
- Density: Hardie board is incredibly dense, thanks to its cement and fiber composition. This density makes it much tougher to penetrate with a nail compared to traditional wood siding. As a result, standard nailing methods won’t suffice.
- Risk of Cracks: Attempting to hammer a nail directly into Hardie board without proper preparation can lead to cracks and damage to the siding. This is due to the material’s rigidity.
Potential Risks And Issues If Not Done Correctly:
- Cracking and Splintering: Incorrect nailing can cause the Hardie board to crack or splinter, compromising its integrity and appearance. These flaws can be challenging and costly to repair.
- Moisture Infiltration: Poorly executed nailing can create gaps in the siding, allowing moisture to infiltrate. This can lead to rot, mold growth, and other structural problems over time.
- Voided Warranties: Many Hardie board manufacturers offer warranties, but improper installation, including nailing, may void these warranties. This can be a costly mistake for homeowners.
Therefore, to hammer a nail into Hardie board successfully, it’s essential to follow specific guidelines and techniques, such as using the right type of nails, pre-drilling pilot holes, and maintaining proper spacing.
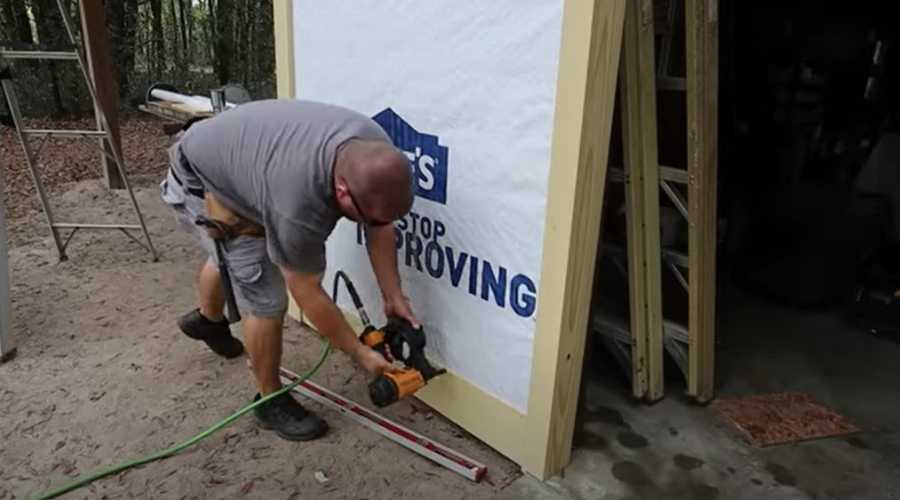
You might also consider installing Hardie board siding with a power nail gun. Power siding nailers will assist you in achieving precision and speed while also preventing the Hardie board from breaking. In such scenario, look for an efficient siding nailer, such as the Bostitch N66C coil siding nailer, which is designed specifically for outside siding.
However, we’ll explore the techniques for hammering nails into Hardie board and more in the upcoming sections to ensure that your Hardie board projects are not only achievable but also maintain the quality and longevity of this durable siding material.
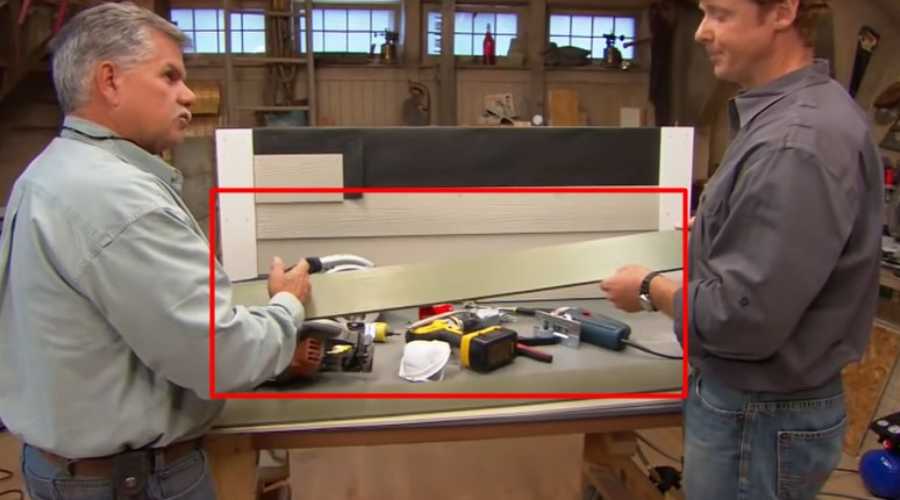
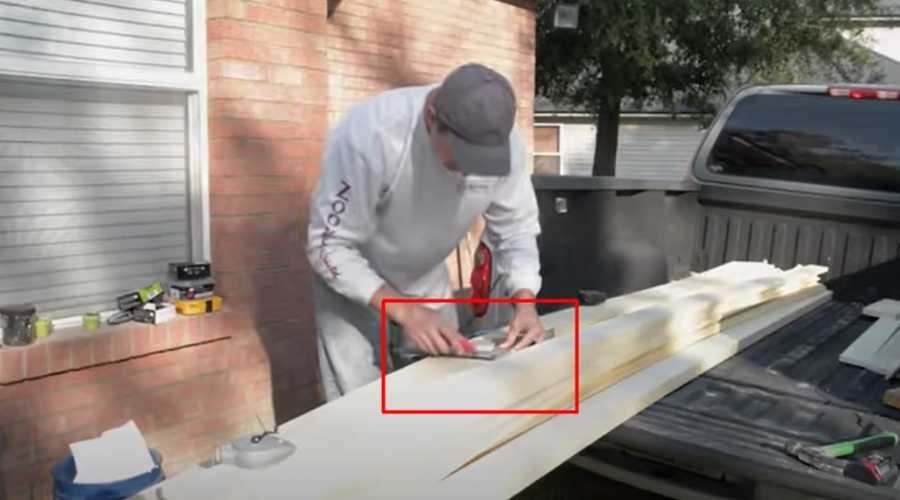
Tools And Materials Needed
Gathering the necessary tools and supplies is a prerequisite for the success of any construction project. Though hammering nails into Hardie board siding appears to be an easy task, it requires adequate competence and the right tools.
“In my experience, nailing into Hardie board requires precision and the right tools. I’ve found that pre-drilling pilot holes and using stainless steel or galvanized nails or screws can significantly reduce the risk of splitting or damaging the siding. It’s all about attention to detail and following best practices.”
John Smith, Professional Siding Installer
Let’s find the list of essential tools and materials required for nailing into Hardie board, including important safety equipment:
- Hardie Board Siding: The primary material you’ll be nailing into.
- Nails: Use corrosion-resistant nails designed for exterior use. Stainless steel or galvanized nails are good options.
- Hammer: Choose a hammer of appropriate size and weight for better control and precision.
- Pilot Hole Drill Bit: You’ll need a drill bit that matches the size of the nails or screws you’re using to create pilot holes.
- Power Drill: A drill is essential for creating pilot holes quickly and accurately.
- Tape Measure: To ensure proper spacing between nails and achieve a neat finish.
- Carpenter’s Pencil: For marking where you’ll make your nail holes.
- Caulk and Caulk Gun: To seal gaps and joints in the siding for weatherproofing.
- Circular Saw or Shears: For cutting Hardie board to the desired dimensions and shapes.
- Level or Straight Edge: To ensure your siding is installed straight and level.
- Safety Glasses or Goggles: Protect your eyes from flying debris and dust generated during installation.
- Work Gloves: Protect your hands from sharp edges and splinters.
- Dust Mask: Wear a mask to avoid inhaling dust and particles when cutting or drilling Hardie board.
- Ear Protection: If you’re using power tools, consider ear protection to reduce noise exposure.
- Ladder or Scaffolding: Depending on the height of your project, you may need a secure platform to work from.
- Safety Harness: For projects involving heights, ensure safety with a harness and appropriate fall protection gear.
- Sealant/Primer: Some projects may require sealing or priming Hardie board before installation.
- Paint and Brushes/Rollers: If you plan to paint the siding, have the necessary paint and application tools on hand.
Having these tools and materials readily available will not only ensure the successful installation of Hardie board but also contribute to a safer and more efficient work environment.
Always prioritize safety and follow manufacturer guidelines for both tools and Hardie board installation.
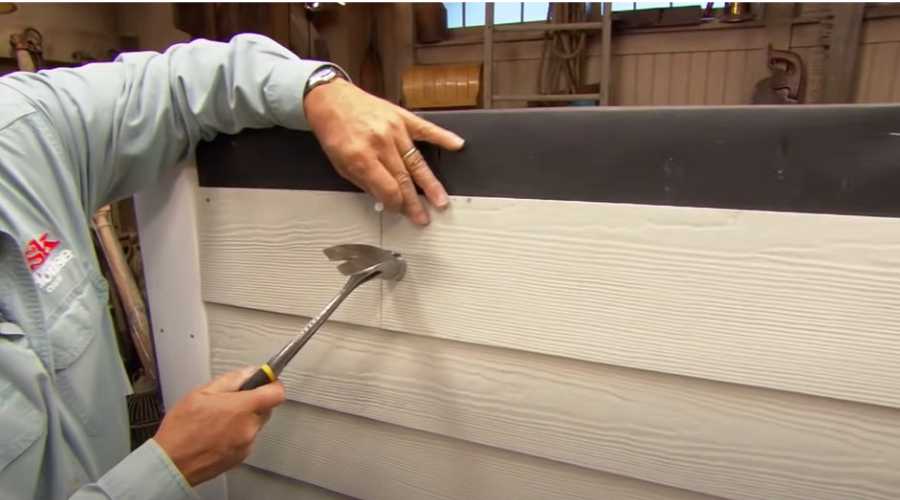
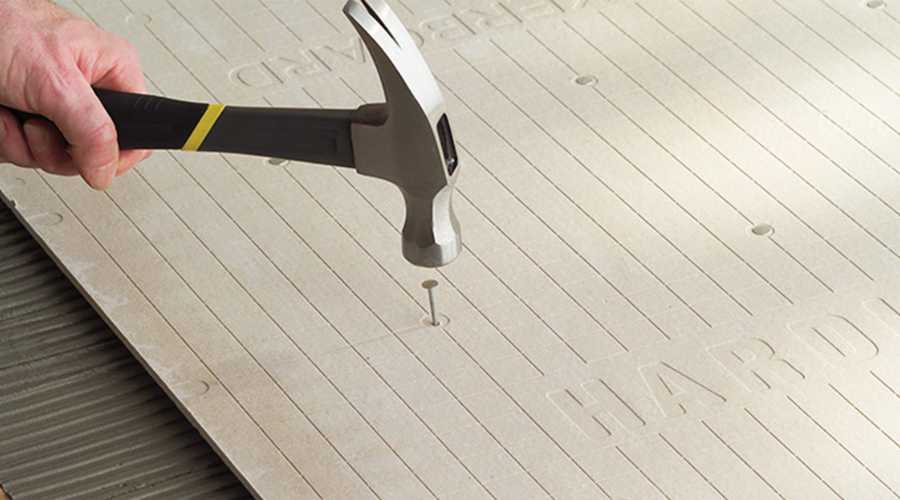
Steps to Hammer a Nail into Hardie Board
We learned from the preceding discussion that it is feasible to hammer a nail through a Hardie board. We also learn about the tools and supplies needed to do this task. Now we’ll show you how to properly drive nails into Hardie board siding.
Let’s get started.
Step 1: Gather Your Tools and Safety Gear
- Ensure you have all the necessary tools and materials, as mentioned earlier.
- Put on safety glasses or goggles, work gloves, a dust mask, and any other appropriate safety equipment.
Step 2: Measure and Cut the Hardie Boards
- Measure the Hardie Board according to your wall size.
- Cut the board by using a circular saw or miter saw (which is available to you). You can also use a knife to cut the board easily.
Step 3: Mark the Nailing Locations
- Measure and mark the locations where you intend to nail the Hardie board.
- According to James Hardie, put nails one inch down from the top of each board.
- Maintain proper spacing between nails (usually 16 inches apart for wall installations) and follow any manufacturer guidelines.

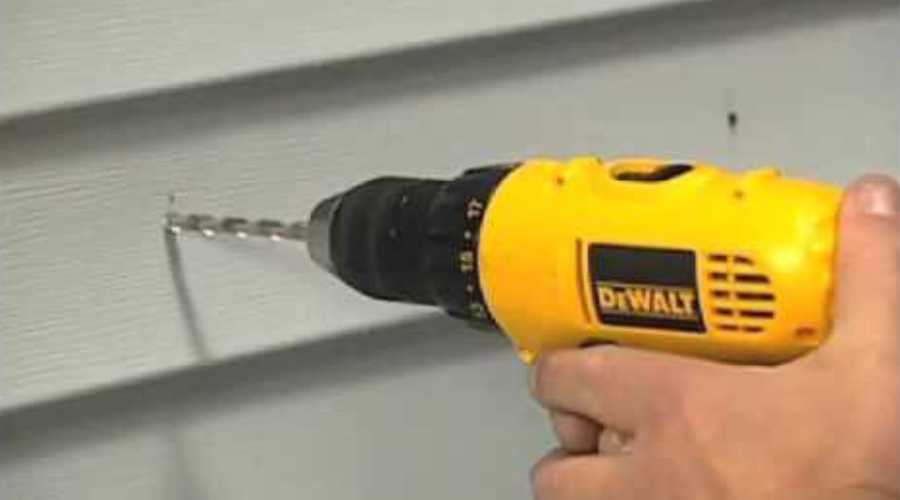
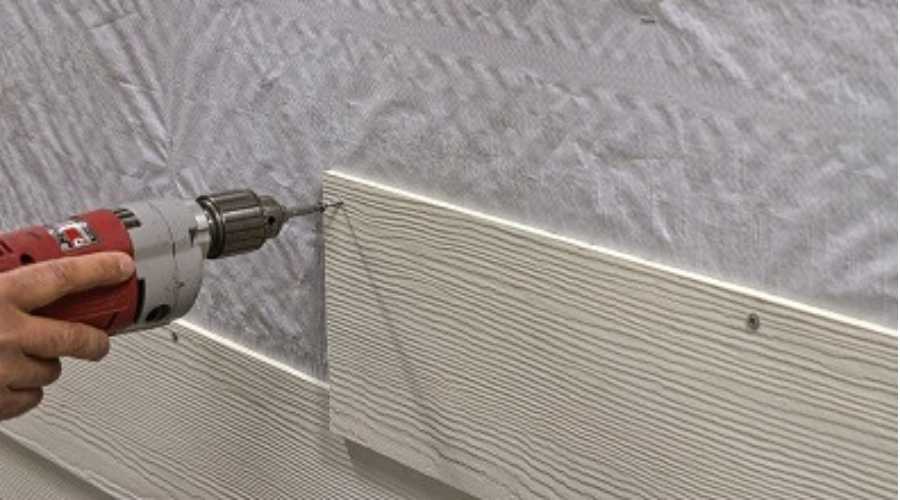
Step 4: Pre-drill Pilot Holes
- Select a drill bit that matches the size of the nails you’re using.
- Drill pilot holes at each marked location. The pilot holes should be slightly smaller than the nail diameter.
Step 5: Insert Nails
- Place the nail in the pilot hole and position the head of the hammer over the nail.
- Hold the hammer securely and align it perpendicular to the Hardie board.
Step 6: Nail Placement
- Gently tap the nail to start it in the pilot hole.
- Maintain a steady hand and a controlled, straight motion while hammering.
- Avoid excessive force, as it can crack or damage the Hardie board.
Step 7: Drive the Nail
- Gradually increase the force while maintaining control, driving the nail until it’s flush with the surface of the Hardie board.
- Be cautious not to overdrive the nail, which can also damage the board.

Step 8: Repeat
- Repeat the process for all the marked nail locations.
You can use glue to hold the sidings in place alongside nails. After you’ve finished nailing the entire project, you may fill in the nail gaps with putty and paint them.
Alternatives To Nailing Into Hardie Board
Hammering nails into Hardie siding is not the only method to attach them. You will find several alternatives, such as screws or anchors. These methods are often preferable in specific situations due to their reliability, strength, and ability to address certain challenges.
Here’s a discussion of these alternatives and when to use them:
1. Using Screws For Installing Hardie Board:
Using screws for installing Hardie board siding is a common practice and a reliable method for attaching the panels to the exterior of a building. It is recommended to use galvanized screws to avoid rusting and ensure long-lasting performance.
Additionally, it is important to follow the manufacturer’s guidelines for proper spacing and placement of screws to ensure the integrity of the siding and avoid damage to the panels.
Let’s find out when it is appropriate to use screws instead of nails.
- High Stability Needed: Screws are a preferred choice when you require a high level of stability and load-bearing capacity. They offer a stronger grip compared to nails.
- Outdoor Installations: In exterior applications where exposure to weather and temperature fluctuations is a concern, screws with corrosion-resistant coatings, like stainless steel, are ideal.
- Attaching Heavy Objects: When attaching heavy fixtures, such as outdoor lights, house numbers, or decorative elements, screws provide the necessary strength to hold them securely.
- Precise Control: Screws allow for more precise control during installation, as you can adjust the tension to achieve the desired tightness.
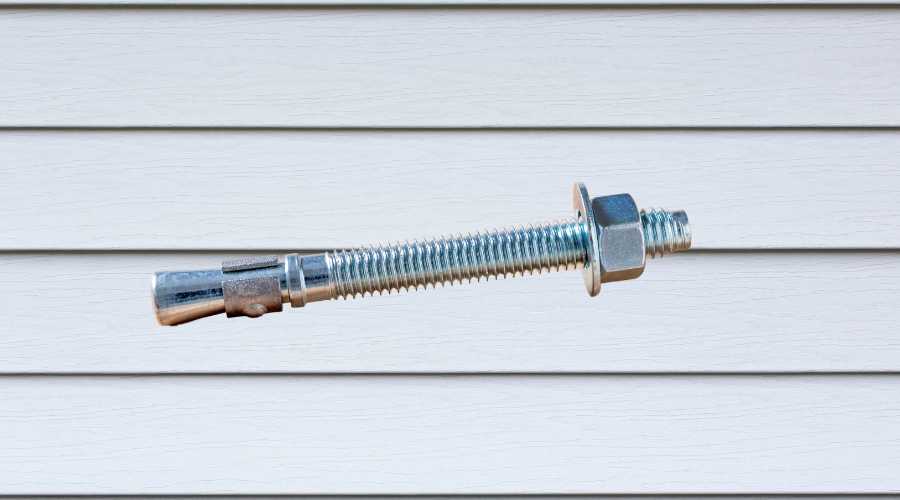
2. Using Anchors For Hardie Board:
It’s critical to choose the best method for securing the Hardie panels to your home. While nails have traditionally been used, many professionals now recommend using anchors instead.
Anchors provide a more secure hold, are less likely to cause damage to the siding, and offer better resistance against wind and weather conditions.
Ultimately, using anchors can help ensure that your Hardie siding remains firmly anchored to your home, providing long-lasting protection and beauty.
Let’s find out when to use anchors.
- Hanging Heavy Objects: Anchors are particularly useful when hanging heavy items like large mirrors, shelves, cabinets, or TV mounts. They distribute the weight more evenly and prevent damage to the Hardie board.
- Drywall Anchors: For lighter items like pictures, small shelves, or towel hooks, drywall anchors can be used with Hardie board. These are easy to install and provide reliable support.
- Versatility: Anchors come in various types, such as toggle bolts, molly bolts, or plastic anchors. Choosing the right type depends on the weight of the object you’re attaching and the specific requirements of your project.
Why These Alternatives Are Preferable:
Strength and Durability: Screws and anchors offer enhanced strength and durability, making them suitable for items that require a secure and long-lasting attachment to Hardie board.
Preventing Cracks: Unlike nails, screws and anchors create larger pilot holes, reducing the risk of cracking or splitting the Hardie board during installation.
Versatility: These alternatives are versatile and can be used in a wide range of applications, from lightweight decorations to heavy fixtures, providing flexibility in your projects.
Weather Resistance: Screws and anchors made from corrosion-resistant materials are ideal for outdoor installations as they withstand exposure to moisture and temperature variations.
Ease of Adjustment: Screws, in particular, allow for adjustments, making it easier to ensure that your attached items are level and securely fastened.
Reduced Maintenance: Using screws or anchors can reduce the need for maintenance, as they are less likely to loosen over time compared to nails.
In summary, screws and anchors are valuable alternatives for attaching items to Hardie boards, especially when stability, durability, or precise control are essential.
Assess the specific requirements of your project and the weight of the items you’re attaching to determine whether screws, anchors, or another method is the best choice.
Precautions And Tips
When hammering nails into Hardie siding, it is critical to take some precautions. As inappropriate hammer use may result in the destruction of the panel or injury to you.
Here are some pointers and measures to help you install Hardie board with a hammer successfully.
- Wear Safety Gear: Always wear safety glasses or goggles, gloves, and a dust mask to protect yourself from debris and dust.
- Use the Right Nails: Choose corrosion-resistant nails designed for use with Hardie board to prevent rust and ensure durability.
- Control Hammer Strikes: Hammer steadily and with controlled force. Avoid swinging too hard or using excessive force, which can damage the Hardie board.
- Proper Nailing Angle: Maintain a perpendicular angle between the hammer and the Hardie board to ensure the nails go in straight.
- Pilot Holes: Always drill pilot holes before inserting nails. This prevents cracking and makes nailing easier.
- Follow Manufacturer Guidelines: Consult the manufacturer’s recommendations for nail size, spacing, and other installation guidelines.
- Avoid Overdriving: Be cautious not to drive the nails too far into the Hardie board. Nails should be flush with the surface but not sunk too deep.
- Inspect Your Work: After nailing, inspect the Hardie board for cracks or damage. If you notice any issues, address them promptly.
By following these steps and safety tips, you can successfully hammer nails into Hardie board while maintaining precision and ensuring the safety of your project and yourself.
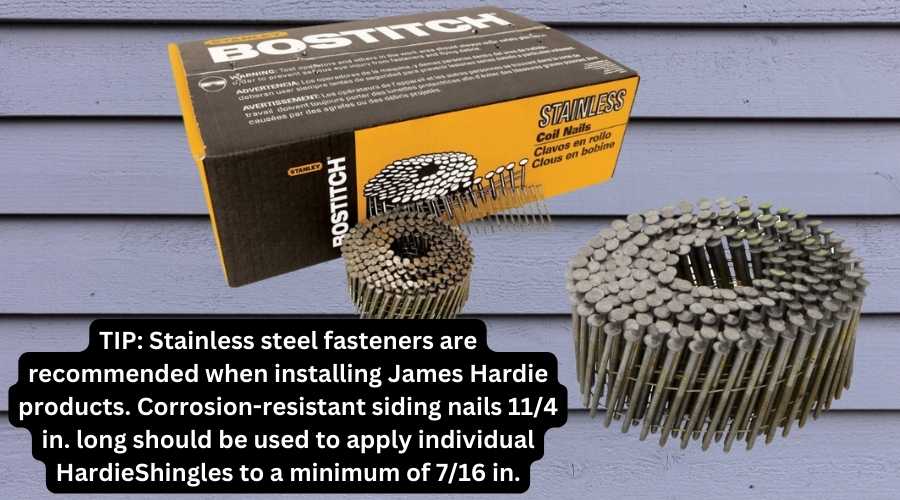
What Size Nails For Hardie Plank Siding?
When installing Hardie plank siding, it’s important to use the correct size nails to ensure a secure and long-lasting attachment. The appropriate nail size can vary based on the specific Hardie plank product you are using and the installation method, but here are some general guidelines:
HardiePlank Lap Siding: For HardiePlank lap siding, which is a common type of Hardie plank siding, 6d or 8d galvanized or stainless steel siding nails are typically recommended. These nails should be corrosion-resistant to withstand outdoor conditions.
The length of these nails should be around 2 to 2.5 inches (6d) or 2.5 to 3 inches (8d) to provide sufficient penetration and holding power.
HardieShingle Siding: If you are installing HardieShingle siding, the nail size and length may differ slightly. Follow the manufacturer’s guidelines provided with the specific product, but you can generally use similar 6d or 8d nails with appropriate lengths.
Pre-painted Hardie Plank Siding: If you are working with pre-painted Hardie plank siding, be cautious not to damage the finish when nailing. Use care and consider touch-up paint for any nail heads that are exposed.
It’s important to check the installation instructions and guidelines provided by James Hardie, the manufacturer of Hardie plank siding, as they may have specific recommendations for the type and size of nails to use with their products.
Additionally, local building codes and climate conditions may influence the choice of fasteners.
So consulting with a local building authority or a professional installer is also advisable to ensure compliance with local regulations and optimal siding performance.
Can You Nail Into Fiber Cement Siding?
Yes, you can nail into fiber cement siding. Fiber cement siding is designed to be fastened to the exterior of buildings, and nails or screws are commonly used for secure installation.
It’s essential to follow manufacturer guidelines for the correct type and size of fasteners to ensure a proper and durable attachment.
Can I Use A Framing Nailer For Hardie Siding?
No, you should not use a framing nailer for Hardie siding. Framing nailers are not suitable for installing Hardie board siding as they provide a sudden thrust that can split the board.
Instead, it’s recommended to use specialized siding nailers, siding screws, or pneumatic nail guns designed for fiber cement siding installation.
These tools are specifically designed to prevent cracking and ensure secure attachment without damaging the siding.
Should I Nail Or Screw Hardie Board?
When it comes to installing Hardie board siding, choosing between nails and screws is a critical decision. Each fastening method has its pros and cons.
Below is a comparison table to help you make an informed choice:
| Aspect | Nails for Hardie Board | Screws for Hardie Board |
|---|---|---|
| Strength | May not be as strong as screws, especially for heavy items. | It offers excellent strength and is ideal for heavy fixtures or areas with high wind exposure. |
| Installation Speed | Faster installation is due to the simpler application. | Slightly slower installation as it requires pre-drilling pilot holes. |
| Risk of Cracking | Higher risk of causing cracks or splits in the Hardie board due to the impact force during installation. | Lower risk of cracking because screws create larger pilot holes and distribute stress more evenly. |
| Weather Resistance | Nails may corrode over time, potentially affecting long-term durability. | Corrosion-resistant screws, such as stainless steel, are suitable for exterior applications and maintain durability over time. |
| Ease of Adjustment | Nails can be challenging to adjust once driven into the Hardie board. | Screws allow for easier adjustment during installation for a level and secure attachment. |
| Versatility | Suitable for lightweight decorations and fixtures. | Ideal for various applications, from lightweight to heavy objects, making it more versatile. |
| Maintenance | May require more frequent maintenance as nails can loosen over time. | Less likely to loosen, reducing the need for maintenance. |
| Cost | Generally, nails are more cost-effective than screws. | Slightly higher cost due to the purchase of screws and potential pre-drilling tools. |
| Manufacturer Guidelines | It is important to follow the manufacturer’s recommendations for nail type and size. | Manufacturers often recommend screws for specific applications due to their reliability. |
In summary, both nails and screws can be used for attaching Hardie board siding, but the choice depends on your specific project requirements.
Nails are suitable for lightweight applications and provide faster installation, while screws offer superior strength, durability, and versatility, making them the preferred choice for heavy fixtures and areas with harsh weather conditions.
Always consider the manufacturer’s guidelines for the best results when working with Hardie board siding.
How To Screw Into Hardie Board?
To screw into the Hardie board, follow these steps:
- Select the Right Screws: Choose corrosion-resistant screws designed for exterior use. Stainless steel or coated screws are good options.
- Mark the Locations: Determine where you want to screw into the Hardie board and mark those locations.
- Pre-drill Pilot Holes: Use a drill bit that matches the screw diameter to create pilot holes at the marked spots. Pilot holes should be slightly smaller than the screw diameter.
- Insert Screws: Place the screw in the pilot hole and use a power drill to drive it in, ensuring it’s flush with the surface. Be cautious not to overdrive the screw.
- Spacing: Maintain proper spacing between screws according to your project’s requirements.
- Check for Stability: Test the stability of the attached item to ensure a secure installation.
By following these steps, you can effectively and securely screw into the Hardie board while minimizing the risk of damage to the siding.
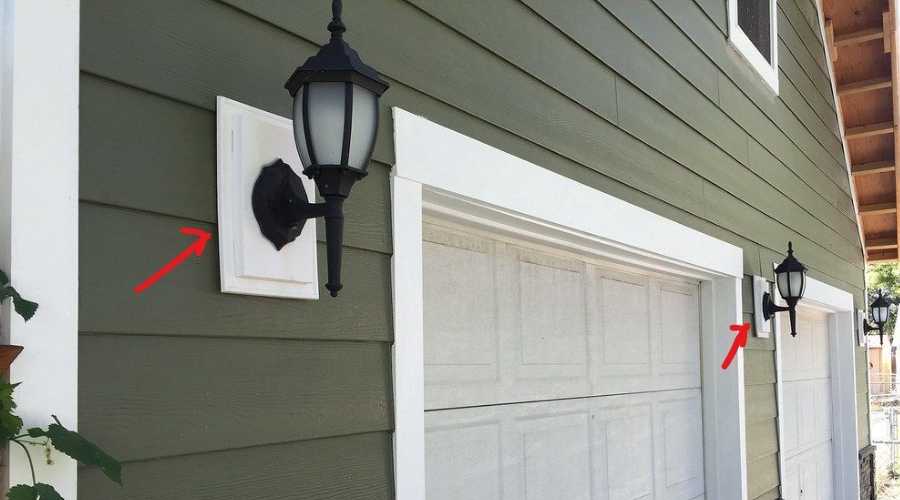
Can You Hang Things On Hardie Board?
Yes, you can hang things on the Hardie board. Hardie board, also known as fiber cement siding, is a suitable surface for hanging various items such as outdoor fixtures, decorations, signs, or even heavy objects. Provided that you use appropriate fasteners like screws or anchors and follow proper installation techniques.
How To Attach Hardie Board Trim?
Here’s a brief overview of how to attach Hardie board trim:
- Prepare the Surface: Ensure that the surface where you’ll attach the Hardie board trim is clean, flat, and properly primed if required.
- Measure and Cut: Measure and mark the trim pieces to the desired length. Use a circular saw or snips to cut the trim accurately.
- Pre-Drill Holes: Pre-drill pilot holes into the trim pieces to prevent splitting. The size of the drill bit should match the size of the fasteners you’ll use.
- Secure with Fasteners: Use appropriate corrosion-resistant screws or nails designed for exterior use. Place the trim in position and insert the fasteners into the pre-drilled holes. Be sure to leave a small gap between the trim and the adjacent siding to allow for expansion.
- Set Fasteners Flush: Drive the screws or nails until they are flush with the surface of the trim, ensuring a secure and neat finish.
- Fill and Seal: Fill any gaps or holes with exterior-grade caulk to create a weatherproof seal and provide a finished look.
- Paint or Finish: Finish the trim by painting or sealing it according to the manufacturer’s recommendations and your design preferences.
Always follow the manufacturer’s guidelines for the specific Hardie board trim product you are using, and consider local building codes and regulations when installing trim.
Proper installation will enhance the appearance and longevity of your Hardie board trim.
How To Attach Something To Hardie Board?
To attach something to the Hardie board, follow these steps:
- Mark the Location: Determine where you want to attach the item and mark the position on the Hardie board.
- Pre-drill Pilot Holes: Use a drill bit that matches the size of the screws or anchors you’ll use to create pilot holes at the marked spots.
- Insert Screws or Anchors: Place the screws or anchors in the pilot holes and use a power drill to secure them, ensuring they are flush with the surface. Adjust the tension as needed for a secure attachment.
These steps help prevent damage to the Hardie board while ensuring a stable and durable attachment for your item.
Best Nails For Hardie Siding
As an expert in Hardie board siding installation, I can recommend the following three reputable brands of nails that are commonly used and well-suited for Hardie board siding:
Maze Nails: Maze Nails is a respected manufacturer known for producing high-quality fasteners for siding applications. Their stainless steel and hot-dipped galvanized nails are corrosion-resistant and suitable for use with Hardie Board siding.
Maze nails are manufactured in the USA. You can find the double-hot-dipped ring shank split-less Maze siding nails on Amazon.
Bostitch: Bostitch is a well-known brand that offers a range of nails designed for siding, including Hardie board. Their galvanized or stainless steel siding nails are reliable choices for secure and long-lasting installations. You can buy Bostitch galvanized siding nails on Amazon.
Grip-Rite: Grip-Rite is another trusted brand that provides a variety of siding nails suitable for Hardie boards. They offer both galvanized and stainless steel options, known for their durability and compatibility with exterior applications. You can buy Grip-Rite Siding Nails on Amazon.
When choosing nails for your Hardie board siding project, be sure to select the appropriate length and type (stainless steel or galvanized) based on your specific installation requirements and local climate conditions.
Always consult the manufacturer’s guidelines and recommendations for the best results.
How to Install HardiePlank Lap Siding
FAQs: Can You Hammer A Nail Into Hardie Board?
Can you hammer a nail into Hardie board without splitting?
It can be challenging to hammer a nail into Hardie board without splitting it due to its density. Pre-drilling pilot holes and using the correct type of nails can help reduce the risk of splitting.
What kind of drill bit is for Hardie board?
Use a masonry or carbide-tipped drill bit for Hardie board. The size of the drill bit should match the size of the screws or anchors you plan to use.
Are there special nails for Hardie board?
Yes, there are special corrosion-resistant nails designed for Hardie board. These include stainless steel and galvanized nails, which are recommended for exterior applications.
Should HardiPlank siding be caulked?
Yes, it’s advisable to caulk the joints and gaps in HardiPlank siding to prevent moisture infiltration and maintain weatherproofing. Use an exterior-grade caulk recommended by the manufacturer.
What is the best way to nail Hardie board siding?
The best way to nail Hardie board siding is to pre-drill pilot holes, use the correct type of nail (corrosion-resistant), and drive the nails flush with the surface. Follow manufacturer guidelines for spacing and installation techniques.
How do you hide your nails on the Hardie board?
Nails on the Hardie board can be hidden by countersinking them slightly below the surface and filling the holes with exterior-grade caulk or putty. Afterward, the filled holes can be painted to match the siding.
Conclusion
In conclusion, while it is possible to hammer a nail into Hardie’s board, it’s crucial to approach this task with careful consideration. Hardie board’s density makes it susceptible to splitting if not handled correctly.
To ensure a successful installation, we recommend pre-drilling pilot holes, using corrosion-resistant nails or screws, and following manufacturer guidelines for spacing and techniques.
By taking these precautions, you can achieve a secure and durable attachment without compromising the integrity of the Hardie board.
Remember, precision and the right tools are key to mastering the art of nailing into the Hardie board.
Recent Posts
Woodworking is one of the most rewarding hobbies and professions, but it also comes with serious risks if proper precautions are not taken. Whether you're working with a table saw, planer, or simple...
What to Use If You Don't Have a Brad Nailer: Handy Alternatives
You can use a hammer and finishing nails paring with nail set or wood glue if you don't have a Brad Nailer. These tools effectively secure trim and small woodworking projects. So, if you’re in...