
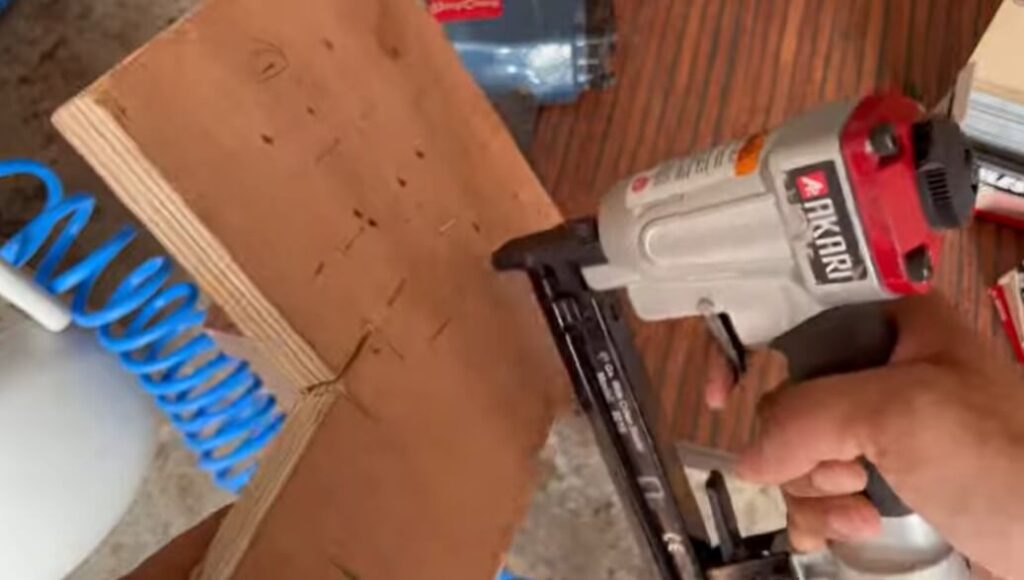
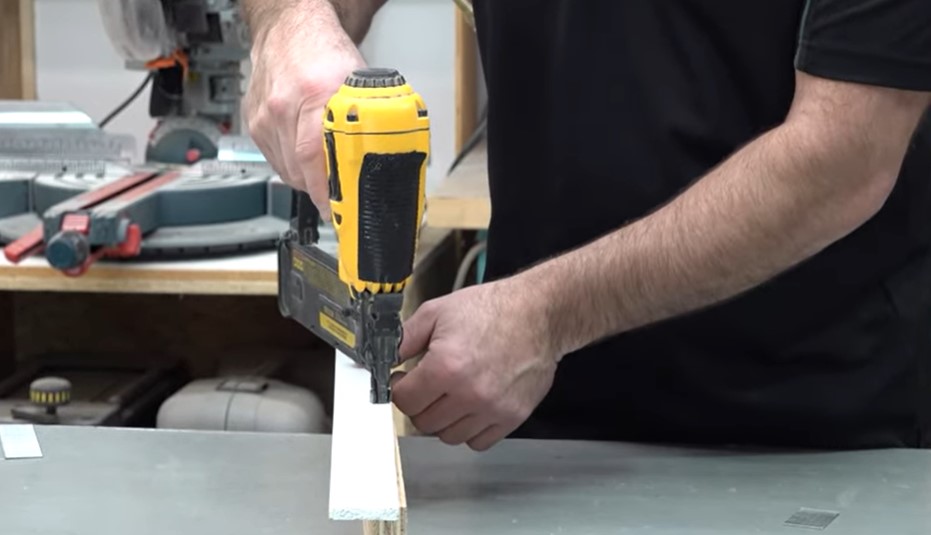
To use a pneumatic nail gun, aim the tip at the surface and pull the trigger. A pneumatic nail gun is an essential tool for any DIY enthusiast or professional carpenter.
Its ease of use, efficiency, and power make it an attractive choice over the traditional hammer and nail technique. However, using a pneumatic nail gun requires some knowledge and skills to ensure safe and effective use.
This article will guide you on how to load the nails, attach the compressor, set the pressure, and other things to keep in mind when operating the tool.
Following these steps will help you save time and effort and provide a professional-looking finish to your woodworking project.
Understanding A Pneumatic Nail Gun
If you’re planning a DIY woodworking project, a pneumatic nail gun can be a valuable tool. It is an ideal tool for projects that require the use of nails. And, if you can handle a few safety precautions, using one is easy.
But before getting too excited about the final outcome of your project, you must understand the basics of pneumatics and the anatomy of a pneumatic nail gun. Here are the most important details and features to take into consideration.
Anatomy Of A Pneumatic Nail Gun:
Before using a pneumatic nail gun, it is essential to know its anatomy. These are the following parts:
- Magazine: A container that holds nails.
- Trigger: A part of the tool that activates the trigger valve, controlling the release of compressed air.
- Nose: The front tip of the nail gun that comes in contact with the surface and allows the release of nails.
- Safety tip: A part that prevents accidental firing, securing it until triggered.
- Air inlet: This is where the compressed air is connected to the tool.
Setting Up The Pneumatic Nail Gun
If you are looking to increase the efficiency and speed of your carpentry or woodworking projects, then learning how to use a pneumatic nail gun is vital. The process of setting up your pneumatic nail gun requires a few steps that you must follow carefully to ensure that you can work with your tool optimally.
We will discuss the steps required for setting up your pneumatic nail gun, including selecting the right air compressor, required accessories and tools, and loading nails into the nail gun.
Choosing The Right Air Compressor
Before setting up your pneumatic nail gun, ensure that you have selected the right air compressor that will provide enough airflow to power the nail gun. Here are some key points:
- Check the air compressor’s CFM (cubic feet per minute) and psi (pounds per square inch) ratings to ensure compatibility with your pneumatic nail gun.
- Ensure that the air compressor is suitable for the type of nail gun you are using. For example, framing nailers require higher psi and CFM ratings than brad nailers.
- Consider the size and weight of the air compressor. A lightweight and compact model is ideal if you’re working in a small space, whereas a larger model may be better suited for a larger workspace.
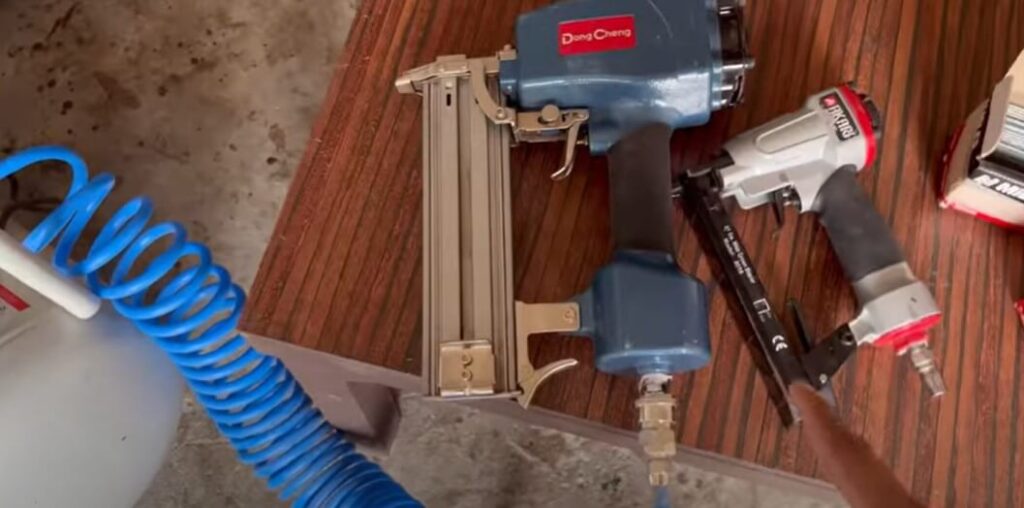
Required Accessories And Tools
To set up your pneumatic nail gun, you will need some accessories and tools. Here are some of the required items:
- Air hose: a flexible, durable air hose that connects your air compressor to the nail gun.
- Fittings: male and female fittings that connect the air hose to the air compressor and nail gun.
- Lubricant: a lubricant that you can apply to the nail gun to ensure smooth operation.
- Safety equipment: eye protection, ear protection, and a dust mask.
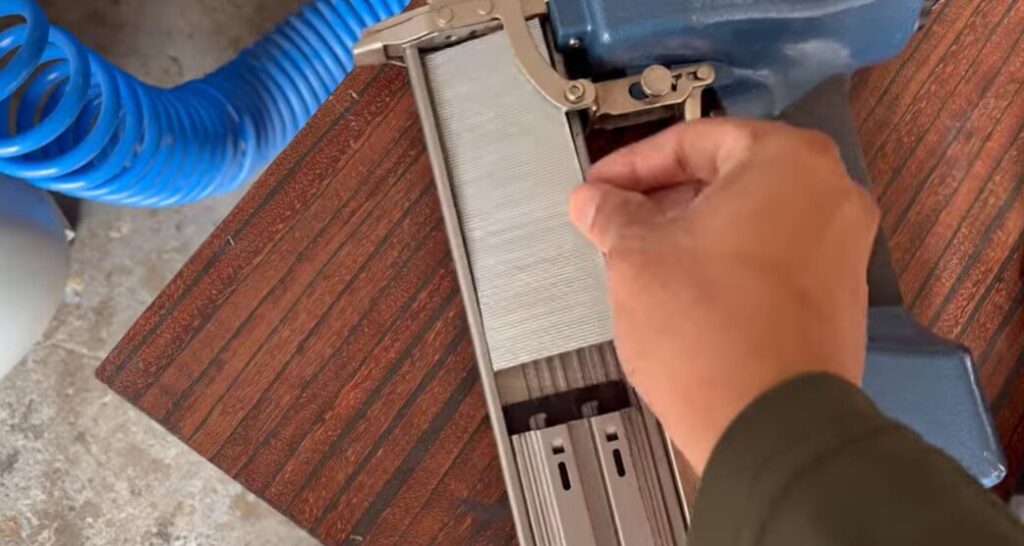
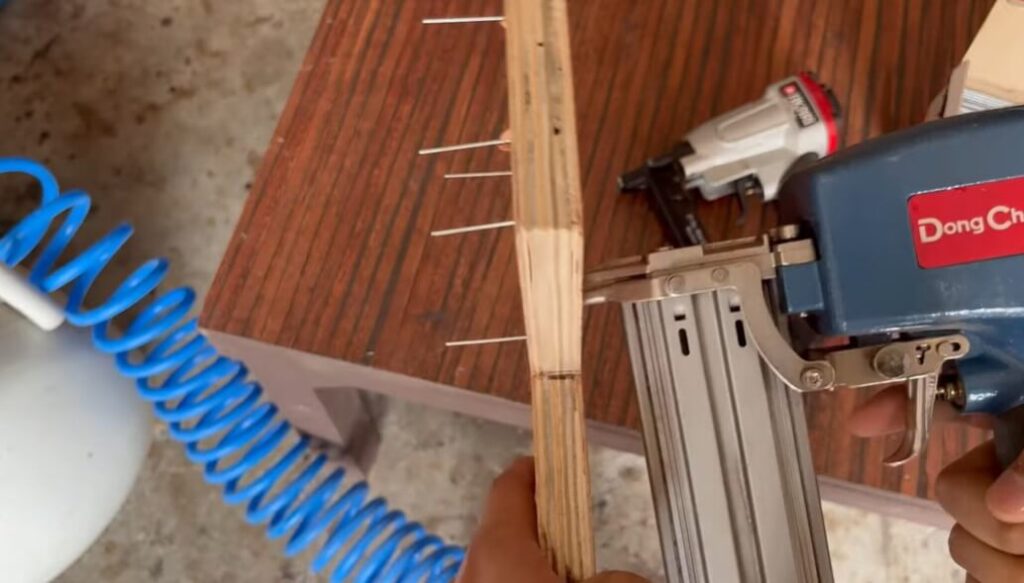
Loading Nails Into Your Pneumatic Nail Gun
After selecting the right air compressor and gathering the required accessories and tools, it’s time to load nails into your pneumatic nail gun. Here’s how:
- Open the magazine by pressing the magazine release latch.
- Insert the nail strip into the magazine, facing the nail heads toward the nose of the nail gun.
- Ensure that the nails are straight and aligned in the magazine.
- Release the magazine to lock it in place.
- Connect the air hose to the nail gun with fittings.
- Set the pressure regulator to the recommended psi for your nail gun.
- Test the nail gun with a few nails to ensure it’s working correctly.
Learning how to use a pneumatic nail gun is a useful skill that will increase the efficiency and speed of your carpentry and woodworking projects.
By following these steps for setting up your pneumatic nail gun, you can ensure that your tool operates optimally and safely.
Using The Pneumatic Nail Gun: Nail it Down
Positioning yourself and your materials:
Before you start using your pneumatic nail gun, you need to position yourself and your materials in the correct position to ensure safety and efficiency.
Here are some essential points to keep in mind:
- Ensure that your materials are secured in place and won’t move when you start nailing.
- Make sure that your body is positioned so that you have full control of the nail gun at all times.
- Always wear the appropriate safety gear, such as safety goggles and ear protection.
Proper grip and hand placement:
Having the correct grip and hand placement is key to using your pneumatic nail gun effectively. By doing this, you will ensure your safety and the safety of others.
Here are some vital pointers to remember:
- Use both hands to hold the nail gun firmly and securely.
- The trigger should be positioned in the middle of your finger to ensure safety and accuracy.
- Always keep your fingers and hands away from the path of the nail.
Shooting techniques:
Mastering shooting techniques is crucial to using a pneumatic nail gun. You want all your nails to go in the right place and avoid damaging your wood.
Here are some tips to keep in mind:
- Hold the gun perpendicular to your work surface.
- Apply firm pressure to the gun, and pull the trigger slowly and steadily.
- Remove the nail gun from your work surface immediately after the nail is driven.
Maintenance and troubleshooting common issues:
To ensure that your nail gun lasts a long time, regular cleaning and maintenance are key factors. However, even with the most stringent maintenance practices, you may still face some common issues.
Here are some important notes on maintenance and troubleshooting:
- Regularly clean your nail gun and lubricate the moving parts.
- Check your air supply and adjust the pressure accordingly.
- If the gun suddenly stops working, check for jams and follow the manufacturer’s troubleshooting guide.
Using a pneumatic nail gun can seem a little intimidating at first. By following these guidelines, you can build confidence with your nail gun and keep your work environment safe.
How To Use A Nail Gun With Compressor?
Using a nail gun with a compressor involves a few simple steps:
Set Up the Compressor:
- Ensure the compressor is placed on a stable surface.
- Connect the air hose to the compressor’s outlet.
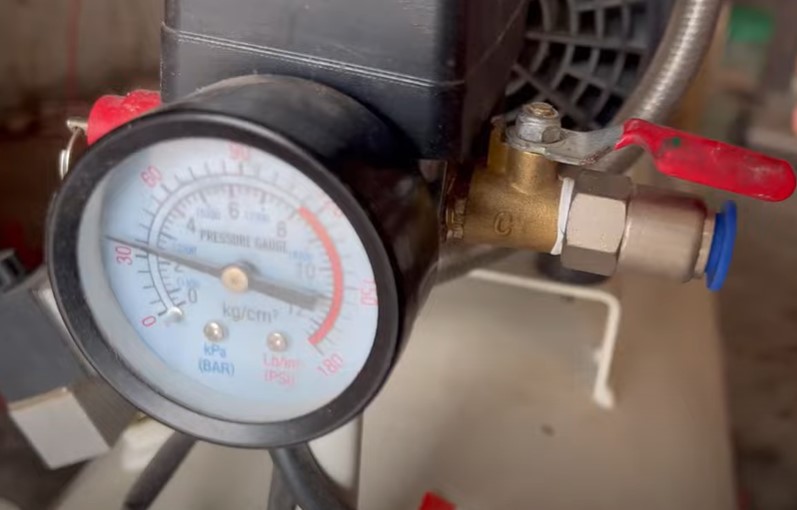
Adjust Air Pressure:
- Check the nail gun’s recommended operating pressure.
- Set the compressor’s pressure regulator accordingly.
Load Nails:
- Open the nail gun’s magazine.
- Load the appropriate nails in the correct orientation.
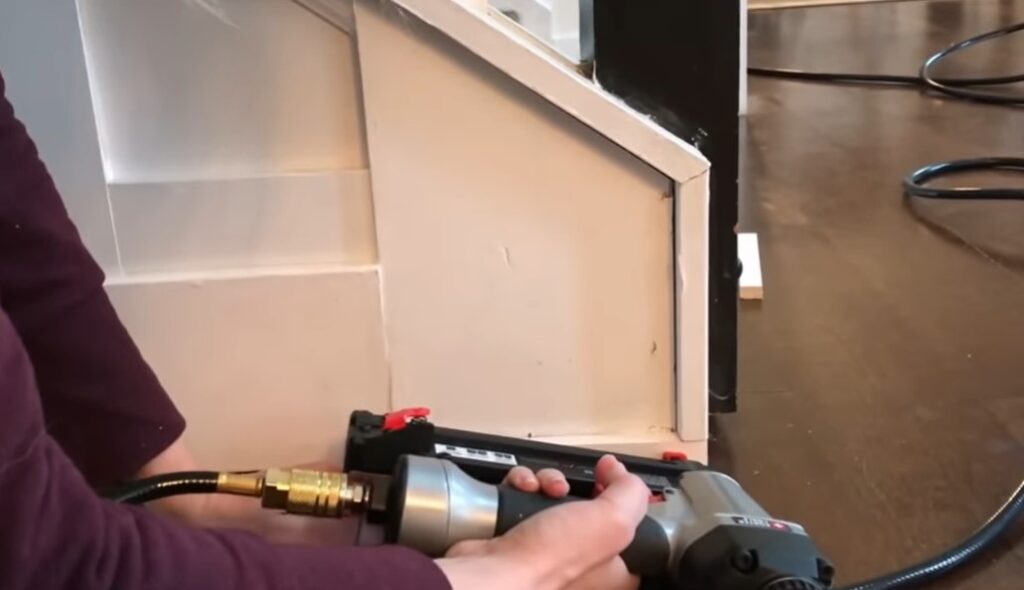
Connect the Nail Gun:
- Attach the nail gun to the air hose using the proper fitting.
Adjust Depth Settings:
- Set the desired depth for nail penetration if your nail gun has depth adjustment features.
Test Fire:
- Before starting your project, test-fire the nail gun on scrap material to ensure proper functioning and depth.
Begin Nailing:
- Position the nail gun at the desired angle on the material.
- Press the tip firmly against the surface.
- Pull the trigger to release the compressed air and drive the nail into the material.
Continue and Repeat:
- Move the nail gun along the surface, firing nails as needed.
- Refill the magazine when necessary.
Shut Down Safely:
- Release the trigger and disconnect the nail gun from the air hose when finished.
- Turn off the compressor and disconnect it from the power source.
Always follow the manufacturer’s instructions for both the nail gun and the compressor to ensure safe and effective use. Additionally, wear appropriate safety gear, such as safety glasses and hearing protection, during operation.
Which Is The Correct Way To Use An Air Nailer?
Using an air nailer correctly involves the following steps:
Safety First: Wear appropriate safety gear, including safety glasses and hearing protection.
Select the Right Nails: Choose nails compatible with your nailer and the specific job.
Adjust Air Pressure: Set the air compressor to the recommended pressure for your nailer.
Load Nails: Load the nail magazine with the appropriate nails.
Adjust Depth Settings: Set the depth adjustment on the nailer, if available, based on the material and the desired depth of nail penetration.
Position the Nailer: Hold the nailer at the correct angle and firmly against the work surface.
Safety Contact Mechanism: Some nailers have a safety contact mechanism that requires the tool to be pressed against the surface before firing.
Sequential Trigger: If your nailer has a sequential trigger, press the safety tip against the surface first, then pull the trigger to fire a nail.
Bump Firing (if applicable): If using a bump or contact trigger, hold the trigger down and bump the safety tip against the surface to fire multiple nails rapidly.
Move Sequentially: Move the nailer along the work surface, firing nails as needed.
Reload as Necessary: Refill the nail magazine when it runs out.
Disconnect Safely: Disconnect the air supply when the task is complete.
Always follow the manufacturer’s guidelines and safety instructions for your specific air nailer model. Regular maintenance, including lubricating moving parts, is also crucial for optimal performance.
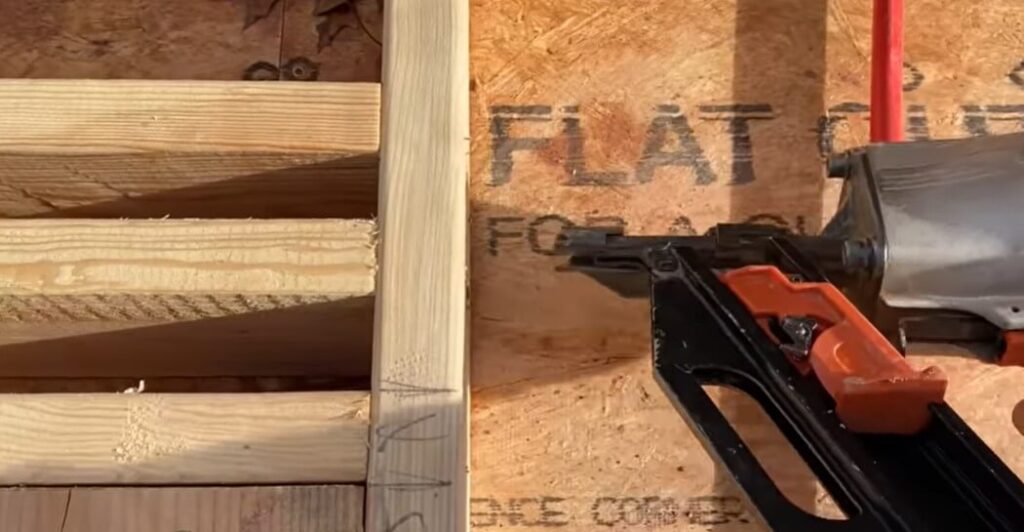
How To Use A Pneumatic Nail Gun For Framing?
To use a pneumatic nail gun for framing, start by selecting the appropriate nails for framing applications and loading them into the magazine.
Adjust the air compressor to the recommended pressure, typically between 70-120 PSI. Set the depth adjustment on the nailer to ensure the nails penetrate the framing material at the desired depth.
Hold the nailer at the correct angle against the work surface, and, if applicable, engage the safety contact mechanism or sequential trigger. Press the nailer firmly against the framing material and pull the trigger to drive a nail.
Move the nailer sequentially along the framing, firing nails as needed.
Reload the nail magazine when empty, and disconnect the air supply when the framing task is complete.
Always prioritize safety by wearing appropriate protective gear and following the manufacturer’s guidelines for your specific pneumatic nail gun.
Tips And Tricks For Using A Pneumatic Nail Gun
Using a pneumatic nail gun can be a game-changer when it comes to finishing DIY projects quickly and efficiently. However, beginners may find it a little challenging as they try to figure out how to handle the tool.
Here are some tips and tricks to ensure you get the most out of your pneumatic nail gun.
Preventing Accidents And Injuries
As with any power tool, using a pneumatic nail gun requires careful handling to prevent accidents and injuries. To be safe, always wear safety goggles to protect your eyes from flying debris and keep your fingers away from the nail gun’s muzzle.
Make sure that you use the appropriate air compressor and air hose for your nail gun.
Ensuring Accurate And Straight Nail Placement
Properly placing nails without bending or jamming them requires a bit of practice and patience. Hold the nail gun at an angle of 90 degrees on the surface you’re nailing, and make sure to grip the nail gun firmly to prevent it from slipping during use.
Never exert too much pressure on the nail gun, as the nail can shoot off course.
Speeding Up Your Work With A Pneumatic Nail Gun
Using a pneumatic nail gun can speed up your work and help you complete projects more efficiently. Load enough nails into the nail gun to avoid running out before completing your project.
For greater control, use the nail gun with a sequential trigger rather than a contact-trip trigger. Make sure there is enough air pressure in the compressor to ensure proper nail penetration and avoid jams.
Clean your nail gun regularly to prevent it from getting clogged with sawdust or other debris.
Troubleshooting Common Issues
Even when you take all the necessary precautions, sometimes things may go wrong when using a pneumatic nail gun. Here are some common issues and how you can troubleshoot them:
- If the nail gun doesn’t fire, the problem may be that the air pressure is too low. Check the compressor and adjust it accordingly.
- If you notice that the nails are bending or jamming frequently, it may mean that you are using the wrong type of nails or that they are not compatible with your nail gun.
- Sometimes, the nail gun may accidentally shoot nails out of sequence. If this happens, release the trigger, hold down the nail gun, and wait for the gun to reset itself.
Remember to keep these tips and tricks in mind to ensure a successful and safe project with your pneumatic nail gun.
FAQs: How To Use A Pneumatic Nail Gun?
How Does A Pneumatic Nail Gun Work?
A pneumatic nail gun works by using compressed air to drive nails into wood or other materials.
What Kind Of Nails Does A Pneumatic Nail Gun Use?
Pneumatic nail guns typically use collated nails, which are held together with paper, plastic, or wire. The specific type and size of nails depend on the model of the nail gun and the intended application, such as framing, finishing, or roofing.
Can I Use A Pneumatic Nail Gun For Any Project?
While pneumatic nail guns are versatile, their suitability depends on the project. They excel in tasks like framing, carpentry, and woodworking but may not be ideal for delicate or precise work. Always choose the right tool for the specific project requirements.
How Do I Load Nails Into A Pneumatic Nail Gun?
To load nails into a pneumatic nail gun, you typically need to open the magazine and slide the nails in.
Is A Pneumatic Nail Gun Safe To Use?
As long as proper safety precautions are taken, a pneumatic nail gun can be a safe tool to use.
What Maintenance Does A Pneumatic Nail Gun Require?
A pneumatic nail gun requires regular cleaning and oiling to keep it in good working condition.
Conclusion
As you continue to hone your skills as a woodworking expert, incorporating the use of a pneumatic nail gun will not only enhance your work but also improve your efficiency. Rev up your compressor and take advantage of the versatility and precision of this tool.
Remember to always observe safety best practices and maintenance routines to keep your nail gun in top shape. And when it comes to choosing the right type of nail gun for your project, consider factors such as nail gauge, size, and depth.
With a bit of practice and patience, you’ll soon be on your way to creating flawless, professional-grade projects in no time. Happy nailing!
Recent Posts
Woodworking is one of the most rewarding hobbies and professions, but it also comes with serious risks if proper precautions are not taken. Whether you're working with a table saw, planer, or simple...
What to Use If You Don't Have a Brad Nailer: Handy Alternatives
You can use a hammer and finishing nails paring with nail set or wood glue if you don't have a Brad Nailer. These tools effectively secure trim and small woodworking projects. So, if you’re in...