
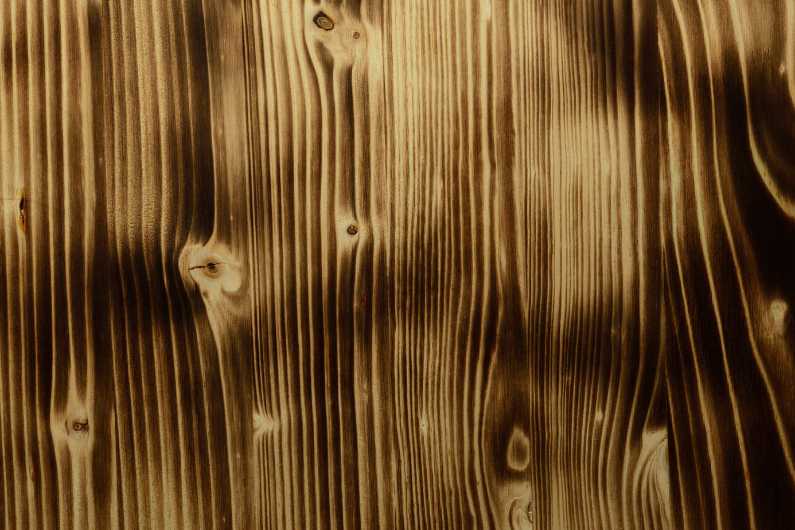
Woodworking is a thrilling hobby for many people. However, it can be frustrating when saw burn marks appear on the woodwork. These marks are usually caused by friction between the blade and the wood, leading to scorching. Saw burn marks can be unsightly and can ruin the appearance of your workpiece.
Although it may appear difficult to repair, there are various methods for removing saw burn markings from wood. To erase burn marks as cleanly and efficiently as possible, use sandpaper, a hand plane, or a scrapper. But, you must take some measures when doing so.
In this blog post, we will explore some of the most effective methods of removing saw burn marks from wood. We also go through some helpful hints and preventative measures. Let’s get started.
Expert Opinions On How To Remove Saw Burn Marks From Wood:
When it is a challenging task to remove wood burn marks, it is not undoable. Here get some expert opinions from woodworking professionals in the USA on how to remove saw burn marks from wood:
David Venditto, Owner of Taylor Woodworks:
“Removing burn marks from wood requires a combination of sanding and scraping. Begin by sanding the surface of the wood with fine-grit sandpaper, working your way up to a coarser grit if necessary. Next, use a scraper or a sharp chisel to remove any remaining burn marks. Finish by sanding the wood with fine-grit sandpaper to smooth out any rough areas.”
Marc Spagnuolo, Woodworker and Host of The Wood Whisperer:
“To remove burn marks from wood, I use a card scraper. This tool can easily remove burn marks without damaging the wood’s surface. Simply scrape the surface of the wood in the direction of the grain until the burn marks are no longer visible. Finish by sanding the wood with a fine-grit sandpaper.”
Bob Clagett, Founder of I Like to Make Stuff:
“I remove burn marks from wood by sanding with fine grit sandpaper or using a hand plane to remove a thin layer of wood. For deeper burn marks, I use a scraper to remove the charred wood before sanding. It’s important to take your time and work slowly to avoid damaging the wood.”
Chris Salomone, Woodworker and Founder of Foureyes Furniture:
“To remove burn marks from wood, I use a combination of sanding and planing. Start by sanding the wood with a fine grit sandpaper, working your way up to a coarser grit if necessary. Next, use a hand plane to remove any remaining burn marks. Finish by sanding the wood with a fine grit sandpaper to smooth out any rough areas.”
These are just a few expert opinions on how to remove burn marks from wood, and there are many different methods that can be effective depending on the severity of the burn marks and the type of wood being used.
Ultimately, it’s important to take your time and work carefully to avoid damaging the wood.
What Causes Saw Burn Marks?
Saw burn marks are a common occurrence in woodworking and can detract from the overall quality and appearance of a finished piece. So, it is essential to understand the causes of saw burn marks.
Let’s find some of the most common reasons for saw burning.
Friction With Saw Blades:
Friction is the main cause of saw burn marks. When the saw blade rubs against the wood, it creates heat that can burn the surface of the wood. The heat generated during the cutting process can cause the wood to become scorched, leaving behind unsightly burn marks.
Using Dull Or Rusted Blades:
Using dull or rusted blades can cause saw burn marks on the wood. A dull blade causes the saw to work harder and creates more friction between the blade and the wood, leading to saw burn marks.
Rusted blades are also less effective at cutting, leading to more friction, which can also result in saw burn marks.
Inappropriate Feed Rates:
The feed rate refers to the speed at which the wood is fed through the saw blade. If the feed rate is too slow, the saw blade will stay in one place for too long, causing friction and saw burn marks. Conversely, if the feed rate is too fast, the blade can become overloaded, leading to poor cutting and saw burn marks.
Selection Of Wrong Blades:
Using the wrong type of blade for the job can also cause saw burn marks. For instance, using a blade with too few teeth or teeth that are too small for the type of wood being cut can result in more friction and saw burn marks.
Types Of Wood Being Cut:
The type of wood being cut can also play a role in the development of saw burn marks. Hardwoods, such as oak or maple, are more prone to saw burn marks due to their density and hardness. On the other hand, softwoods like pine are less dense and can be cut more easily, resulting in fewer saw burn marks.
How To Prevent Burning Wood By Saw?
When using a saw, it is essential to take proper precautions to prevent burning. Here are some tips on how to prevent burning wood during a cut:
Use A Sharp Blade:
A sharp blade cuts through wood more easily, reducing friction and heat, and preventing burn marks. Make sure to keep your saw blade sharp and in good condition.
Use The Right Blade:
Use the right type of blade for the job, depending on the wood’s density, thickness, and moisture content. For example, a blade with more teeth is better for cutting through harder woods, and a blade with larger gullets is better for removing sawdust and debris.
Adjust The Speed And Feed Rate:
Adjust the speed of the saw and the feed rate of the wood to ensure a smooth, steady cut. Make sure to follow the manufacturer’s recommendations for your specific saw and blade.
Use Lubrication:
Using a lubricant such as wax or oil can help reduce friction and heat, preventing burn marks. Apply the lubricant to the blade before making the cut.
Keep The Saw Blade Cool:
The heat generated during a cut can cause the blade to heat up, leading to burn marks. To prevent this, use a cooling lubricant or water to cool down the blade during the cut.
Make A Relief Cut:
Making a relief cut, or a shallow cut in the wood before the actual cut, can help reduce friction and prevent burn marks. This is especially helpful when making a long or intricate cut.
By following these tips, you can prevent burning wood during a cut and achieve clean, smooth cuts without any unsightly burn marks.
How To Remove Saw Burn Marks With Sandpaper
Preparing the wood for removing saw burn marks requires a meticulous approach to ensure a smooth and even finish.
There are several methods of removing saw burn marks from wood. However, using sandpaper is the most common.
The first step in removing burn marks is to thoroughly inspect the wood surface and identify affected areas.
Once identify the spot, follow the following step-by-step guide for removing saw burn marks with sandpaper:
1. Assess The Damage:
Before you start sanding, assess the severity of the saw burn marks. If the marks are deep, you may need to start with a coarser grit sandpaper and work your way up to a finer grit.
2. Choose The Right Sandpaper:
Choose sandpaper with the appropriate grit for the severity of the burn marks. Coarser grit sandpaper (such as 80 grit) removes more material and is best for deep saw burn marks.
Finer grit sandpaper (such as 220 grit) is best for light burn marks or to smooth out the surface after using coarser grit sandpaper.
3. Sand With The Grain:
Sand the wood with the grain, using long strokes in the direction of the wood’s natural pattern. This helps to avoid creating scratches or uneven areas on the wood.
4. Apply Even Pressure:
Apply even pressure to the sandpaper as you sand. Don’t press too hard or too lightly, as it either can create uneven sanding or even damage the wood.
5. Check Frequently:
Check the progress of the sanding frequently by wiping the surface with a clean cloth. This helps you determine if you have removed enough material and if the burn marks are fading.
6. Use A Finer Grit:
After removing the saw burn marks with the coarser grit sandpaper, use a finer grit sandpaper to smooth out the surface. Sand in the direction of the wood grain, applying even pressure.
7. Clean The Surface:
Once you have finished sanding, use a clean cloth or a vacuum to remove any sawdust or debris from the surface of the wood.
8. Repeat If Necessary:
If the burn marks are still visible after sanding with the finer grit sandpaper, you may need to repeat the process with even finer grit sandpaper until the burn marks are no longer visible.
By following these steps, you can successfully remove saw burn marks from wood using sandpaper. Remember to take your time and be patient, as removing burn marks can be a time-consuming process.
Alternative Methods For Removing Saw Burn Marks
There are several alternative methods for removing saw burn marks from wood. One of the most popular methods is to use a wood plane or scraper to shave off the burnt surface layer of the wood.
Chemical strippers can also be used to remove the burn marks, but care must be taken to avoid damaging the wood.
In some cases, the burn marks can be camouflaged by using wood stain or a wood filler.
It is important to assess the severity of the burn marks before deciding on the most appropriate method of removal.
Let’s get the step-by-step guide of each method in brief below.
Using A Hand Plane Or Card Scraper
When it comes to removing saw burn marks from wood, hand planes, and card scrapers can be highly effective tools in achieving desired results.
A hand plane can be used to shave off thin layers of wood, which can help to even out the surface and remove any visible burn marks. Similarly, a card scraper is ideal for smoothing rough surfaces and removing any remaining burn marks.
It’s important to use these tools with care and precision to avoid damaging the wood.
Start by testing the tools on a small, inconspicuous area of the wood and gradually work your way toward the affected areas.
With patience and careful attention, you can successfully remove wood burn marks using a hand plane or card scraper.
Using A Chemical Stripper
Removing saw burn marks from wood can be a challenging task, but using a chemical stripper can make it easier.
Start by cleaning the area with a mild detergent and water to remove any dirt or debris.
Then, apply a chemical stripper to the burn mark using a brush or cloth, following the manufacturer’s instructions.
Allow the stripper to sit for the recommended amount of time, usually between 15 and 30 minutes.
Afterward, use a scraper to remove the softened burn mark, being careful not to damage the surrounding wood.
Finally, rinse the area with water and allow it to dry completely before sanding and refinishing the wood.
Cautions: Always wear protective gloves and eyewear when working with chemical strippers.
Using A Heat Gun
A heat gun is a useful tool for removing wood burn marks, as it uses high heat to loosen and remove burnt wood fibers.
To begin, start by setting the heat gun on a low-temperature setting and holding it about 2-3 inches from the burn mark.
Move the heat gun back and forth over the burn mark, being careful not to overheat the wood or scorch it further.
Use a scraper or sandpaper to gently remove the loosened burnt wood fibers.
Repeat the process until the burn mark is completely removed.
Always wear protective gear such as gloves and eye protection when using a heat gun.
Aftercare And Maintenance Of The Wood
After removing burn marks from wood, it is essential to take proper aftercare and maintenance steps to ensure the longevity and beauty of the wood.
This includes –
- Cleaning The Wood After Removing Saw Burn Marks
- Applying A Finish To The Wood
- Preventing Future Saw Burn Marks
Cleaning: The first step is to clean the surface thoroughly with a soft cloth and mild detergent solution to remove any loose debris and dirt. Avoid using abrasive cleaners or materials that can scratch the surface.
Finishing: Once cleaned, sand the surface lightly to remove any remaining burnt marks or stains. Apply a wood conditioner or sealant such as wax or oil finish to protect the wood from future damage and to restore its natural beauty.
Additionally, it will help to seal and protect the surface from moisture and other environmental factors.
It is recommended to reapply the sealant every six months to maintain its protective barrier.
Prevent Future Burn Marks: It is also recommended to avoid exposing the wood to excessive heat or sunlight to prevent further damage.
By following these aftercare and maintenance steps, you can ensure your wood stays looking its best for years to come.
Wrap-up
To sum up, there are different methods for removing burn marks from wood caused by sawing, but sandpaper is the most effective and commonly used.
However, it’s important to consider aftercare and maintenance of wood during the process of removing burn marks.
Whether you use a hand plane or card scraper, a chemical stripper, or a heat gun, it’s crucial to protect the wood and ensure it stays in good condition.
With the right tools and maintenance, you can restore your wood to its original beauty and avoid any damage caused by burn marks.
Before you move, if you want to learn “How to remove pencil marks from wood,” you can do so by going here.
Additional Resources:
How To Make A Plunge Cut With A Jigsaw?
How To Use A Miter Saw To Cut Angles?
How To Use A Jigsaw To Cut Curves?
How To Cut A Straight Line With A Circular Saw?
How To Use A Circular Saw As A Table Saw?
Recent Posts
Woodworking is one of the most rewarding hobbies and professions, but it also comes with serious risks if proper precautions are not taken. Whether you're working with a table saw, planer, or simple...
What to Use If You Don't Have a Brad Nailer: Handy Alternatives
You can use a hammer and finishing nails paring with nail set or wood glue if you don't have a Brad Nailer. These tools effectively secure trim and small woodworking projects. So, if you’re in...