
You can use a hammer and finishing nails paring with nail set or wood glue if you don’t have a Brad Nailer. These tools effectively secure trim and small woodworking projects.
So, if you’re in the middle of a woodworking or home improvement project and realize you don’t have a brad nailer, don’t worry — you still have plenty of options. Whether you’re installing trim, assembling small projects, or attaching molding, there are effective alternatives that can deliver clean, professional results.
This guide explains the best substitutes for a brad nailer, when to use each option, and how to get strong, neat finishes without specialized tools.
What Is a Brad Nailer and Why Is It Used?
A brad nailer is a tool that drives thin 18-gauge nails (brads) into wood. It’s commonly used for:
- Trim and molding installation
- Cabinet and furniture assembly
- Craft and small woodworking projects
- Baseboards and decorative panels
Brad nailers are popular because they:
✔ Leave tiny holes
✔ Reduce wood splitting
✔ Provide quick fastening
✔ Improve accuracy and speed
But if you don’t own one, you can still complete your project successfully.
What can I use instead of a brad nailer?
If you don’t have a brad nailer, you can use finish nails and a hammer, pin nails for delicate trim, wood glue for lightweight materials, screws for strong joints, or a staple gun for thin panels. Finish nails are the closest substitute and provide clean, secure results for most trim and woodworking projects.
Best Alternatives To A Brad Nailer
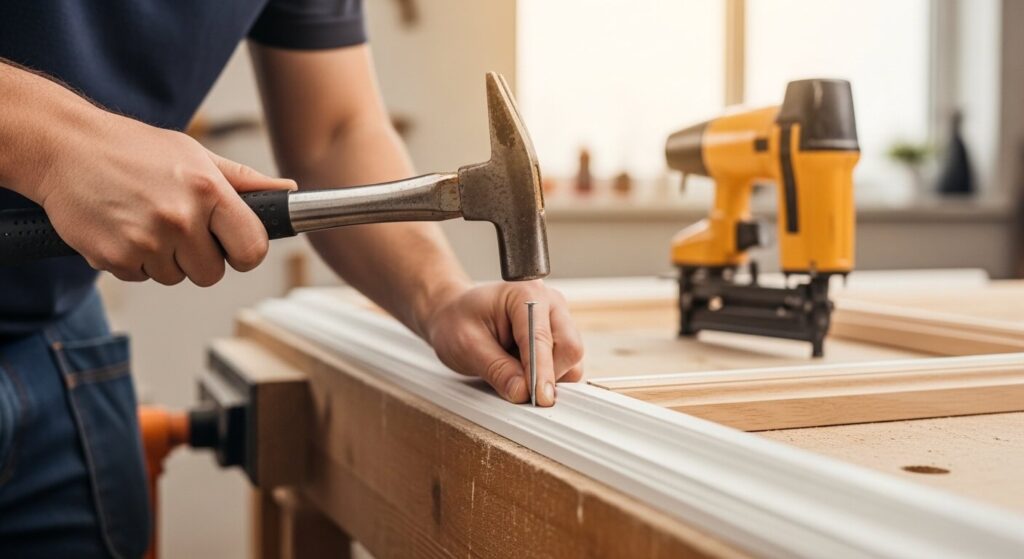
1. Traditional Hammer And Finish Nails
If you don’t have a brad nailer, a traditional hammer and nails can be a reliable alternative. Using these simple tools can still achieve excellent results. This method requires careful selection of nails and proper hammering techniques to ensure a sturdy and clean finish.
Best for: Trim work, molding, light carpentry
A simple hammer paired with finish nails is the most accessible substitute.
Why it works:
- Finish nails have small heads for clean appearance
- Strong hold for trim and light wood pieces
- Available everywhere
Choosing The Right Nails
Selecting the right nails is crucial for your project. Different nails are designed for various materials and purposes. Here are some common types:
- Common Nails: Ideal for general construction, framing, and carpentry.
- Finishing Nails: Perfect for trim work and interior projects.
- Box Nails: Used for lighter construction projects like fencing.
Use the correct nail length. For instance, nails should be at least three times the thickness of the material being nailed. This ensures a secure hold.
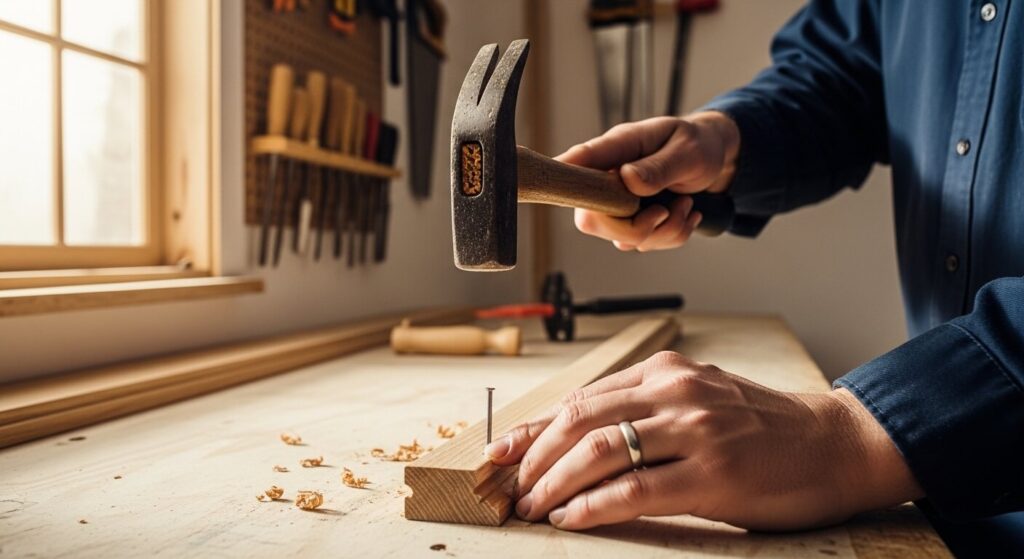
Proper Hammering Techniques
Proper hammering technique is essential to avoid damaging the material and ensure nails are driven in straight. Follow these steps:
- Hold the hammer near the end of the handle for better control.
- Place the nail at the desired spot and gently tap it to set it.
- Once set, increase the force of your swings to drive the nail in.
- Keep the hammer head perpendicular to the nail to avoid bending.
- Use smooth, controlled swings to maintain accuracy and avoid injury.
Tips For Best Results:
- Use a nail set to sink the nail below the surface
- Fill holes with wood filler for a smooth finish
- Tap gently to prevent wood splitting
👉 This method closely mimics brad nailer results.
2. Pin Nails and a Nail Punch
If you need to attach delicate trim or holding glue set, you can use pin nails along with nail punch as a substitue of brad nailer. Pin nails are extremely thin and nearly invisible. And nail punch helps you drive nails without splitting wood. It’s simple and effective for woodworking projects.
Best for: Delicate trim, small crafts, thin materials
Advantages Nail Punch:
- Works with different nail sizes
- Minimal visible holes
- Ideal for delicate work
- Reduced splitting risk
- Cheaper than a brad nailer
Because they are tiny, you’ll need a nail punch to drive them flush.
How To Use A Nail Punch?
Using a nail punch is easy and requires few steps:
- Place the nail in the desired spot.
- Drive the nail partially into the wood.
- Position the nail punch on the nail head.
- Tap the punch with a hammer until the nail is flush.
Ensure you hold the punch steady. It avoids damage and makes precise holes.
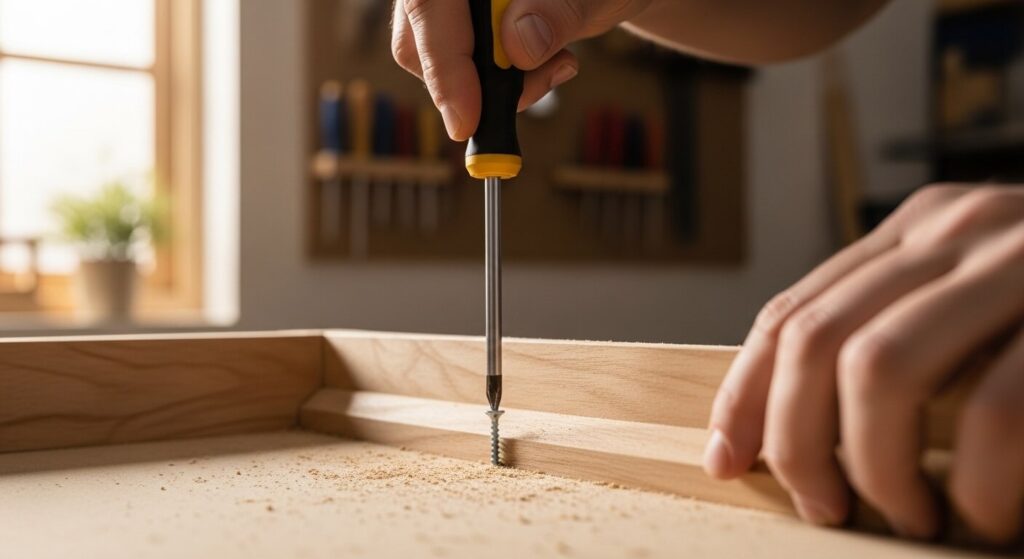
3. Screwdrivers And Screws
Don’t have a brad nailer? Use screwdrivers and screws instead. This method is simple and effective. It provides strong, lasting bonds in woodworking projects. You will need the right type of screws and screwdrivers. Let’s explore more.
Best for: Strong joints, cabinetry, structural support
Screws provide superior strength compared to brads.
Benefits:
- Excellent holding power
- Removable if adjustments are needed
- Works well for thick materials
Types of Screws
Different screws serve different purposes. Selecting the right one is crucial.
| Type | Use |
|---|---|
| Wood Screws | Ideal for wood projects |
| Drywall Screws | For attaching drywall to studs |
| Machine Screws | Best for metal or plastic |
| Deck Screws | Perfect for outdoor projects |
Effective Screwdriving Steps
Effective screwdriving ensures strong joints and reduces material damage.
- Choose the correct screwdriver bit.
- Pre-drill holes to avoid wood splitting.
- Insert screws straight to avoid wobbling.
- Countersink the screw head.
- Apply wood filler to fill the holes.
- Use a power drill for faster results.
Follow these steps for a clean, strong finish. Ensure screw heads are flush with the surface. This will give your project a professional look.
4. Manual Staple Gun
If you don’t have a brad nailer, a manual staple gun is a great alternative. It’s versatile, easy to use, and cost-effective. With a manual staple gun, you can complete a variety of projects with ease. Let’s explore the benefits and proper usage of this handy tool.
Best For: Thin wood, back panels, upholstery
A manual or electric staple gun can replace brads in some situations.
Ideal Uses:
- Attaching backing boards
- Securing thin strips
- Upholstery projects
Avoid using staples on decorative trim where appearance matters.
Staple Sizes And Uses
Choosing the right staple size is crucial for your project. Here’s a quick guide:
| Staple Size | Usage |
|---|---|
| 1/4 inch | Light fabrics, paper, and small crafts |
| 3/8 inch | Upholstery, canvas, and larger crafts |
| 1/2 inch | Woodworking, heavy fabrics, and securing wires |
Knowing the right size helps ensure your staples hold well.
Safe Stapling Methods
Safety should always be your top priority. Follow these methods for safe stapling:
- Wear safety goggles to protect your eyes.
- Keep fingers clear of the stapling area.
- Use both hands for better control and stability.
- Test on scrap material to check staple depth and alignment.
- Store the staple gun safely when not in use.
Following these steps can help you avoid injuries and ensure project success.
5. Construction Adhesive or Wood Glue
When you don’t have a brad nailer, adhesives can save the day. They are versatile and easy to use. Let’s explore some adhesive options for your woodworking projects.
Best for: Lightweight trim, molding, craft projects
Adhesives can sometimes replace nails entirely.
Use when:
- Materials are lightweight
- No heavy stress will be applied
- You want invisible fastening
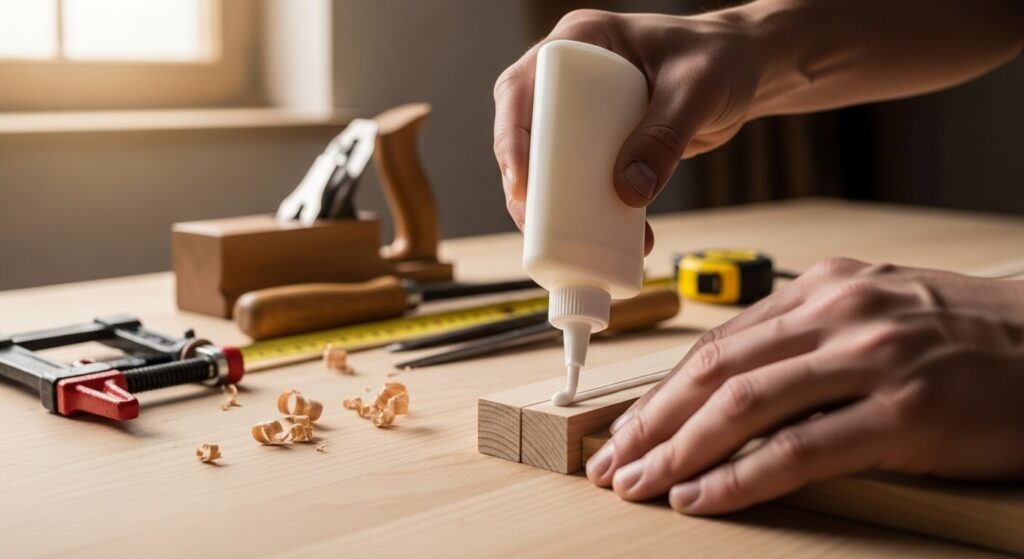
5.a Wood Glue
Wood glue is a reliable adhesive for woodworking projects. It forms a strong bond between wooden pieces.
- Easy to apply with a brush or nozzle.
- Dries clear, ensuring a clean finish.
- Non-toxic and safe for indoor use.
To use wood glue:
- Apply a thin layer to both surfaces.
- Press the pieces together firmly.
- Clamp the pieces and let them dry for 24 hours.
5.b Construction Adhesives
Construction adhesives offer a robust bond for various materials. They are ideal for heavy-duty projects.
| Type | Best For |
|---|---|
| Polyurethane | Wood, metal, and plastics |
| Epoxy | Concrete and stone |
Using construction adhesives:
- Clean and dry the surfaces.
- Apply the adhesive in a zig-zag pattern.
- Join the pieces and hold them in place.
- Allow the adhesive to cure as per the instructions.
Both wood glue and construction adhesives can be effective alternatives to a brad nailer. Choose the right one based on your project needs.
6. Double-sided Woodworking Tape
Double-sided tape can be a handy alternative to a brad nailer. It is easy to use and effective for many projects. This adhesive solution is ideal for those who want a quick fix without using nails.
Best for: Temporary positioning and lightweight materials
This is useful when you need a temporary hold before permanent fastening.
Strength And Durability
Double-sided tape offers impressive strength and durability. It can hold items securely and withstand various conditions. The adhesive is strong enough to bond most surfaces together.
There are different types of double-sided tape. Some are designed for light-duty tasks, while others are for heavy-duty use. Choose the right tape for your project.
| Type of Tape | Strength |
|---|---|
| Light-duty | Moderate |
| Heavy-duty | High |
Best Applications
Double-sided tape is versatile and useful for many applications. It works well for craft projects, temporary fixes, and decorative purposes.
- Craft Projects: Attach paper, fabric, or lightweight materials.
- Temporary Fixes: Hold items in place without permanent damage.
- Decorative Purposes: Secure pictures or decorations on walls.
Double-sided tape is also effective for securing carpets and mounting small objects. It is a versatile tool for many DIY enthusiasts.
7. Wooden Dowels
Wooden dowels are a great alternative to a brad nailer. They provide strong joints and an aesthetically pleasing look. Dowels can be used in various woodworking projects to ensure stability and durability.
Steps of Using Wooden Dowels
i. Preparation And Drilling
Begin by gathering your materials. You will need wooden dowels, a drill, and drill bits. Also, have wood glue and clamps handy.
First, mark the spots on the wood where you will insert the dowels. Use a pencil and a ruler for accuracy.
Next, select a drill bit that matches the diameter of your dowels. This ensures a snug fit.
Drill holes at the marked spots. Ensure you drill straight to avoid misalignment. A drill press can help maintain accuracy.
| Step | Action |
|---|---|
| 1 | Gather materials: dowels, drill, bits, glue, clamps |
| 2 | Mark spots for dowels with pencil and ruler |
| 3 | Select matching drill bit |
| 4 | Drill holes at marked spots |
ii. Securing With Dowels
Now, insert the dowels into the drilled holes. Apply wood glue to the dowel ends for better hold.
Gently tap the dowels into the holes using a mallet. Make sure they sit flush with the wood surface.
Clamp the joint tightly to ensure a strong bond. Leave the glue to dry as per the manufacturer’s instructions.
Once dry, remove the clamps. Sand the area to smooth out any excess glue and ensure a clean finish.
- Insert dowels into holes
- Apply wood glue to dowel ends
- Tap dowels with mallet
- Clamp joint tightly
- Let glue dry
- Remove clamps and sand area
8. Clamps And Brackets
Clamps and brackets are excellent alternatives if you don’t have a brad nailer. They provide strong, reliable support for various woodworking tasks. These tools are versatile and ensure that your projects are secure.
Let’s explore how you can use clamps and brackets for both temporary and permanent fixtures.
Temporary Holding
Clamps are perfect for temporarily holding pieces together. They come in various sizes and styles, including C-clamps, bar clamps, and spring clamps.
- C-Clamps: Ideal for holding small pieces in place.
- Bar Clamps: Best for larger pieces and longer boards.
- Spring Clamps: Quick and easy to use for light tasks.
Using clamps is simple. Place the clamp around the pieces you want to join. Tighten it until the pieces are securely held together.
| Clamp Type | |
|---|---|
| C-Clamps | Small pieces |
| Bar Clamps | Large boards |
| Spring Clamps | Light tasks |
Permanent Fixtures
Brackets are excellent for creating permanent fixtures. They offer strong support and come in many types, including L-brackets and corner braces.
- L-Brackets: Great for right-angle joints.
- Corner Braces: Perfect for reinforcing corners.
To use brackets, first align them with the pieces you want to join. Use screws to secure the bracket in place.
- Align the bracket with the pieces.
- Drill pilot holes if necessary.
- Insert screws to secure the bracket.
Brackets provide a permanent, sturdy solution for your woodworking projects. They ensure that your joints are strong and reliable.
Choosing the Right Alternative
Use this quick guide:
| Project Type | Best Alternative |
|---|---|
| Trim & molding | Finish nails |
| Delicate trim | Pin nails |
| Lightweight decor | Wood glue |
| Heavy-duty joinery | Screws |
| Thin panels | Staple gun |
| Temporary hold | Double-sided tape |
When You Should NOT Skip a Brad Nailer?
Alternatives work well, but a brad nailer is still best when:
- Installing long runs of trim quickly
- Working on large projects
- You need consistent depth and speed
- Precision and productivity matter
If you frequently do woodworking, investing in one saves significant time.
Tips for Professional Results Without a Brad Nailer
✔ Pre-drill to prevent splitting
✔ Use wood filler for seamless finishes
✔ Sand and paint after filling holes
✔ Clamp glued pieces for tight bonding
✔ Measure and align carefully
Can I install trim without a brad nailer?
Yes. A hammer with finish nails or construction adhesive can securely install trim. Apply adhesive, press trim in place, and secure with nails.
What size nails should I use instead of brad nails?
Use 15–16 gauge finish nails for better holding strength. If you’re not finding 18-gauge brad nails, don’t be panic. 15 -16 gauge finish nails will be your best alternative to provid enough “bite” or structural support.
Think of it as the “sturdier older brother” to the brad nail—it’s thick enough to hold heavy wood in place but small enough that the hole is still easy to fill with a bit of wood putty.
Will wood glue hold trim in place?
Yes, if the trim is lightweight and properly clamped during drying.
Can I use screws instead of brad nails?
The short answer is yes, but with a few “human” caveats. Screws offer incredible holding power, but they are much more “aggressive” than a tiny brad nail.
If you’re building a bookshelf or a workbench where things might get bumped or pulled, screws are actually better because they won’t pull out over time. Also in high-tension joints where there is a chance that the wood is slightly warped and you need to “force” it flush, a screw can pull it tight in a way a nail never could.
However, screws leave much larger holes. You’ll need to countersink them (drive them below the surface) and use wood filler or plugs if you want a clean look. There is a chance of wood spliting during driving screws if you do not pre drill it. Therefore, it is a time consuming task compared to nail.
| Feature | Brad Nails | Screws |
|---|---|---|
| Strength | Low (mostly for trim) | High (structural) |
| Visibility | Nearly invisible | Very visible |
| Ease of use | Fast (point and shoot) | Slower (drilling, swapping bits, and driving) |
| Risk | Low splitting risk | High splitting risk |
How do I hide nail holes without a nail gun?
Use wood filler, let it dry, sand smooth, and paint or stain.
Is a staple gun a good substitute?
If you’re staring at a project and don’t have a brad nailer handy, a staple gun is a solid “Plan B”—but it’s a bit of a specialist. It’s not a direct 1:1 swap, as staples use two prongs instead of one, which changes both the look and the grip.
Staple Gun vs. Brad Nailer
| Feature | Staple Gun (Narrow Crown) | Brad Nailer (18-Gauge) |
|---|---|---|
| Grip Style | Mechanical: Wraps around fibers | Friction: Relies on the shank |
| Best For | Thin plywood, lattic, upholstery | Decorative trim, molding, casing |
| Visibility | High: Leaves a visible | Low: Leaves a tiny dot |
| Spliting | Higher: Two legs = double stress | Lower: Thin single entry |
If using a staple gun feels too messy, and you have no option of using a brad nailer, don’t forget the Hammer and Finish Nails. It’s slower and requires a “nail set” tool to sink the heads, but it will give you a much cleaner, professional look than staples for decorative work.
FAQs: What to Use If You Don’t Have a Brad Nailer?
What is the closest substitute for a brad nailer?
A hammer with finish nails provides the most similar results.
Can You Nail Brads With A Hammer?
Yes, you can nail brads with a hammer. Use a small hammer for better control. Be gentle to avoid bending the brads.
Can I Use Finish Nails Instead Of Brad Nails?
Yes, you can use finish nails instead of brad nails. Finish nails provide stronger holding power, but they might split delicate wood. Choose based on your project’s needs.
Are screws stronger than brad nails?
Yes. Screws offer superior holding power for heavier materials.
Is it worth buying a brad nailer?
If you frequently install trim or do woodworking, a brad nailer saves time and improves precision.
Conclusion
Not having a brad nailer doesn’t have to stop your project. Exploring alternatives can save your time and money. Various tools like hammers, screws, staple gun, or adhesives helps you to achieve strong, professional-looking finish. Each option has its own benefits, making them suitable for different tasks.
Choose the method that fits your project’s weight, visibility, and durability needs. With proper technique and finishing, your results can look just as clean and polished as if you used a nail gun.
Recent Posts
Woodworking is one of the most rewarding hobbies and professions, but it also comes with serious risks if proper precautions are not taken. Whether you're working with a table saw, planer, or simple...
Dust Mask vs Respirator for Woodworking: Which One Do You Really Need?
Woodworking is rewarding, creative, and therapeutic—but it also exposes you to wood dust, fine particles, and harmful airborne contaminants that can seriously affect your health. If you’ve ever...