
There is no question that the framing nailer is an essential daily resource for carpenters and wood constructors to do nailing work much faster than the traditional methods. But the fact is that a nail gun can shoot nails at the same speed as a firearm crushing bullets. So, it can be a lethal weapon if not used correctly.
Therefore, it is essential to learn how to use a framing nailer correctly.
Don’t worry if you’re new to framing nailers and don’t know how to use a framing nail gun. It is simple to use if you follow the instructions. Trust me! It’s not rocket science. So, there’s nothing to concerned about!
To use a framing nailer, load the magazine with the appropriate nails and adjust the depth of the nailer according to the thickness of the wood. Then, position the nailer at a 90-degree angle and firmly press the trigger to drive the nail into the wood. However, don’t forget to take necessary safety precautions during doing this.
Scroll below with us to learn the step-by-step guide on how to use a framing nailer professionally and safely and get the maximum benefit out of it.
Understanding the Framing Nailer
Before we move on to our steps, we just want to gather a simple knowledge about the framing nailer and its kind, which will be awesome to know its uses more specifically.
What Is A Framing Nailer?
A framing nailer is a powerful tool used in construction for quickly and efficiently driving nails into wood. It is designed to handle large nails and can be used for a variety of tasks, such as framing, sheathing, and decking.
The nailer uses compressed air or gas or battery to drive the nail with precision and speed, making it an essential tool for professionals in the building industry.
It is important to use caution when operating a framing nailer, as the force of the nail can cause injury if not used properly.
“The framing nail gun is a smarter and more efficient alternative to traditional hammer. You can drive a nail more perfectly and quicker with it.”
Types Of Framing Nailers
Based on the power source, framing nailers are of two types – pneumatic and cordless.
Pneumatic framing nailers are required compressed air pressure to drive nails. An air compressor pushes air via a long hose and puts pressure on the piston to drive nails into the workpiece.
Cordless framing nailers work with the same principle, but the power comes from either the battery and gas canister or only the battery.
Now let’s move to the legs on how to use a framing nail gun-
The Steps On How To Use A Framing Nailer:
A. Take Necessary Safety Precautions
Are you aware that there are thousands of examples of careless handling of the framing nailer, which causes serious injuries and, in the worst cases, carpenters had to be admitted to the hospital.
So, there’s no chance to take the matter lightly. Don’t ignore health problems when using a nail gun.
Before you start nailing, you must wear appropriate safety outfits. Just like –
- Eyeglasses,
- Helmet,
- Hand gloves,
- Earbuds or Earmuffs (as a framing nailer can create noise that can affect your hearing), and
- Wear safety clothing during operating the gun.
In a recent survey, it was found that a nail gun accident did not only injure a woodworker; it could also hurt adjacent co-workers. So, you can always ensure that your colleagues wear protective clothing if they are close to you during the activity. You should also check that no children or pets are playing at that place.
Whenever you want to take a rest or a nail gun that is not in use for any reason, be sure to turn off the power supply or remove the hose to ensure safety.
According to the NCBI report, a safer sequential trigger instrument can prevent 53-71 percent of accidents. Disabling safety devices and inadequate personal protective equipment (PPE) are also significant causes of injury.
B. Check if The Nail Gun Is In Good Condition Or Not
Before starting to shoot nails, test whether or not the nail gun is in good shape. For that, you can check the driveway whether or not a nail is stuck. Check out the external appearance, something that looks damaged or not.
Check the temperature of the body as well – is it extremely cold or hot? If it is cold enough, then keep it in a warmer place for a few moments to back it to the normal temperature. Otherwise, it won’t go to shoot nails properly.
If everything is found good, then put some oil in the connector of the air hose and make it ready to load the nail strips.
Caution: When you check your nail gun, you must disconnect it from the air hose or separate the battery from the device.
C. Select the Correct Size Nails
Choosing the right nail size for a framing nailer is crucial for the success of any carpentry project. To select the correct nail size, consider the thickness and hardness of the material you will be nailing together, and refer to the manufacturer’s recommendations for the nailer.
It is also important to ensure that the nail size is compatible with the gun’s magazine capacity and the type of nail collation.
Usually, most nail guns have a stick-style magazine that allows both rounds and clipped head nails. Clipped head nails have occupied less space than the round head.
Roundhead, on the other hand, has more retaining power and allows by most of the building codes. You’ve also noticed another form of a magazine, and it is the coil type. It would allow you only to drive the round head nails, and you have to reload the magazine less frequently.
Besides selecting the correct style, it is also recommended to use the correct gauge and length of nails. Usually, framing nailers are compatible with 2 to 3-1/2 inches long 10-12 gauge nails.
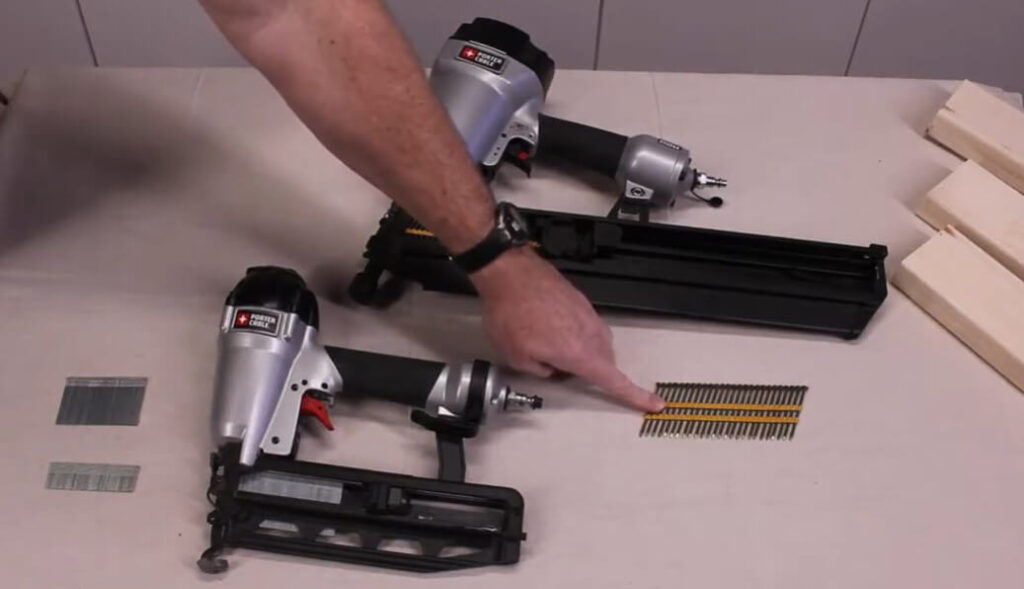
Again, there are different angles of the magazine, thus different angles of the nails available on the market. The most common types of nail angles are 21, 28, and 34 degrees. You can not use one-degree nail strips in others. So, you should select the correct angle of nails.
By taking these factors into account, you can ensure that your framing nailer operates safely and efficiently and that your finished product is structurally sound.
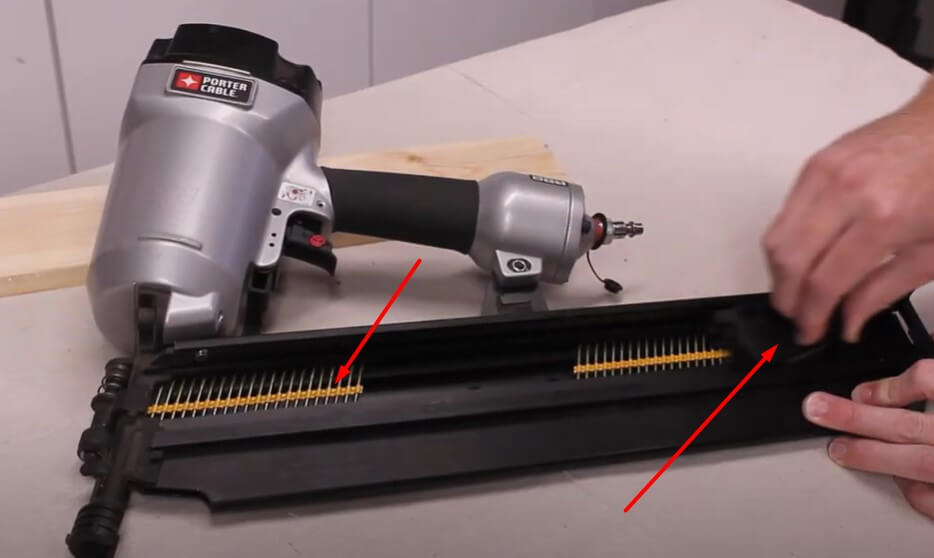
D. Load The Nail Gun
After confirming all the safety issues and the condition of the nail gun, the next step is to load the magazine with the recommended style and angle of the nail strip.
Follow the steps to load a framing nail gun:
- Firstly, ensure that the nail gun is disconnected from its power source and ensure that the magazine is empty.
- Next, pull back the magazine spring and insert the nails in a straight line, making sure they are properly aligned.
- Once the nails are in place, push the magazine back in and test the gun by firing a few nails into scrap wood.
Always wear appropriate safety gear, such as eye protection and gloves, and never point the gun at anyone or anything other than the intended target.
E. Know About Trigger Selection
Once the magazine is loaded, the next task is to select the trigger mode. Usually, each framing nailer comes with two types of triggers – sequential and bump.
In a modern framing nailer, you can switch from one mode to another by simply pressing a button. However, some conventional nail gun needs to change the trigger manually.
Between the two trigger modes, the sequential firing mode is safer. Because in this method, you’ve to press the contact tip on the wood or materials you are going to fasten, then pull the trigger to shoot. You couldn’t shoot more than one nail at a time in sequential mode.
So, if you’re a newbie, this will be best for you to start. It gives you extra control and precise nailing, too.
On the other hand, if you’re an expert framer and need to speed up your project, you can choose bump fire mode. In this mode, you have to press and hold the trigger, and the nail gun shoots continuously whenever the contact tip touches the surface of the wood.
The alarming part of the bump mode is that it can fire even in the event of a nail gun accidentally dropping from your hand. It may cause serious injury to you or your nearby people. So, it’s advisable that unless you’re a seasoned craftsman, don’t fall in fascination with its pace.
F. Test The Nail Gun On Scrap Wood
It is clear from the above discussions that running a nail gun requires some skill. So, if you are a first-time user, some practice will give you a good result to go to the final stage. Take a spare piece of wood, attach the air compressor hose, and pull the trigger to fire the nails on it to feel your nailer.
Pneumatic nail guns usually drive nails at a pressure of 70 to 120 psi. The precision of sinking a nail into the wood depends largely on the amount of air pressure and the correct timing.
Practice lets you learn about the right amount of air pressure and the exact timing to drive a nail safely and precisely.
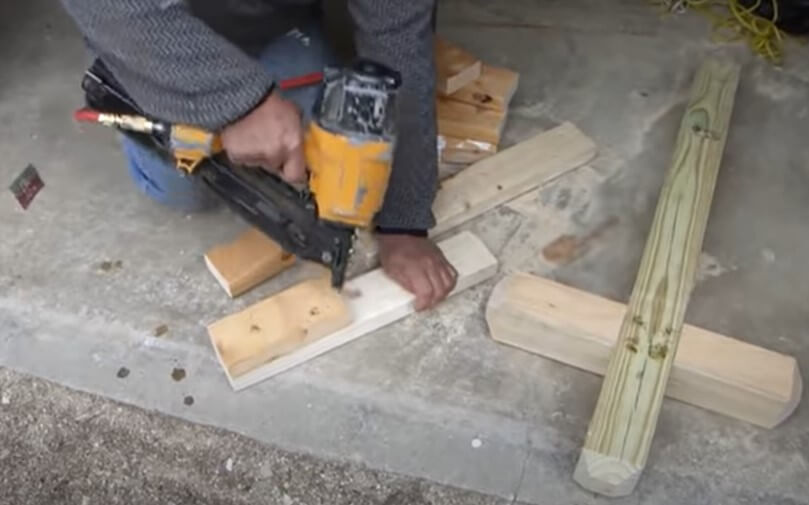
G. Place The Framing Nailer On the Final Product
Since you’re getting a feel for your pneumatic nailer, it’s time to ride on the final stage. Place the nailer on the piece of wood you need to fasten. Hold the handle in a way that gives you easy access to the trigger and supports the gun to put it in the right place.
Be careful about the other hand. Be alert about the kickback of the nail gun, too.
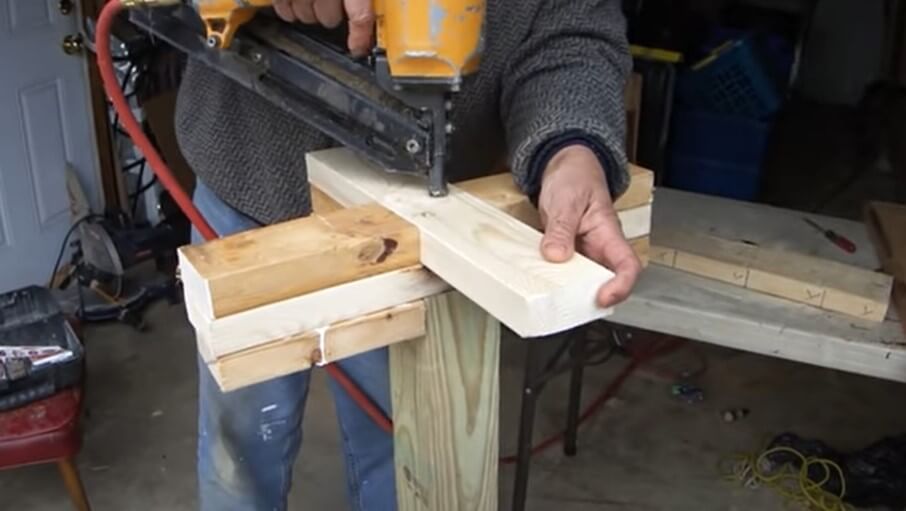
H. Push The Contact Tips Against the Piece of Wood
The contact tip of a framing nailer is mainly spring-loaded and doesn’t need to put excessive pressure to push it. So, keep it in mind while putting pressure on your nail gun, and never utilize your chest or belly as you could badly hurt yourself. Only remember that you will require enough body balance to be prepared for the kickback.
When you have shot your first nail, promptly release the trigger. Holding the trigger down leads to shooting lots of pins at a time and may cause jamming.
I. Check The Flush Condition Of The Nails
When you pull the nail gun after driving the nails, check whether it flushes properly or stops halfway. If the nail doesn’t sink completely into the surface, you might not be setting the right air pressure, not imposing enough weight, or pulling away from the surface too soon while nailing.
Avoiding any of the above instances will give you a good countersink, and the proper holding power.
J. Reload The Framing Nail Gun
When the nail is finished in the magazine, before proceeding to the next cycle, first disconnect the framing nailer from its power source or compressor hose, then reloading is safer.
Keep an eye on the nail strip in the magazine as well, try to stop shooting when it reaches the end (left 3 to 5 nails in it) to dodge dry fire. You can also choose a framing nailer that designs with a dry-fire lockout system.
How to Use a Framing Nail Gun [Video]
The Methods Of Fastening Nails
The proper use of the nail gun entirely depends on what and where you are going to nailing. Usually, with a framing nailer, you could perform nailing in two ways: face or through nailing and toenailing.
i) Face or through nailing: It is the most practical and traditional nailing process. It’s a simple way to get a nail on a board or a wooden frame, where your nail gun is placed square (or perpendicular) to the object you’re going to shoot.

ii) Toenailing: Driving the nail at an angle to the end of the board to anchor it is toenailing. If you are a framer, you know that you can’t always drive nails vertically to a 90-degree position. Toenailing is the solution to it, particularly when you need to fasten your wall studs to the top plate. Whatsoever, the toenailing requires some kind of practice.

Some Useful Tips And Tricks On How To Use A Nail Gun
- Always keep the air hose or battery disconnected from the nailer until you need to use it.
- Always remember that your nail gun is in loaded condition and connected to a power supply
- Do not point your nail gun at anything other than the stuff you intend on nailing
- Always keep the trigger off your finger until you are going to use it
- Better keep your nailer empty until you use it
- Don’t think your nail gun’s safety would stop it from shooting
- Use your dominant hand during nailing
- Don’t leave your nail gun unattended somewhere kids can touch it
- Don’t try to improve or alter your nail gun in any way
Frequently Asked Questions (FAQ)
Is a framing nailer the same as a nail gun?
No, a framing nailer is not the same as a nail gun. While both tools are designed to drive nails into various materials, framing nailers are specifically designed for heavy-duty construction work such as framing, roofing, and decking. They are typically larger, more powerful, and can handle longer nails than traditional nail guns.
Nail guns, on the other hand, are more versatile and can be used for a wider range of projects including trim work and finishing. It is important to select the correct tool for the job to ensure optimal results and safety.
How to use a nail gun with an air compressor?
An air compressor is a must-tool to use any pneumatic device. And you cannot drive pneumatic nail guns with an air compressor, too. To use an air compressor, first, check the PSI and CFM rating required by the nail gun. Then connect the air compressor to the nail gun using a hose and air connector on the gun. That’s it.
Let’s see the video below to know how to set up and use an air compressor with your nail gun.
What pressure should I run my framing nailer?
Usually, to run a framing nailer, you will need 2.2 CFM and 70 to 110 psi air pressure. Below or excessive pressure can create under or over-flashing of nails. So, always select the right air pressure recommended by the manufacturer.
How do you use a toenail with a framing nailer?
It’s always better to use a framing nailer for toenailing instead of hammering because you don’t need to pull it and force it again and again. Position your nailer at an angle of 45 degrees to the frame you wish to anchor with the top or bottom plate. Then place the contact tip in the right place and press and pull the trigger to fire the fastener into the wood.
It sounds easy, but actual work demand some experience. You may learn details on how to toenail with a framing nail gun by clicking here.
What framing nailer should I buy?
If you’re an absolute novice and you want something cheap but sturdy to start with, then you can go with the Numax SFR2190 framing nailer. On the other hand, if you’re a pro framer, then you may already know what you’ll need. As a result, you can choose your framing nailer from this list according to your project requirement. You additionally find a shopping guide there.
Is it better to use screws or nails for framing?
It depends on the size of the project you’re going to do. Nails are often used in large-scale projects such as building house frames or hardwood floors where you need extra holding power and minimize costs, too. As the nails are straight in size, they tend to enter the wood quickly and easily with a hammer or nail gun.
On the other hand, for small or medium projects such as cabinet making, decking, or furniture installation, where you need more control while inserting and extracting fasteners, screws are the best. You may read our article on screws vs nails to know more.
Conclusion
I hope you find this article helpful, and now you’re learning how to make proper use of the framing nailer. So, nothing can stop you from starting a new journey to become a woodworker or craftsperson.
Oh! Oh! One thing, have you brought a framing nail gun? If not, do it first. It’s a prerequisite for starting your career or DIY projects. You can rent a framing nailer for practice, either. However, if you want to buy a new one, you can check out the reviews of the best framing nailer and save your time and money.
Woodworking is a promising job in the United States, and it grows day by day. So, don’t miss out on your chance to be an expert nailer, grab one, and devote yourself right now.
Related Reviews:
- Nail Gun Not Shooting Nails – What would you’ve to do next?
- How To Use A Cordless Drill: It’s Not Hard To Learn With The Dummies!
- All You Need to Know About Different Types of Nail Guns
- How To Use A Ramset Gun?
- How To Oil A Framing Nail Gun?
- How To Choose A Framing Nailer?
Recent Posts
Woodworking in 2025 is all about efficiency, precision, and smart technology. Whether you're a beginner or a seasoned craftsman, having the right tools can make all the difference. Here are the top 7...
Ever tried drilling into a piece of wood only to end up with a splintered mess or a wobbly hole? Yeah, it's more common than you think. Wood might seem like an easy material to work with, but...